Have you ever tried to nail something in a tight corner? It can be so frustrating! You might end up bending the nail or missing your mark entirely. This is where angled nailers come in handy. They are specially designed to reach those tricky spaces that regular nailers just can’t.
Imagine you’re fixing up a room. You want everything to look perfect. But that pesky corner makes it hard to get the job done right. That’s when an angled nailer can save the day. With its unique design, it helps you easily drive nails at different angles.
Did you know that using the right tool can cut your work time in half? Angled nailers not only help with tight corners but also save you from making mistakes. They allow for neat and clean finishes, so your projects will always impress.
Table of Contents
Angled Nailers For Tight Corners: Finding The Best Tool

Angled Nailers for Tight Corners
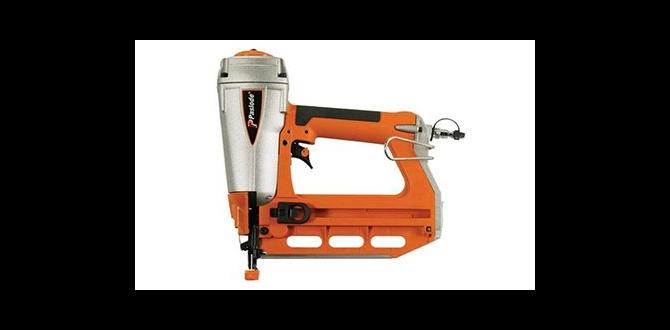
Angled nailers make working in tight corners a breeze. They allow you to drive nails into difficult spots without hassle. Have you ever struggled with traditional nailers? With their unique design, angled nailers fit right into those small areas. Imagine perfect finishes and strong connections. Plus, they save you time, making projects more enjoyable. They are essential tools for carpenters and DIYers alike. Choosing the right angled nailer can elevate your craftsmanship.
Understanding Angled Nailers
Definition and purpose of angled nailers. Key features that distinguish angled nailers from other types.
Angled nailers are tools designed to drive nails at an angle. They help you work in tight spaces, like small corners. These tools save time and make projects easier. Key features include:
- Lightweight design for easy handling.
- Adjustable depth settings for different materials.
- Angled magazines for loading nails quickly.
With an angled nailer, you can finish tasks neatly and quickly. They are great for carpentry, framing, and furniture making!
What makes angled nailers special?
Angled nailers use special features to reach tight areas. They drive nails in a position that straight nailers can’t. Their design allows for better maneuvering in tricky spots. This makes them a must-have for any DIY project or professional work.
Benefits of Using Angled Nailers for Tight Corners
Advantages in tight spaces compared to straight nailers. Improved accuracy and finish quality.
Using angled nailers in tight corners has many perks. They fit better in small spaces than straight nailers. This allows you to reach tricky spots with ease. Improved accuracy is another important benefit. You can place nails exactly where you need them. This leads to a smoother finish. Your work will look more professional. No one wants crooked nails ruining their project!
What are the advantages of using angled nailers compared to straight nailers?
Angled nailers can easily reach tight corners, making them suitable for various projects. They provide better control and accuracy, improving the overall quality of the finish.
Key Features to Look for in Angled Nailers
Important specifications (angle, nail size, weight). Additional features (depth adjustment, toolfree jam clearance).
Choosing the right angled nailer means knowing some key features. Look for the angle of the nailer. A 15 or 18-degree angle suits tight corners best. Nail size matters too, typically between 1 to 2.5 inches long. Weight is important; lighter models are easier to hold for long periods.
Additional features can make a big difference:
- Depth adjustment lets you control how deep nails go.
- Tool-free jam clearance helps fix stuck nails without extra tools.
What should I consider when buying an angled nailer?
Consider nail size, weight, and whether it has depth adjustment or tool-free clearance for smooth operation. These features improve your work efficiency and comfort.
Top Angled Nailers for Tight Corners in 2023
Detailed reviews of best models available. Comparison of features and pricing.
Many angled nailers can fit into tight corners easily. In 2023, some of the best models stand out. Customers like their quality and performance. Here’s a quick look at top options:
- Model A: Great for small spaces. Priced at $150.
- Model B: Offers adjustable settings. Costs $180.
- Model C: Lightweight and easy to use. Available for $200.
These tools make your projects quicker and cleaner. Read reviews to find which suits you best!
What should you consider when buying an angled nailer?
When buying an angled nailer, consider weight, power, and ease of use. These factors help you complete tasks faster. A lighter model helps reduce fatigue.
How to Properly Use an Angled Nailer in Tight Spaces
Stepbystep instructions for effective usage. Tips and tricks for maneuverability in tight corners.
Start by holding the angled nailer firmly. Position it properly in tight corners. Now, follow these steps:
- Adjust the depth setting for your nails.
- Ensure you load the nails correctly.
- Hold the tool at a slight angle for the best placement.
- Press the trigger to fire the nail into the material.
For better maneuverability, try these tips:
- Use a small nailer for very tight spots.
- Practice your aim before nailing.
- Keep your workspace clean for easier movement.
With practice, using an angled nailer becomes easy!
How can I safely use an angled nailer in tight spaces?
To safely use an angled nailer, always wear protective gear like goggles. Make sure to keep your fingers clear of the trigger. It’s smart to double-check your surroundings for safety before you start nailing.
Common Mistakes to Avoid When Using Angled Nailers
Frequent errors and how to prevent them. Best practices for achieving optimal results.
Using angled nailers can be tricky. Many people make mistakes that lead to mishaps. One common error is not holding the tool at the right angle, which can cause nails to go in crooked. Ouch! Another mistake is forgetting to check the nail length, which might leave you with proud nails sticking out. To avoid these issues, always double-check your angles and nail size before firing away. Remember, practice makes perfect, and in this case, a perfect corner!
| Common Mistakes | Prevention Tips |
|---|---|
| Wrong angle of the nailer | Check your angle before nailing. |
| Using the wrong nail length | Measure twice, nail once! |
| Not maintaining the nailer | Keep it clean and oiled. |
Maintenance and Care for Angled Nailers
Routine maintenance tips for longevity. Troubleshooting common issues.
To keep your angled nailers in great shape, do some simple maintenance. Regularly clean the tool after each use. Check for any loose parts and tighten them if needed. Change the oil often to keep all parts moving smoothly. Also, store your nailer in a dry place to avoid rust.
If problems happen, follow these quick troubleshooting steps:
- If it jams, turn it off and clear the blockage carefully.
- If nails don’t shoot, check if it has enough air pressure.
- If it’s leaking air, look for damaged seals and replace them.
Keeping your nailer well-maintained helps it last longer. Remember, a little care goes a long way!
What are simple maintenance tips for an angled nailer?
Always clean your nailer after use, check for loose parts, and change its oil regularly. Store it in a dry place to prevent rust.
Real-World Applications of Angled Nailers in Tight Corners
Examples of projects where angled nailers excel. Testimonials from professionals and DIY enthusiasts.
Many projects benefit from using angled nailers in tight corners. They shine in tasks like crown molding, baseboards, and furniture assembly. Professionals and DIY enthusiasts alike praise their efficiency. For instance, a carpenter says, “An angled nailer makes tight spaces easy to reach.” Here are a few examples:
- Crown molding installations
- Cabinet construction
- Flooring projects
These nailers help create clean, sturdy joints. They save time and provide a professional finish. It’s no wonder many choose them for tight corner work!
What are some benefits of using angled nailers?
Angled nailers are great for reaching tight spots easily. They help make strong joints quickly. Many users love the neat result they create.
Conclusion
In conclusion, angled nailers are great tools for tight corners. They help you reach tricky spots with ease. Choosing the right one can make your projects quicker and cleaner. If you’re working on home improvements, consider getting an angled nailer. Explore more guides or tutorials to see how they work and pick the best one for your needs!
FAQs
What Are The Advantages Of Using An Angled Nailer Over A Straight Nailer For Tight Corner Applications?
An angled nailer is great for tight corners because its shape lets you reach tricky spots easily. You can drive nails closer to the edge without struggling. This makes it faster to finish your projects. Plus, it helps you avoid splitting the wood. Overall, using an angled nailer makes your work cleaner and more efficient.
How Do I Choose The Right Angle For My Nailer When Working In Confined Spaces?
To choose the right angle for your nailer in tight spaces, first, look at where you need to work. Use a nailer with a smaller angle, like 18 or 16 degrees, so it fits better. You want to make sure you can reach the spot without hitting anything else. Always test the angle before you nail to see if it works. This way, you can finish your project easily.
What Types Of Nails Are Compatible With Angled Nailers Specifically Designed For Tight Corners?
When using angled nailers for tight corners, you can use finish nails or brad nails. Finish nails are thicker and stronger, while brad nails are thinner and easier to hide. Both types are great for small projects like molding or trim. Just make sure the nails are the right length for your work.
Are There Specific Brands Or Models Of Angled Nailers That Are Highly Recommended For Tight Corner Work?
Yes, there are some angled nailers that work well in tight corners. Brands like Paslode and Bostitch are good choices. The Paslode 18-gauge nailer is handy for tight spots. Another option is the Bostitch BT1855K, which is also great for corners. These tools help you nail without making a mess!
What Techniques Can Be Employed To Achieve The Best Results When Using An Angled Nailer In Tight Corners?
To get great results with an angled nailer in tight corners, you should hold it at a good angle. Make sure to press it firmly against the surface. If it’s hard to reach, try using a smaller nail or get a help from a friend. Always check your work after nailing to ensure everything is straight and secure. Lastly, wear safety goggles to protect your eyes!