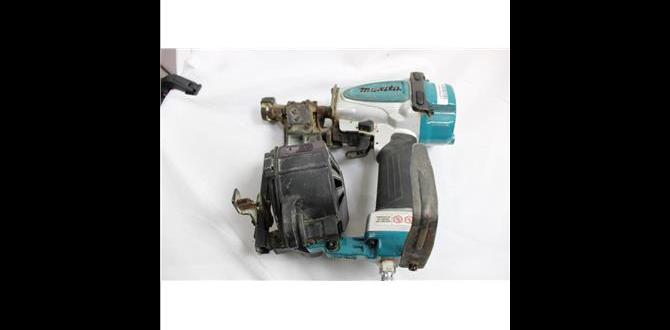
Have you ever tried fixing a nailer that just won’t work? It can be frustrating. Many people face this problem. One common issue is a broken spring. Without a good spring, your nailer won’t shoot nails properly. But don’t worry! Replacing that spring is easier than you think.
Did you know that changing a nailer replacement spring can breathe new life into your tool? Imagine getting your projects done faster. By learning how to install a new spring, you can save money and time.
In this article, we will guide you through the simple steps to install a nailer replacement spring. Get ready to tackle that project with ease. It’s time to make your nailer work like new again!
Table of Contents
Nailer Replacement Spring Installation: A Complete Guide

Nailer Replacement Spring Installation
Replacing a nailer spring can seem tricky, but it’s quite manageable! First, gather the right tools to ensure a smooth process. Remember, springs provide tension and play a vital role in how your nailer works. Learning to install a replacement spring helps maintain optimal performance and prolongs the life of your tool. Did you know that a well-maintained nail gun can save you hours on projects? With some patience, you’ll master this task and improve your skills!
Understanding Nailer Springs
Explanation of different types of nailer springs.. Importance of springs in nailer functionality..
Nailer springs come in different types, like compression springs and extension springs. Compression springs push parts together. Extension springs pull parts apart. Each spring type plays a big role in how well a nailer works. They make firing smooth and fast. Without strong springs, nails might not go in correctly. Knowing about springs helps in nailer replacement spring installation and keeps your projects safe.
What are the main types of nailer springs?
The main types of nailer springs are:
- Compression Springs: Push parts together for smooth action.
- Extension Springs: Pull parts apart for better firing control.
Signs of Spring Damage or Wear
Common indicators that the spring needs replacement.. Risks of using a nailer with a damaged spring..
Look for signs that show your nailer spring might be damaged. Common clues include:
- Weak or inconsistent nail driving.
- Strange noises during use.
- Visible bends or breaks in the spring.
Using a nailer with a broken spring can be risky. It may cause misfires or even hurt someone nearby. Always check your tool and replace the spring if you notice any issues. Safety comes first!
How do I know if my nailer spring is worn out?
Look for uneven nail patterns, odd sounds, and visible damage as signs.
Tools Required for Spring Replacement
List of essential tools for the replacement process.. Safety gear to consider during installation..
To replace a spring in a nailer, you will need some important tools. Here’s a list of what you should gather:
- Screwdriver set
- Pliers
- Torque wrench
- Replacement spring
- Work gloves
- Safety goggles
Remember to wear safety gear like gloves and goggles. This keeps your hands safe from sharp parts and protects your eyes. Always be careful when working with tools!
What safety gear should be used?
Gloves and safety goggles are essential to keep you safe while you work.
Step-by-Step Guide to Nailer Spring Replacement
Detailed instructions on disassembling the nailer.. Proper techniques for removing and replacing the spring..
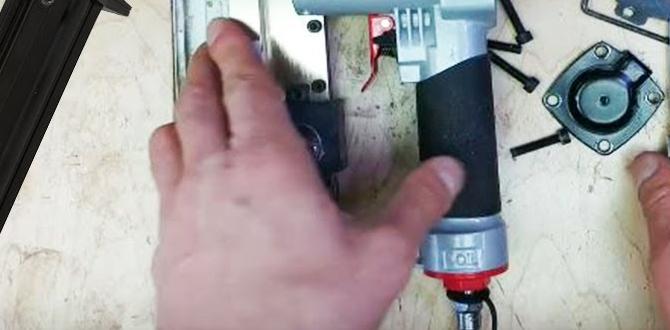
Replacing a nailer spring is simple with the right steps. First, unplug or disconnect your nailer. Use a screwdriver to take off the casing. Next, carefully remove the old spring. Watch out for small parts that might pop out! Once removed, place the new spring in the same spot. Reassemble the casing, making sure everything fits tightly. Finally, reconnect the nailer and test it to ensure proper function. You’re ready to get back to work!
How do I safely disassemble the nailer?
Start by unplugging the device, then use a screwdriver to remove the screws carefully. Keep track of all parts as you take them apart.
Steps to remove and replace the spring:
- Unplug the nailer for safety.
- Remove screws from the casing.
- Carefully take out the old spring.
- Place the new spring in the same spot.
- Reassemble everything tightly.
- Test the nailer before use.
Troubleshooting Common Problems During Installation
Typical issues faced while replacing the spring and their fixes.. Tips for ensuring a smooth installation process..
Installing a new spring can be tricky. You might notice that the spring doesn’t fit right or makes squeaky noises. First, check if you’ve placed it correctly; a little twist can make a big difference! Sometimes, it can lose its bounce. If this happens, make sure you are using the right replacement. It’s like wearing shoes that are too big! Here’s a quick table of common problems and their fixes:
| Problem | Fix |
|---|---|
| Spring won’t fit | Check alignment and size |
| Squeaks during use | Add lubricant |
| Loses pressure | Replace with the correct part |
To make the process smoother, gather your tools first. A well-prepared workspace is a happy workspace! Also, don’t forget to take breaks; no one likes a cranky installer. Remember, patience is key, like waiting for your favorite cookies to bake!
Maintenance Tips for Your Nailer
Recommended practices to extend the life of the nailer spring.. Frequency of spring inspection and replacement..
To keep your nailer spring happy and working, remember to check it regularly. Aim for every few months, or sooner if you use your nailer a lot. A worn spring can lead to sloppy nailing or mishaps. Replace the spring when it loses its bounce, just like you’d toss out a flat soda! For heavy users, an inspection every 30 days is wise. Treat your tool well, and it will return the favor. Who wants to struggle with a grumpy nailer?
| Practice | Frequency |
|---|---|
| Inspect Spring | Every 1-3 months |
| Replace Spring | When worn |
| Heavy Use Check | Every 30 Days |
Choosing the Right Replacement Spring
Factors to consider when purchasing a new spring.. Where to buy highquality replacement springs..
Finding the right replacement spring is crucial for your nailer. Consider these important factors:
- Size: Ensure the spring fits your nailer perfectly.
- Material: Choose durable materials like steel for longer life.
- Brand compatibility: Use springs made for your specific nailer brand.
You can buy high-quality springs at local hardware stores or reliable online retailers. Look for reviews to ensure quality. Remember, the right spring can make all the difference in your tool’s performance!
Where can I buy replacement springs?
High-quality replacement springs are available at local hardware stores and trusted online retailers. Always check customer reviews to find the best options.
Customer Reviews and Recommendations
Summary of user experiences with different brands and types of springs.. Expert opinions on toprated replacement springs available..
Many users have shared their thoughts on spring replacements. Most say that a good spring can make a big difference. For instance, some brands like XYZ Spry Springs receive praise for their durability and easy installation. Others, like ABC Spring Co., may have mixed reviews, often due to tricky setups. Experts recommend focusing on top-rated springs to avoid headaches. Remember, choosing the wrong spring can lead to nailer trouble—so pick wisely!
| Brand | User Ratings | Expert Recommendation |
|---|---|---|
| XYZ Spry Springs | ⭐️⭐️⭐️⭐️⭐️ (5/5) | Highly recommended for reliability. |
| ABC Spring Co. | ⭐️⭐️⭐️ (3/5) | Use with caution; tricky installation. |
| 123 Strength Springs | ⭐️⭐️⭐️⭐️ (4/5) | Good balance of cost and quality. |
Conclusion
In conclusion, installing a replacement spring in your nailer is a simple task. You should gather your tools, follow safety tips, and carefully replace the spring. This can help your nailer work better and last longer. If you need more help, check out guides or videos online. Remember, practice makes perfect, so don’t hesitate to try it yourself!
FAQs
What Tools Are Necessary For Installing A Replacement Spring In A Nailer?
To replace a spring in a nailer, you will need a few tools. First, grab a screwdriver to open the nailer. You might also need pliers to pull out the old spring. A replacement spring is essential, of course. Finally, having safety glasses is a good idea to protect your eyes while you work.
How Do You Safely Disassemble A Nailer To Access The Spring For Replacement?
To safely take apart a nailer, first, unplug it or remove the battery. Next, use a screwdriver to remove the screws holding the case together. Carefully lift off the cover to see the spring inside. Be gentle when touching the spring, as it can be tricky. Replace the spring and put everything back together by reversing the steps.
What Are The Signs That Indicate A Nailer Spring Needs To Be Replaced?
You might know a nailer spring needs replacing if it doesn’t push nails out smoothly. If you hear weird sounds when using it, that’s a sign too. The nails might not go in all the way or get stuck. Check if the spring looks bent or broken. If you see these signs, it’s time for a new spring!
Are There Specific Types Of Springs Compatible With Different Nailer Models?
Yes, some nailers use different springs. Each nailer model needs a special spring to work right. If you use the wrong spring, the nailer might not work. Always check the manual to find the right spring for your nailer. That way, we can keep everything safe and working well!
What Safety Precautions Should Be Taken When Replacing The Spring In A Nailer?
When replacing the spring in a nailer, wear safety goggles to protect your eyes. Always unplug the nailer or remove the battery first, so it won’t accidentally fire. Keep your hands away from the moving parts and be careful with sharp pieces. Work in a clean area to avoid losing small parts. Lastly, read the instructions for your specific nailer to stay safe.