Using a roofing nailer is easy if you follow the instruction in detail and practice a bit. To use a roofing nailer properly, get the right tool, right nails, and right accessories, adjust all the features of your nailer according to your need, and lastly, take all the safety measurements before nailing on the roofs.
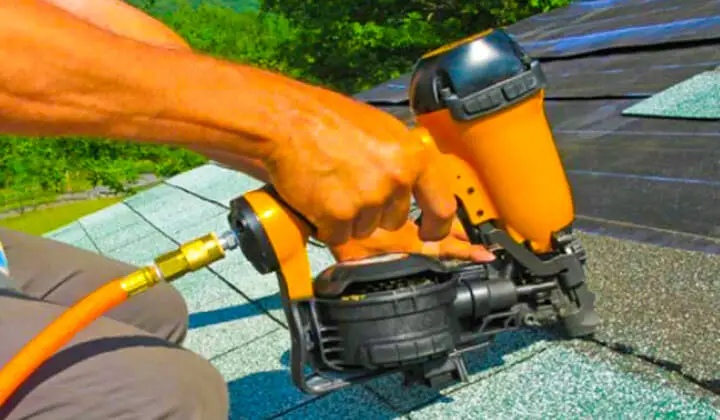
Table of Contents
How to Use a Roofing Nailer
Right Nail Gun
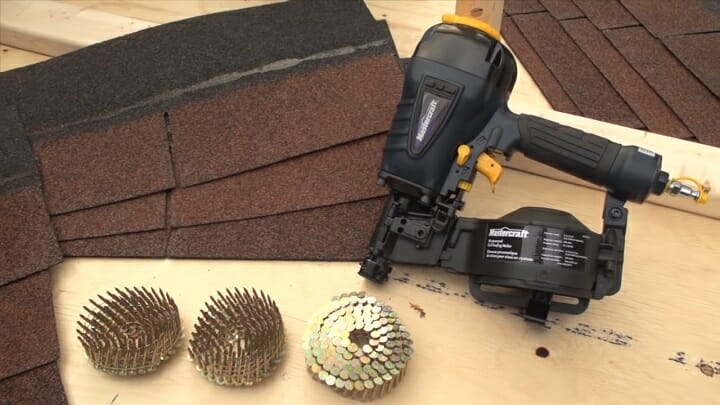
Make sure the nailer you are using is indeed a roofing nail gun. If you are new with nail guns, you can easily mistake any other nailer for a roofing nailer as most of the nails gun looks the same.
Right Fastener
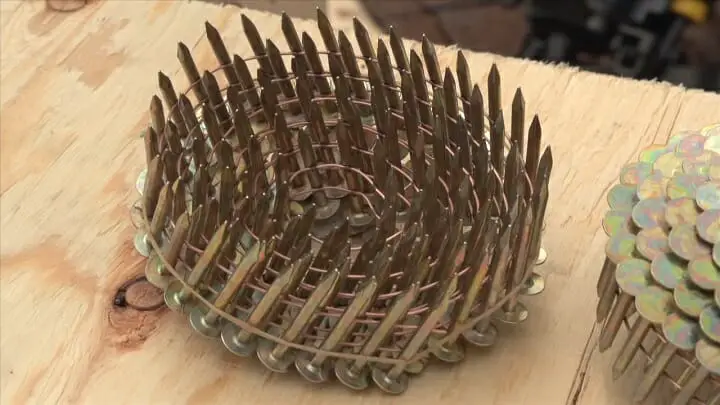
For roofing nailers, you need short and angled nails. As specified by the International Building Code, roofing nails must have a minimum 12 gauge shank and 3/8 inch diameter head. The minimum required angle of the nail is 15°. Most of the roofing nail has coil magazine, you need coiled nails for them.
Right Air Compressor
Some nailers can shoot nails up to 10 times per second which needs a huge amount of air if those nailers are powered by air. To get the best result with a pneumatic nailer, you need the best air compressor.
Most of the compressors on the market don’t fit every nailer’s air consumption specs. You can do your jobs with a small-size air compressor, but you won’t get satisfactory results. So, choose the air compressor that is best suited for your nailer.
Loading Nails
The loading of the nails depends on the magazine type of your roofing nailer. Most of the roofers prefer using a nailer with a coil magazine. Other types of magazines are not popular for roofing jobs.
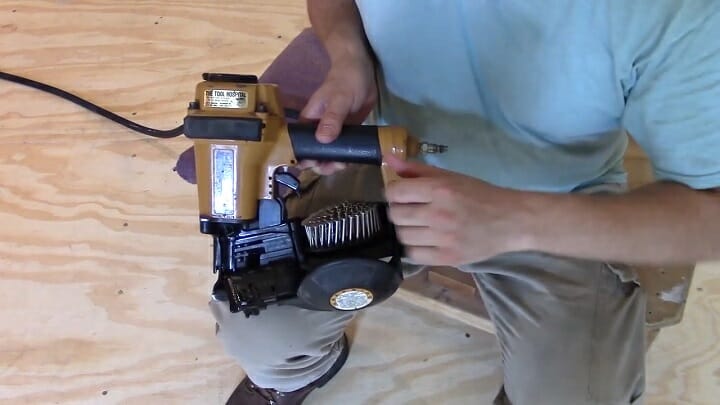
First, open the feeder door and the magazine door to load the canister. In most cases, they open in opposite directions to let you see the whole nail path. Get rid of the rubber or any strip that holds the nails together.
After that, put the coil inside the canister with the nail’s head on the upper side. To position the nails in the barrel, unwrap the outside end of the coiled nails. Then close both of the doors.
Depth Adjustment
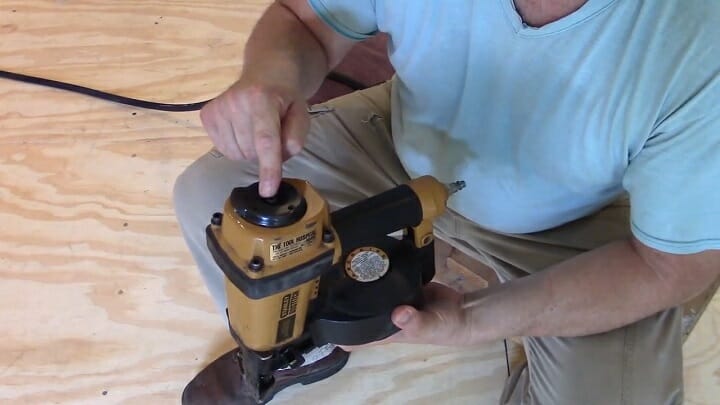
The depth adjustment feature of your nail gun helps to adjust different lengths of nails to suit your demand. You can also choose at which depth from the work surface, the nail will drive into the workpiece.
You can easily adjust the depth by rotating the adjusting wheel. Check carefully about the depth before starting the main process since unintentional holes or depth can damage the whole project sometimes.
Adjust the Exhaust
As the name says, the exhaust of a roofing nailer expels a blast of air after driving each nail. Sometimes the air blasts directly into the user’s face which can be very uncomfortable and slow down the work progress. To avoid the burst of air, adjust the exhaust deflector away from your side.
Firing Mode
Typically, roofing nailers have two firing modes, single action or sequential mode and bump or contact mode. In the sequential mode, only one nail will be fired with every trigger pulling. But in the bump mode, your nail gun requires contact with the work surface to shoot nails after setting the trigger mode.
Bump mode is more suited for jobs that need shorter nails. Whereas, the sequential mode is preferable for longer nails since they are more likely to be misplaced. This mode is also not recommended for amateurs. Many nail guns offer both firing mode options. Set the firring mode correctly before starting the job.
Connect hoses
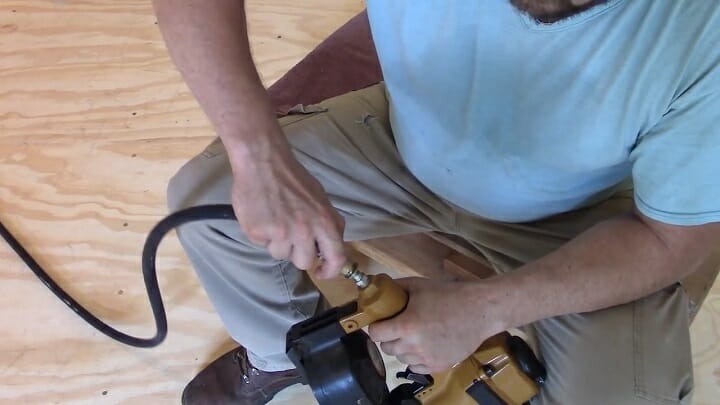
For a pneumatic nailer, it needs to be connected to the air compressor by hoses. This is the turning point from arranging the nailer to practically starting the nailing job. Connect the hoses tightly and remove them when you are not working.
Test Fire
You need to get in your rhythm of nailing for a better job. Test fire a couple of times to get in your work rhythm before starting the main job. For decent work, fire at a pace that is both comfortable and efficient. Test fire also helps to let you know if the firing mode or depth adjustment is correct or needs to be changed.
Clearing Jams
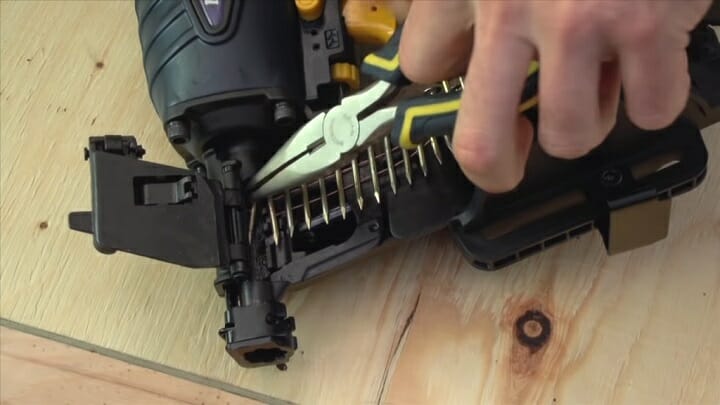
Jams are common with nail guns. If a nailer gets old, it starts to jam sometimes. Also, new nailers can show jams often if the built quality is poor. You can clear the jams easily by opening the magazine and removing the jamming nail. Though it is easy, it surely hampers the work rhythm and slows down the work progress.
Safety Features
Roofing comes with many undercover dangers both for you and the tool. For your protection, always wear goggles, and don’t fall off the roof! For the safety of your nailer or the workpiece, lock the trigger or remove the power source when you are not working. Put caps on the nose of the nail gun to protect the work surfaces.
Also, keep in mind that the bump firing mode is dangerous to use. Bump mode is so fast and this leads to unintentional firing also the rapid burst of air while driving nails leads to recoil. Recoiling causes firing nails into unwanted places. The double firing occurs with even a professional but lags more for a newbie.
Roofing Nailer Uses
A roofing nailer is only required once the entire house has been constructed, except for some roofing works such as the installation of shingles. Roofing guns are appropriate for driving nails into most types of asphalt and fiberglass shingles, waterproof tar paper, and insulation boards.
Cordless Roofing Nailer
[aawp box=”B005CRTHZU” template=”vertical”]
Cordless roofing nailers are mainly battery-powered tools. They don’t need hoses or cables, that’s why they are compact and cordless. Using a cordless nail gun is better for roofing since it eliminates some risks and is easy to carry while riding a ladder. Grab the best cordless roofing nailer to do jobs without hassles.
Can You Use a Brad Nailer for Roofing?
Brad nailers use brad nails that are just a bit bigger than the pins. These brad nails are suitable for small-scale works where more holding power is not needed. Installing roof shingles requires strong nails since the shingles need to be right in place even in the worst weather. So, you can’t use a brad nailer for proper roofing.
Who Makes the Best Roofing Nailer?
Leading brands always offer top-notch nailers to be the first choice of professionals. Although these brands offer different types of unique traits of their own, such as some brand offers lifetime warranty or lifetime free replacement option to lure you to be their customer.
Most of the time it is a process of mutual benefit, so don’t worry about secret flaws. Some best nailers come from brands named BOSTITCH, Hitachi, Wen, DeWalt, and RIDGID. Being the best won’t always be ideal for you, so take the nailer that matches your requirements.
Frequently Asked Questions (FAQs)
1. What is the difference between the roofing nailer vs framing nailer?
A roofing nailer and a framing nailer are different in size, usage, strengths, and some other traits. A framing nailer is bigger and stronger than a roofing nailer. Framing nailers are used in heavy construction jobs from the start of the project, but a roofing nailer is used only on roof jobs after the completion of the building.
2. How often do I need to lubricate my nail guns?
All nail guns need regular lubrication even if you use them regularly or once in a very long time. When you use the nailer every day, the tool parts start to wear out to friction, that’s why it needs lubrication. And, when you are not using the nailer often, the parts get rusted or jammed, for this reason, it still needs to be lubricated.
3. Is hand-nailing a roof better?
Some roofers prefer nailing by hand as it gives more control over the process. You can also fix any mistake easily as it takes more time to finish the process. Also, the pressured or over-pressured nail guns can overdrive nails which is risky. But hand nailing a roof takes a longer time and the labor cost is too high.
Final Statement
Experience is the teacher of all things, so keep nailing and you will be better at it in no time. Make sure to take care of your nailer so that it can serve you for decades. Oil the tool regularly, and replace the driver when necessary, it will prevent The tool parts from being damaged. Also, use Shingle Guides for more accurate nail placements.

