Have you ever tried building something new? A fresh project can be exciting, but it can also be tricky. That’s where tools like the Ryobi framing nailer come in. This handy tool makes nailing together wood faster and easier. It’s perfect for remodeling tasks or simple home fixes.
Imagine you want to add a new room or fix up an old one. You might feel unsure about how to start. With the Ryobi framing nailer, you can simplify your work. Do you find yourself wishing for an easy way to join pieces of wood? The user manual can help you get the most out of your tool.
Many people don’t realize how much help a good manual can be. It’s like having a friend guiding you through your project. From tips on safety to troubleshooting common problems, the Ryobi framing nailer user manual is packed with useful information.
With it, you will learn how to use your nailer safely and effectively. Every step you take will feel more confident. So, if you’re ready to tackle your next remodeling project, let’s dive into why this tool is a must-have!
Table of Contents
Complete Ryobi Framing Nailer For Remodeling User Manual
Looking to tackle a remodeling project with ease? The Ryobi framing nailer can be your best friend. This user manual guides you on setup, safety tips, and maintenance. Did you know proper nail depth can change your outcome? Learning how to adjust this feature can make a big difference in your work. Follow the manual to avoid common pitfalls, and explore each function fully. Your next project could be your best yet!
2. Safety Precautions Before Using Your Framing Nailer
Essential safety gear and equipment. Common hazards and how to avoid them.
Before using a framing nailer, wear essential safety gear. This includes safety glasses, gloves, and ear protection. Always check your equipment for damage. Common hazards are flying nails and loud noises. To avoid these risks, keep your hands clear of the nailing zone and use the tool away from others.
- Wear safety glasses to protect your eyes.
- Use gloves to avoid pinches and cuts.
- Put on ear protection to guard against noise.
What should I do to stay safe while using a framing nailer?
Stay aware of your surroundings and follow the tool’s instructions.
3. Components of the Ryobi Framing Nailer
Detailed description of key parts. Functionality of each component.
The Ryobi framing nailer has three key parts that help it work well. Each component plays an important role. The main parts are:
- Magazine: This holds the nails and feeds them into the tool.
- Trigger: Pressing it makes the nailer fire nails quickly.
- Depth Adjustment Mechanism: This helps control how deep the nails go into the wood.
Understanding these parts makes using the Ryobi nailer easier and safer.
What does the magazine do?
The magazine stores nails and feeds them as needed, making the job smoother and faster.
How does the trigger work?
The trigger is pressed to shoot nails. It gives you control over when they fire.
Why is the depth adjustment important?
The depth adjustment mechanism allows you to set how deep the nail goes. This is vital for a clean finish.
4. Setting Up Your Ryobi Framing Nailer
Unboxing and initial inspection. Stepbystep setup guide.
Unboxing your Ryobi framing nailer is like opening a gift on your birthday! First, carefully take the nailer out of the box and check for any damage. Look at the parts to make sure everything is there. Excited yet? Now, let’s set it up!
| Step | Description |
|---|---|
| 1 | Attach the depth adjustment knob. |
| 2 | Plug in the battery or connect it to air. |
| 3 | Load the nails into the magazine. |
| 4 | Check safety features to ensure they work. |
Now you’re ready to go! Make sure to practice before using it on your big projects. Remember, safety first! Always wear goggles and gloves. Happy nailing!
5. Loading Nails into the Framing Nailer
Types of nails compatible with the tool. Instructions for loading nails correctly.
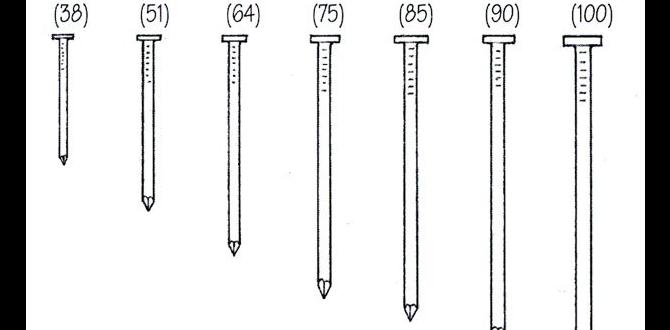
Choose the right nails for your framing nailer. The most common types include:
- Clipped head nails
- Full head nails
- Round head nails
Loading nails correctly is important for safety and performance. First, check the magazine release. Open the magazine and load the nails with the pointed ends facing out. Ensure the nails fit snugly. Close the magazine until it clicks. Always double-check before using!
What nails can I use with a Ryobi framing nailer?
You can use clipped head, full head, or round head nails with the Ryobi framing nailer.
6. Operating the Ryobi Framing Nailer
Detailed operating instructions. Tips for achieving optimal performance.
Using a Ryobi framing nailer is simple if you follow these steps. First, check the air supply. Make sure it’s connected and set to the right pressure. Load the nails carefully into the magazine. Aim the nailer where you want to shoot, and press the safety tip against the surface. Finally, pull the trigger smoothly. For the best results:
- Use the correct nail size for your project.
- Keep the nailer clean and well-maintained.
- Practice on scrap wood before the real job.
These tips help you achieve great performance every time.
How do I load nails into the framing nailer?
To load nails, slide open the magazine at the back, insert the nails, and close it securely. Always check that the nails are the right size.
7. Maintenance and Care for Longevity
Cleaning and lubricating your framing nailer. Troubleshooting common issues.
Keeping your nailer in good shape is simple. Regular cleaning and lubricating help it last longer. Use a soft cloth to wipe off dust and debris. Apply a few drops of oil to the moving parts. This keeps things running smoothly.
If your nailer jams or doesn’t shoot nails, check these common issues:
- Make sure the nails are loaded correctly.
- Check the air pressure; it should be at the right level.
- Inspect for any blockages in the tip.
How often should you clean your framing nailer?
It is best to clean your framing nailer after every use. This keeps it in top shape and prevents problems.
8. Frequently Asked Questions (FAQs)
Common queries related to operation and maintenance. Expert answers and tips.
Got questions about using your nailer? You’re not alone! Here are some common queries and expert answers that can help. Check out the table below for quick tips.
| Question | Answer |
|---|---|
| How do I load nails? | Slide the magazine open, drop in the nails, and close it. Simple! |
| What type of nails do I need? | Use framing nails that match your project. Don’t use spaghetti! |
| How do I maintain my nailer? | Clean it regularly and check for jams. It’s like brushing your teeth! |
| Is it safe to use? | Yes, but remember to wear safety goggles. Your eyes will thank you! |
These tips should help you become a nail-gunning pro. Remember, practice makes perfect. And always aim for the wood, not your buddy!
9. Additional Resources and Support
Where to find supplemental materials and manuals. Customer service and warranty information.
Need more help with your Ryobi framing nailer? You’re in luck! Find supplemental materials and manuals on the Ryobi website. It’s like finding hidden treasure! For any questions, their customer service team is just a call away. Have warranty issues? Don’t fret! Ryobi has you covered. Here’s a quick reference table of helpful resources:
| Resource | Details |
|---|---|
| Website | Ryobi Tools |
| Customer Service | 1-800-525-2579 |
| Warranty Info | Check the website for details. |
With these handy links, you’ll be a nail-driving superstar in no time! Don’t forget: a well-informed user is like a well-oiled nailer—smooth and efficient!
Conclusion
In conclusion, the Ryobi framing nailer user manual is your essential guide for safe and effective use. It teaches you setup, maintenance, and troubleshooting. By following these tips, you’ll improve your remodeling projects. Remember to always wear safety gear. For more detailed information, check the manual online or visit Ryobi’s website. Happy remodeling!
FAQs
What Are The Key Safety Precautions To Follow When Using The Ryobi Framing Nailer For Remodeling Projects?
When using the Ryobi framing nailer, always wear safety goggles to protect your eyes. Keep your hands away from the front of the nailer. Never point the tool at anyone, even if it’s not loaded. Make sure the area is clear before you start. Always follow the instructions that come with the nailer to stay safe.
How Do I Troubleshoot Common Issues That Might Arise While Operating The Ryobi Framing Nailer?
To troubleshoot problems with your Ryobi framing nailer, first, check the power source. Make sure it’s plugged in, or the battery is charged. If it doesn’t shoot nails, the magazine may be empty or jammed. Remove any stuck nails carefully. Lastly, if it makes a strange noise, check for damaged parts or loose screws.
What Types Of Nails Are Compatible With The Ryobi Framing Nailer, And How Do I Load Them Properly?
You can use 21-degree and 30-degree plastic collated framing nails with the Ryobi framing nailer. These nails usually come in different lengths, but 2 to 3.5 inches are best. To load the nails, first, open the magazine by pulling the latch. Then, place the nails inside, making sure they’re facing the right way. Finally, close the magazine firmly until it clicks.
What Maintenance Steps Should I Take To Ensure The Longevity And Optimal Performance Of My Ryobi Framing Nailer?
To keep your Ryobi framing nailer working well, you should clean it after every use. Remove any dust and dirt from inside. Use a few drops of oil on the moving parts to keep them running smoothly. Check the air filter regularly and change it if it’s dirty. Finally, store it in a dry place to avoid rust.
Are There Any Recommended Techniques For Using The Ryobi Framing Nailer Effectively In Different Remodeling Applications?
To use the Ryobi framing nailer well, hold it steady and straight when nailing. Make sure to keep your fingers away from the front. Always check your safety gear, like goggles. Start with scrap wood to practice. This will help you get better before doing the real work.