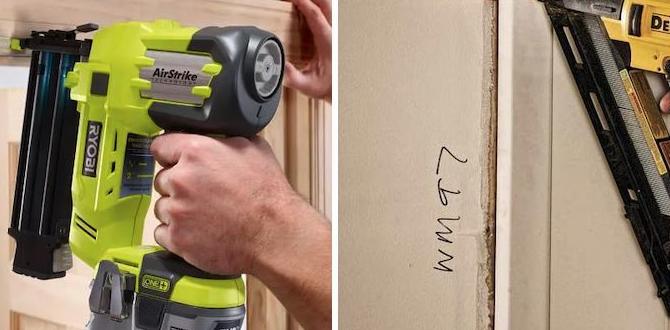
Have you ever faced a tough task of nailing things together? Maybe you wanted to build a birdhouse or fix a furniture piece. If so, understanding how to use a finish nailer and its accessories can make your job much easier and faster.
Imagine the satisfying sound of nails going in perfectly. It feels like magic, right? A finish nailer lets you do just that with ease. When paired with the right equipment accessories, you can achieve a flawless finish every time.
But what exactly are these accessories? And how do they help you? Each piece plays a special role, making your project smoother and more successful. Discovering the secrets behind these tools will boost your skills and give you confidence.
So, let’s dive into the world of finish nailers. Learn how to unlock their true potential and take your DIY projects to the next level!
Table of Contents
How To Use A Finish Nailer Equipment Accessories Effectively
Using a finish nailer can make your projects smoother and faster. First, choose the right type of nails for your task. Ensure that the nailer is set up correctly with suitable accessories, like a safety tip. Did you know that using an air compressor adds power? Safety gear is essential too. Always wear goggles to protect your eyes. With these tips, you can tackle your woodworking projects like a pro and impress your friends!
What is a Finish Nailer?
Definition and purpose of a finish nailer.. Differences between finish nailers and other types of nail guns..
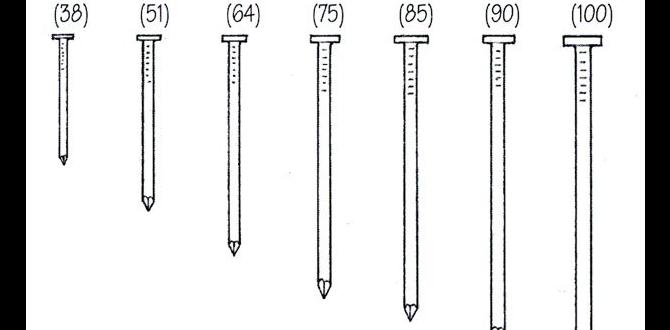
A finish nailer is a handy tool that shoots small nails, known as finish nails, into wood. It helps in adding trim, molding, and other decorative work quickly and cleanly. Unlike regular nail guns, which might shoot larger nails or staples, finish nailers offer precision for fine projects. Think of them as the little elves of carpentry, making everything look neat without the hassle of hammering! Here’s a quick look at how they differ:
| Type of Nail Gun | Nail Size | Use Case |
|---|---|---|
| Finish Nailer | 1 to 2.5 inches | Trimming and molding |
| Framing Nailer | 2 to 3.5 inches | Heavy-duty framing |
| Brad Nailer | 0.5 to 2 inches | Lightweight projects |
With the right finish nailer, your projects can go from bland to grand—like magic! Just remember, the smaller the nail, the fancier the job!
Key Accessories for Finish Nailers
Description of essential accessories (e.g., compressor, hoses).. Optional accessories that can enhance functionality (e.g., nailer stands, protective gear)..
To make the most of your finish nailer, you’ll need some key accessories. First, a compressor is essential for powering the nailer. You can’t nail without some air! Then, hoses connect everything, ensuring air flows smoothly. Optional goodies like nailer stands help keep your tools organized, while protective gear keeps those accidental nail mishaps at bay. Remember, safety first—nobody wants a nail in their toe! Here’s a quick look at what you need:
| Essential Accessories | Optional Accessories |
|---|---|
| Compressor | Nailer Stands |
| Hoses | Protective Gear |
Safety Precautions When Using a Finish Nailer
List of mandatory safety gear (e.g., goggles, gloves).. Common hazards and how to mitigate them..
Using a finish nailer safely is very important. Always wear the right safety gear to protect yourself. Here’s a list of what you need:
- Safety goggles – Protect your eyes from flying debris.
- Gloves – Keep your hands safe from sharp edges.
- Ear protection – Guard your ears against loud noise.
- Dust mask – Breathe safely, especially in dusty areas.
Common dangers include nail misfires and tool malfunctions. To avoid these issues, always check your tool before use. Keep your hands clear while nailing. Following these tips will help keep you safe while you work!
What should you have to stay safe while using a finish nailer?
To stay safe, wear goggles, gloves, ear protection, and a dust mask. This gear helps protect you from injury and keeps your work area safer.
Step-by-Step Guide to Using a Finish Nailer
Preparing the nailer and workspace.. How to properly load nails and set pressure settings..
Start by setting up your space. Find a clean, flat area to work. Keep your finish nailer nearby. Next, check the accessories. Make sure you have the right nails and safety gear.
To load the nails:
- Open the magazine.
- Insert the nail strip carefully.
- Close it securely.
Now, adjust your pressure settings. Set it according to the material thickness. If it’s thin, use less pressure. For thicker wood, increase it. This helps nails drive smoothly without damage.
What is the proper pressure setting for a finish nailer?
The ideal pressure setting depends on the material. For softwood, usually set it around 60-80 PSI. For hardwood, use 80-100 PSI. Adjust according to your job for the best results.
Maintenance of Finish Nailers
Importance of regular maintenance for longevity.. How to clean and store your finish nailer properly..
Taking care of your finish nailer is like giving your favorite toy a spa day! Regular maintenance keeps it happy and working longer. Always clean it after use to prevent dust and debris from making it cranky. Store it in a dry place away from kids—because they might mistake it for a Transformers toy! Use the table below to remember key maintenance steps:
| Maintenance Task | Frequency |
|---|---|
| Clean the exterior | After every use |
| Check air hose | Weekly |
| Oil the nailer | Monthly |
| Check for damage | Before each project |
With these simple steps, your finish nailer will be ready to tackle any job and look great doing it!
Conclusion
In conclusion, using finish nailer accessories can make your projects easier and more precise. Remember to choose the right nails, use safety gear, and maintain your equipment. With practice, you’ll improve your skills quickly. Don’t hesitate to explore more resources or tutorials to enhance your knowledge. Let’s get started on your next project and have fun!
FAQs
What Types Of Accessories Are Essential For Operating A Finish Nailer Effectively?
To use a finish nailer, you need some important accessories. First, you should have safety goggles to protect your eyes. Gloves will help keep your hands safe too. You might also need a compressor, which gives the nailer power. Lastly, having extra nails ready will make your work easier.
How Do You Choose The Right Size And Type Of Finish Nails For Your Specific Project?
To choose the right size and type of finish nails, start by thinking about your project. Think about the thickness of the wood you are using. For thin wood, use short nails, like 1 inch long. For thicker wood, use longer nails, like 2 inches. You can pick nails made of steel for strong projects.
What Safety Gear Should Be Worn When Using A Finish Nailer And Its Accessories?
When using a finish nailer, you should wear safety goggles to protect your eyes. Ear protection is important too, as the tool can be loud. Always wear a mask to keep dust and tiny bits of wood out of your lungs. Finally, sturdy gloves will help protect your hands.
How Do You Properly Maintain And Clean The Accessories Of A Finish Nailer To Ensure Optimal Performance?
To keep your finish nailer working well, you should clean it regularly. Start by unplugging it or removing the battery. Use a brush to remove dust and dirt from the nailer parts. Check the air filter and replace it if it’s dirty. Finally, oil the moving parts a little to keep them working smoothly.
What Techniques Can Be Used To Achieve Precise And Consistent Nail Placement With A Finish Nailer?
To place nails accurately with a finish nailer, you can follow a few easy steps. First, hold the nailer firmly against the surface where you want to nail. Use the built-in guide to help aim it correctly. You should also practice a little on scrap wood first. Finally, press the trigger steadily to drive the nail straight in without wobbling.