Have you ever wanted to build something amazing out of wood? A right triangle could be a great start! It’s not just shapes we learn in math class; they are handy in DIY projects. With a few simple steps, you can create a sturdy right triangle. You might use it for furniture, games, or even decorations.
Imagine creating a fun wooden frame or a cool shelf. A right triangle is a perfect choice! Did you know that right triangles help us understand angles? They also play a big role in many DIY crafts. Learning how to make a right triangle out of wood can spark your creativity. It could be your first step toward DIY mastery.
Ready to dive in? Let’s explore how to make this shape easily and have fun along the way! Your next project awaits!
Table of Contents
How To Make A Right Triangle Out Of Wood: Diy Mastery

How to Make a Right Triangle Out of Wood: DIY Mastery
Creating a right triangle out of wood can be a fun project! Start by gathering your wood and tools. Cut three pieces of wood: two shorter sides and one longer hypotenuse. Did you know a right triangle is handy in many DIY tasks? By using the Pythagorean theorem, you ensure your angles are accurate. With patience and creativity, you’ll have a sturdy triangle for crafts or building. Ready to get started on your next DIY adventure?
Essential Tools and Materials
List of required tools (saw, drill, measuring tape, etc.). Types of wood suitable for making a right triangle.
To build a right triangle from wood, you’ll need some essential tools and materials. Grab a saw for cutting, a drill for creating holes, and a trusty measuring tape for accuracy. You can also use a square to make sure those corners are perfect. For the wood, options like pine or plywood work well. They are strong and easy to handle. Remember, no one likes a wobbly triangle!
| Tools | Description |
|---|---|
| Saw | To cut the wood into pieces |
| Drill | For making holes for screws |
| Measuring Tape | To measure lengths accurately |
| Square | To keep corners right and neat |
Understanding Triangle Geometry
Explanation of right triangles and their properties. Importance of accurate measurements for stability.
A right triangle is a shape with one corner that measures exactly 90 degrees. It has two shorter sides called legs and a longest side called the hypotenuse. These shapes are like the superheroes of geometry because they help us build strong structures! Accurate measurements are super important. They ensure that your triangle is stable and won’t collapse like a house of cards. Remember, even a tiny mistake in measuring can turn your masterpiece into a shaky mess!
| Property | Description |
|---|---|
| Right Angle | One angle measuring 90 degrees. |
| Legs | The two sides that form the right angle. |
| Hypotenuse | The longest side opposite the right angle. |
Step-by-Step Guide to Cutting the Wood
Detailed instructions on measuring and marking wood pieces. Techniques for making precise cuts for triangle sides.
First, grab your measuring tape and a pencil. Measure the lengths for the triangle sides. For a classic right triangle, use the 3-4-5 method. Measure 3 feet, then 4 feet, and check the diagonal. If it’s 5 feet, you’re golden! Mark those points clearly. Next, place your wood on a stable surface. Using a saw, cut slowly along the lines. A straight edge helps keep the cuts neat and clean. Remember, cutting wood isn’t a race—it’s a craft!
| Measurement | Marking | Cutting Technique |
|---|---|---|
| 3 feet | Mark with pencil | Use straight edge |
| 4 feet | Mark with pencil | Slow and steady cutting |
| Diagonal 5 feet | Double-check | Follow the line closely |
Always wear safety goggles, because no one likes flying wood shavings in their eyes! And there you go, you made it through the world of woodcuts.
Assembling the Right Triangle
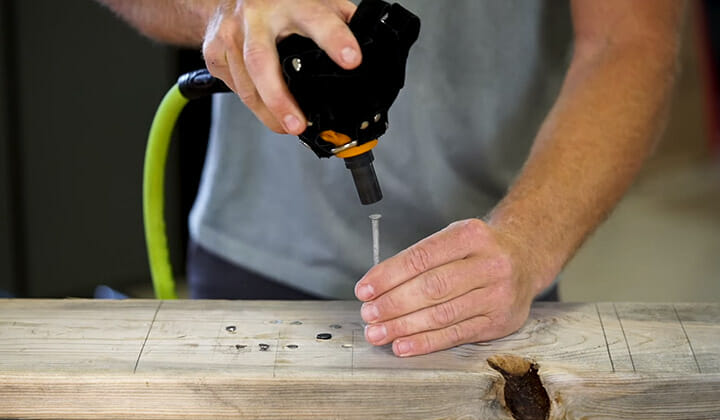
Methods for joining the wood pieces (glue, screws, etc.). Tips for ensuring the triangle maintains its shape.
To put your triangle together, you can use glue or screws. Each method has its own perks. Glue is easy and makes a clean look. Screws give extra strength. Make sure to use wood clamps while the glue dries. This helps the triangle stay in shape. If using screws, place them evenly for balance.
- Use wood glue for a neat finish.
- Attach screws for added support.
- Clamp the pieces until dry.
- Check your angles with a square.
What is the best way to join wood pieces for a right triangle?
The best way is to use a combination of glue and screws. This provides a strong bond and a clean look. Choose the method that suits your project best!
Finishing Touches: Sanding and Staining
Importance of sanding for a smooth finish. Best practices for staining or painting the triangle.
After cutting your wooden triangle, it’s time to smooth things out. Sanding is super important. It helps get rid of rough spots and makes your triangle feel nice. Think of it like giving your triangle a spa day! Use a finer sandpaper for a softer finish. Then, move on to staining or painting. Choose colors that pop and bring your project to life. Remember, spills happen, so wear an apron or an old t-shirt. Here’s a simple guide:
| Step | Action |
|---|---|
| 1 | Smooth rough areas with sandpaper. |
| 2 | Wipe dust off with a damp cloth. |
| 3 | Apply stain or paint evenly. |
| 4 | Let it dry completely. |
It’s like magic! Your triangle will look stunning and ready to impress.
Common Mistakes to Avoid
Frequent errors during the cutting and assembly processes. Tips for troubleshooting and correcting mistakes.
Cutting and assembling wood can be tricky. Many people make mistakes that can mess up their right triangle project. One common mistake is measuring wrong. Always double-check your measurements before you cut! Another issue is not using the right tools. Using a dull saw is like trying to slice toast with a spoon—totally ineffective! If you notice mistakes during assembly, don’t panic. Most errors can be fixed by adjusting pieces or using some wood glue. Remember, even carpenters have “oops” moments!
| Error | Solution |
|---|---|
| Wrong measurement | Re-measure and cut again |
| Dull tools | Sharpen or replace tools |
| Loose joints | Add wood glue or clamps |
Creative Uses for Your Right Triangle
Ideas for incorporating the triangle into home decor. Suggestions for using the triangle in practical applications (e.g., crafts, construction).
Your right triangle can be a fun part of home decor. Use it in many ways! Think of creating wall art. Hang a triangle shelf to show off your favorite things. You can also use it in crafts like making wooden signs or decorative frames. For practical uses, it helps in construction. Use it to make sure your angles are correct. This tool can improve your DIY projects and add charm to your space!
How can I use my triangle in home decor?
You can decorate with your triangle by creating unique items. Consider making wall art, shelves, or custom frames. These add a special touch to any room!
Ideas for Creative Use:
- Triangles as shelves
- Wooden sign crafts
- Framed artworks
Conclusion
In conclusion, making a right triangle out of wood is fun and easy! Use precise measurements and sturdy materials for best results. Remember to take your time when cutting and assembling pieces. We encourage you to try this project and explore other DIY activities. Each step builds your skills, so keep creating and learning!
FAQs
What Type Of Wood Is Best For Constructing A Right Triangle Frame?
For building a right triangle frame, you can use softwoods like pine or fir. These woods are strong and easy to work with. They are also light, which makes your frame easier to move. If you want something stronger, hardwoods like oak are good too, but they can be heavier and more expensive. Choose what fits your project best!
What Tools And Materials Will I Need For This Diy Project?
For this DIY project, you will need some basic tools and materials. First, get a pair of scissors or a craft knife. You’ll also need glue or tape to stick things together. Don’t forget markers or paint to make your project colorful. Finally, gather paper or cardboard as the main materials for your project.
How Do I Calculate The Dimensions Of The Sides To Ensure It’S A True Right Triangle?
To check if you have a right triangle, you can use the Pythagorean Theorem. This rule says that if you square the lengths of the two shorter sides, their total equals the square of the longest side. So, if you have sides of lengths A and B, and the longest side C, do this: A² + B² = C². If this math works out, you have a true right triangle!
What Are Some Techniques For Joining The Wood Pieces Securely At The Corners?
To join wood pieces securely at the corners, you can use different methods. One way is to use screws. You drill holes and then twist the screws in to hold the wood tight. Another method is to use wood glue. You spread the glue on the edges and press the pieces together. You can also use corner brackets for extra strength. Just attach the brackets with screws to each corner.
How Can I Finish Or Treat The Wood To Enhance Durability And Aesthetics?
To finish wood and make it look nice, you can use things like oil or varnish. First, smooth the wood with sandpaper. Then, apply the oil or varnish with a brush. This will help protect the wood from water and dirt. Let it dry completely for the best results!