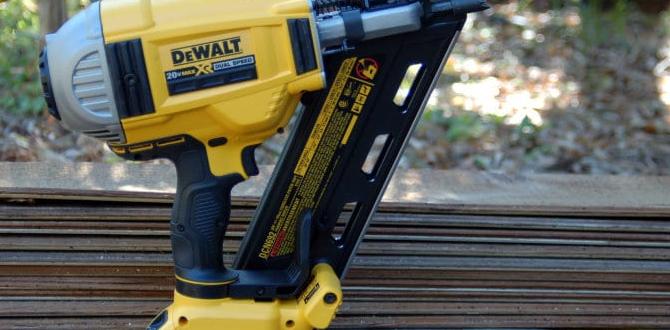
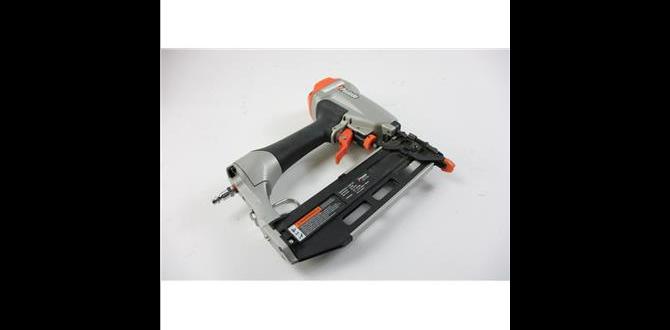
Have you ever tried to use a nail gun, only to find it just won’t work? It can be so frustrating! Sometimes, the problem lies with the worn-out nailer springs. These little pieces play a big role in how well your tool works. When they lose their strength, your nailer can stop firing just when you need it most.
Imagine you’re in the middle of a big project. You have boards to nail, but your tool is giving you a hard time. What if I told you that fixing worn-out nailer springs can be quick and easy? Many people don’t realize how simple it is to replace these springs. A few basic steps can bring your tool back to life!
Did you know that a fresh spring can make a nailer function like new? It’s true! Just by learning how to fix these springs, you can save money and extend the life of your tools. So, let’s dive into the details of this handy repair.
Table of Contents
Fixing Worn-Out Nailer Springs: A Step-By-Step Guide

Fixing Worn-Out Nailer Springs
Ever struggled with a nailer that just won’t work? Fixing worn-out nailer springs can bring life back to your tool. First, identify the signs of wear, like bent springs or decreased performance. Replacing springs is often simple and can save you money. Did you know that a well-maintained nailer can last for years longer? Regular checks and timely repairs keep your projects smooth and efficient. Keep those springs fresh to nail your tasks effectively!Signs of Worn-Out Nailer Springs
Common symptoms indicating that a nailer spring may be worn out. Impact of wornout springs on nailer performance and safety.When your nailer springs are worn out, you might notice some clear signs. Common symptoms include:
- Weak nail penetration
- Frequent misfires
- Unusual noise during operation
- Difficulty in reloading nails
These issues can hurt both performance and safety. Weak springs can lead to inaccurate nail placement. This can cause accidents or damage to your work surface. Fixing worn-out nailer springs is important for safe and effective use. Regular checks can ensure your nailer works well.
What are the signs of worn-out nailer springs?
Signs of worn-out nailer springs include weak nail penetration and frequent misfires. These can affect how well your nailer works and how safe it is to use. If you notice these symptoms, it might be time to fix your springs.
Tools and Materials Needed for Spring Replacement
List of essential tools required for fixing nailer springs. Recommended materials for replacement springs and where to source them.Replacing worn-out nailer springs? You’ll need a few handy tools! Grab a screwdriver set to open up your nailer. A pair of pliers will help you pull the old springs out without any fuss. Don’t forget a measuring tape to ensure your replacement springs fit perfectly. For sourcing new springs, check local hardware stores or online. Just think of it as a treasure hunt for your nailer’s new best friends!
| Tool/Material | Purpose | Where to Buy |
|---|---|---|
| Screwdriver Set | Open the nailer | Local hardware store |
| Pliers | Remove old springs | Online retailers |
| Measuring Tape | Check spring size | Any tool shop |
Step-by-Step Guide to Fixing Nailer Springs
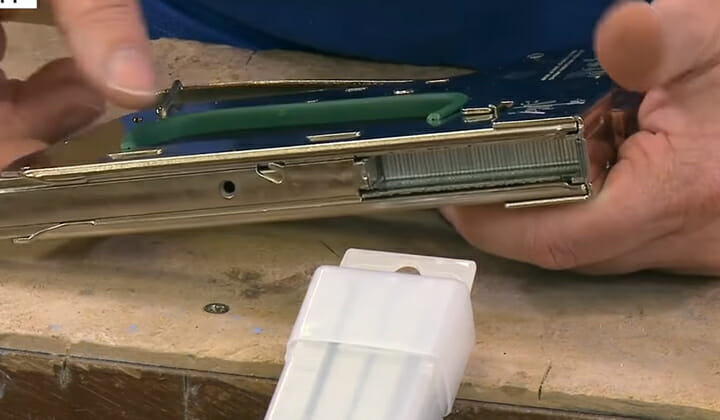
Detailed, stepbystep instructions for disassembling the nailer. Comprehensive guide to removing and replacing the wornout spring.To start fixing those worn-out nailer springs, first, find a clean workspace. Ready your tools, like screwdrivers and pliers. Unscrew the nailer’s casing gently—don’t lose those tiny screws! Once opened, carefully take out the old spring. It might play hard to get, but with a little coaxing, it’ll come out. Now grab your shiny new spring! Slide it in the same way the old one came out. Then just reassemble, tighten those screws, and voila! Your nailer should feel rejuvenated, like it just had a spa day.
| Step | Action |
|---|---|
| 1 | Find a clean workspace |
| 2 | Gather tools (screwdrivers, pliers) |
| 3 | Unscrew the nailer casing |
| 4 | Remove the old spring |
| 5 | Insert the new spring |
| 6 | Reassemble and screw it back |
Safety Precautions During Repair
Key safety guidelines to follow when working on nailers. Importance of personal protective equipment (PPE) during repairs.Working on nailers can be a bit tricky, so safety is key! Always wear proper gear like goggles and gloves to protect those precious peepers and fingers. A surprising number of accidents happen because people forget this. Securing your workspace is also a must. Keep your tools in check; a loose spring might just take off like a rocket! Remember, you don’t want to become a nailer target. Here’s a quick safety table to follow:
| Safety Item | Description |
|---|---|
| Goggles | Protects your eyes from debris. |
| Gloves | Keeps your hands safe from sharp objects. |
| Ear Protection | Helps reduce noise from nailers. |
| Sturdy Shoes | Protects your toes from dropped tools. |
Your safety matters! Following these guidelines ensures a smoother repair process and keeps you in one piece. Remember, a happy repair experience is a safe one!
Maintenance Tips to Prolong Spring Life
Best practices for maintaining nailers to prevent spring wear. Recommended routine checkups and servicing intervals.Keeping your nailer’s springs in top shape means more time nailing and less time fixing! Start with regular checkups—every 500 nails fired is a good rule. Also, keep your nailer clean. Remove dust and debris, so your springs stay happy and healthy. Don’t forget to lubricate the springs too; a little oil goes a long way. If your nailer starts hiccupping, it might be time for a tune-up. Let’s protect those springs like they are made of gold!
| Maintenance Task | Frequency |
|---|---|
| Check springs for wear | Every 500 nails |
| Clean nailer | Weekly |
| Lubricate springs | Monthly |
| Full servicing | Annually |
FAQs About Nailer Springs
Commonly asked questions regarding nailer spring issues and solutions. Expert tips for troubleshooting other nailer problems related to springs.Nailer springs can wear out over time. This can lead to several issues. Many people ask about how to fix these problems. Here are some common questions and useful tips:
What should I do if my nailer jams?
If your nailer jams, check for a broken spring. Remove any stuck nails and inspect the area.
How can I tell if my nailer springs are weak?
If nails don’t drive in fully, your springs might be weak. Try replacing them to improve performance.
What tools do I need for troubleshooting?
- Screwdriver – for opening the nailer.
- Pliers – to remove springs easily.
- Replacement springs – ensure a good fit.
Fixing nailer springs can solve many nailer problems. Remember to work carefully to avoid injury. These tips can help you keep your nailer in great shape!
When to Seek Professional Help
Signs that indicate it’s time to consult a professional technician. Benefits of professional servicing versus DIY repairs.Knowing when to call in a pro can save you headaches. If your nailer starts acting like a game of “whack-a-mole,” it’s time for help. Look for signs like inconsistent firing or strange noises. Pro technicians have tricks to fix problems that DIYers might overlook. They also use proper tools, ensuring repairs last longer, just like your favorite pair of shoes. Save yourself the mess! Check out the table below for a quick comparison:
| DIY Repairs | Professional Servicing |
|---|---|
| Requires time and patience | Quick and reliable fixes |
| Possible mistakes | Expert knowledge |
| Inconsistent results | Long-lasting repairs |
Sometimes, it’s best to let the experts handle it. Remember, nailers are tricky machines, like trying to catch a slippery fish!
Conclusion
In conclusion, fixing worn-out nailer springs is simple. Check your nailer regularly and replace springs when needed. Always use the right parts to keep your tool working well. Remember, regular maintenance helps you finish projects faster. If you’re curious to learn more, look up guides or watch videos online. Let’s keep our tools in top shape together!FAQs
Sure! Here Are Five Questions Related To Fixing Worn-Out Nailer Springs:Sure! Here are five questions related to fixing worn-out nailer springs: 1. **How can you tell if a nailer spring is worn-out?** You can tell if a nailer spring is worn-out if it doesn’t shoot nails properly or feels weak. 2. **What tools do you need to fix a nailer spring?** You need basic tools like a screwdriver, pliers, and maybe a new spring to fix it. 3. **Can you replace the spring yourself?** Yes, you can replace the spring yourself if you follow the instructions carefully. 4. **How do you put the new spring in the nailer?** To put in the new spring, you take apart the nailer, remove the old spring, and add the new one carefully. 5. **What should you do if you’re unsure about fixing it?** If you’re unsure, ask an adult or a friend who knows about fixing tools to help you.
Sure! Just ask your question, and I’ll be happy to help you with a clear answer!
What Are The Signs That Indicate A Nailer Spring Is Worn Out And Needs Replacement?You might notice a few things if the nailer spring is worn out. First, the nails may not go in straight or might get jammed. You could also hear sounds like clicking instead of smooth operation. If the nailer feels weak or doesn’t fire like it used to, that’s another sign. It’s time to replace the spring when you see these signs.
How Do You Properly Disassemble A Nail Gun To Access And Replace The Worn-Out Springs?To take apart a nail gun, first, make sure it’s unplugged or has no air supply. Next, find the screws on the casing and use a screwdriver to remove them. Carefully lift off the cover to see the inside. Look for the springs; take them out gently and replace them with new ones. Finally, put the cover back on and screw it in place.
What Type Of Replacement Springs Are Recommended For Specific Brands And Models Of Nailers?You should look for replacement springs that match your nailer’s brand and model. Each nailer has its special spring type. Check the manual or the brand’s website for details. You can also ask at a tool store for help with your specific nailer. Using the right spring keeps your nailer working well!
Are There Any Maintenance Tips To Extend The Lifespan Of Nailer Springs And Prevent Premature Wear?To help your nailer springs last longer, keep it clean. You should wipe away dust and dirt after each use. Also, be gentle when you load nails. Too much force can hurt the springs. Finally, store your nailer in a dry place to avoid rust.
What Tools And Safety Precautions Are Necessary When Repairing Or Replacing Nailer Springs?When you repair or replace nailer springs, you need some tools. Get a screwdriver, pliers, and a wrench. Always wear safety glasses to protect your eyes. Use gloves to keep your hands safe from sharp parts. Make sure the nailer is unplugged to avoid accidents.