Have you ever walked into a room and felt instantly cozy? Wide plank hardwood floors can do just that. They add warmth and charm to any home. Imagine the soft sounds of your feet on beautiful wood as you move through your space.
Many homeowners wonder if they can install these stunning floors themselves. The good news? You can! Wide plank hardwood DIY projects are easier than they seem. With some simple tools and a bit of patience, you can transform your home.
Did you know that wide planks can make a room look bigger? It’s true! They trick the eye, making spaces feel open and airy. So, why not bring that magic into your home?
In this article, we’ll explore how to tackle a wide plank hardwood DIY project. Get ready to roll up your sleeves and create something special. Are you excited to start your flooring journey? Let’s dive in!
Table of Contents
Discover The Benefits Of Wide Plank Hardwood Diy Projects

Discovering Wide Plank Hardwood DIY
Wide plank hardwood floors can transform any space. Imagine walking into a room with elegant wooden floors that feel warm and inviting. DIY projects can make this dream a reality. By choosing wide planks, you create an open and airy look. The installation process may seem tricky but can be enjoyable. With the right tools and guidance, you can achieve beautiful results. Is it time to upgrade your floors? Embrace the challenge and enjoy the rewards!
Understanding Wide Plank Hardwood
Definition and benefits of wide plank hardwood. Comparison of wide plank to traditional hardwood flooring.
Wide plank hardwood is a type of flooring made from wide pieces of wood. It adds beauty and warmth to any room. One benefit of wide planks is their stylish appearance. They make spaces look larger. Compared to traditional hardwood, which uses narrower boards, wide planks create a more open feel. Here are some key differences:
- Width: Wide plank is usually 5 inches or more.
- Visual Impact: Wide planks give a rustic charm.
- Installation: Fewer seams make installation easier.
What are the benefits of wide plank hardwood?
Some benefits of wide plank hardwood include:
- Beauty: It looks warm and inviting.
- Value: It can increase home value.
- Durability: It often lasts longer than thinner options.
Choosing the Right Wood Species
Popular wood species for wide plank flooring. Factors to consider when selecting wood (durability, appearance, cost).
Picking the right wood species for your wide plank floor is like choosing the right pizza toppings – it can make or break the vibe! Some popular options include oak, maple, and hickory. Each type offers unique features. Oak is tough and timeless; maple is light in color and elegant; hickory has a fun twist with its vibrant patterns.
When choosing wood, remember three key factors: durability, appearance, and cost. Durability ensures your floor can handle mischievous pets and heavy foot traffic. The look should match your style, and of course, keep an eye on your budget! Here’s a quick table to help you decide:
| Wood Species | Durability | Appearance | Cost |
|---|---|---|---|
| Oak | High | Classic | Medium |
| Maple | Medium | Light & Elegant | Medium |
| Hickory | High | Bold Patterns | Higher |
So, think carefully! A little humor? Just like a bad haircut, you don’t want to regret your wood choice later!
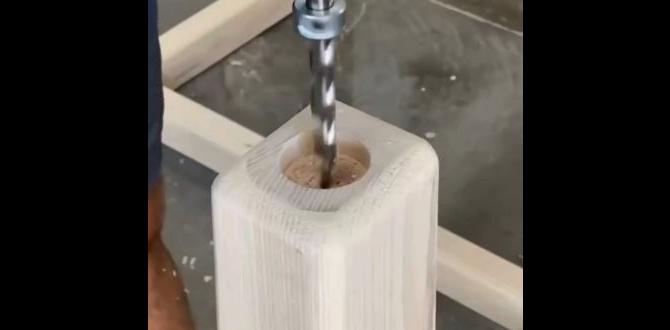
Tools and Materials Needed for DIY Installation
Essential tools for wide plank hardwood installation. List of materials required (underlayment, boards, nails, adhesives).
To install wide plank hardwood, you’ll need some essential tools and materials. First, gather these tools: a hammer, a saw, a measuring tape, and a level. Next, have the right materials ready:
- Underlayment: This helps with noise and insulation.
- Boards: Choose your favorite wood planks.
- Nails: You’ll need these for securing the boards.
- Adhesives: Some boards may need glue.
Having these tools and materials will help make your DIY project smooth and fun!
What tools are essential for wide plank hardwood installation?
For wide plank hardwood DIY, some important tools include a hammer, saw, measuring tape, and level. These tools make measuring and cutting much easier.
Preparation Steps Before Installation
Importance of acclimating wood to the environment. Subfloor requirements and preparations.
Before laying wide plank hardwood, proper preparation is key. First, it’s essential to let the wood acclimate to your home’s temperature and humidity. This step helps prevent future warping. Next, check your subfloor. It needs to be clean, dry, and level. A strong subfloor supports the wood and ensures stability.
- Acclimation: Allow wood to sit for 3-7 days.
- Subfloor Check: Ensure it’s flat and without moisture.
- Treatment: Treat any mold or damage.
Why is acclimating wood important?
Acclimating wood helps it adjust to its new environment. It reduces gaps and ensures the wood stays in shape.
What must I do to prepare the subfloor?
To prepare the subfloor, make sure it is clean, dry, and level. Any problems can lead to issues later. Repair any damage before starting.
Step-by-Step Installation Process
Detailed steps for installing wide plank hardwood flooring. Tips for achieving a professional finish.
Ready to turn your room into a stunning space? First, gather your tools: a saw, measuring tape, and some good old-fashioned elbow grease! Start by measuring your area. Next, lay down a moisture barrier. It’s like a raincoat for your floors. Then, begin placing the wide plank boards, starting from the corner. Tap them into place like you’re putting together a puzzle. For a professional finish, remember to stagger your seams – nobody likes a boring floor! Finally, enjoy your beautiful creation. Now your floors can dance to the sound of your footsteps!
| Step | Action |
|---|---|
| 1 | Gather your tools |
| 2 | Measure your area |
| 3 | Lay a moisture barrier |
| 4 | Place wide plank boards |
| 5 | Stagger your seams |
| 6 | Enjoy your new floors! |
Finishing Touches for Your Floor
Sealing and finishing options for wide plank hardwood. Maintenance advice for longevity.
After laying your wide plank hardwood floor, it’s time for the finishing touches! First, pick a sealant. Options like polyurethane and natural oils offer different looks and protection levels. A good seal keeps dirt off your floor and saves your back from unnecessary scrubbing sessions. Did you know that a well-finished floor can last over a decade? Talk about long-term investment!
| Sealing Option | Finish Type | Durability |
|---|---|---|
| Polyurethane | Glossy | 10+ years |
| Natural Oil | Satin | 3-5 years |
For maintenance, a simple sweep or vacuum keeps debris away. Remember: water and wood do not get along, so avoid mopping. If spills happen, grab a cloth, not a mop! With these care tips, your floor can look great for years and maybe even impress your cat!
Common DIY Mistakes and How to Avoid Them
Typical pitfalls in wide plank hardwood installation. Solutions and preventative measures.
Installing wide plank hardwood can be a fun adventure, but there are some common traps you might fall into. One big mistake is not letting the wood acclimate. If you skip this step, your boards might warp later, which is about as fun as stepping on a LEGO. To avoid this, always let your wood sit in the room for at least 48 hours. Another pitfall is not checking for level floors. If your base isn’t flat, your wood may squeak or buckle. Use a level, or things could get wobbly!
| Common Mistakes | Solutions |
|---|---|
| Not acclimating wood | Let wood sit for 48 hours |
| Ineven flooring | Check with a level tool |
Remember, a little patience now saves big headaches later. Happy DIY-ing!
Cost Estimates and Budgeting for Your Project
Breakdown of costs associated with materials and tools. Tips for budgeting your DIY installation project.
Planning your project means knowing what to spend. Here’s a simple breakdown of your costs:
- Materials: Floorboards, glue, nails, and underlayment can add up.
- Tools: You might need a saw, drill, or hammer.
- Cleanup: Don’t forget about bags for old materials.
Budgeting tips can help save money:
- Set a budget before shopping.
- Look for sales on materials.
- Rent tools instead of buying them.
Keeping track will help ensure your DIY project stays fun and affordable!
How much does wide plank hardwood cost?
The cost varies by type and quality. Expect to pay between $3 to $10 per square foot.
What tools do I need for installation?
- A miter saw for cutting.
- A nail gun for quick installation.
- A measuring tape for accuracy.
Resources for Further Learning
Recommended online tutorials and guides. Relevant books and magazines on hardwood flooring DIY.
Learning about wide plank hardwood DIY can be fun! Many resources can help you. Check out these online tutorials for step-by-step guidance. You can also explore books and magazines that focus on hardwood flooring projects. Here are some great options:
- Online Tutorials: YouTube offers many hands-on videos.
- Books: “The Complete Guide to Hardwood Floors” is a must-read.
- Magazines: “Home Improvement” features helpful DIY tips.
These resources will help you improve your skills. Dive in and enjoy your project!
What are good online resources for DIY hardwood flooring?
Websites like YouTube and DIY Network offer a variety of video tutorials. They show you everything from choosing wood to installation techniques.
Conclusion
In conclusion, wide plank hardwood DIY projects can brighten your home. They’re simple and fun to do. You can choose your wood and finish, making a personal touch. Always measure carefully and gather your tools first. Ready to start? Check out online guides or videos for helpful tips. Let’s transform your space together!
FAQs
What Are The Key Factors To Consider When Selecting Wide Plank Hardwood For A Diy Flooring Project?
When choosing wide plank hardwood for your floor, think about the type of wood you like. Different woods have different colors and patterns. You should also check the width of the planks; wider planks give a nice look. Make sure the wood is strong and can handle wear and tear. Finally, consider how much money you want to spend.
What Tools And Materials Are Necessary For Properly Installing Wide Plank Hardwood Flooring?
To install wide plank hardwood flooring, you need a few important tools and materials. First, get a measuring tape to measure your space. You also need a saw to cut the wood pieces to fit. Don’t forget a hammer or a nail gun to secure the planks. Finally, you’ll need some wood glue and a level to make sure everything is even.
How Do I Prepare My Subfloor Before Laying Wide Plank Hardwood Planks?
First, you need to clean the subfloor well. Remove any dirt or old glue. Next, check for squeaks or holes. You can fix these with screws or wood filler. Then, make sure the floor is flat and dry. Use a level tool to help. Finally, add a moisture barrier if the subfloor is concrete. This will protect your new planks!
What Are Some Common Mistakes To Avoid When Diy-Ing Wide Plank Hardwood Flooring?
When putting down wide plank hardwood flooring, avoid a few common mistakes. First, measure your space carefully. If you don’t measure right, the flooring might not fit! Next, let the wood adjust to the room’s temperature. This helps prevent warping. Lastly, make sure the planks aren’t too close together. If they are, they might buckle when they expand.
How Can I Maintain And Care For My Wide Plank Hardwood Flooring To Ensure Its Longevity?
To care for your wide plank hardwood flooring, you should sweep or vacuum it regularly to remove dirt and dust. Use a damp mop with a wood-safe cleaner to clean spills right away. Avoid wearing shoes with high heels or heavy shoes on the floor to prevent scratches. You can also place rugs in busy areas to protect the wood. Lastly, keep the room’s humidity between 30% and 50% to stop the wood from warping.
{“@context”:”https://schema.org”,”@type”: “FAQPage”,”mainEntity”:[{“@type”: “Question”,”name”: “What Are The Key Factors To Consider When Selecting Wide Plank Hardwood For A Diy Flooring Project? “,”acceptedAnswer”: {“@type”: “Answer”,”text”: “When choosing wide plank hardwood for your floor, think about the type of wood you like. Different woods have different colors and patterns. You should also check the width of the planks; wider planks give a nice look. Make sure the wood is strong and can handle wear and tear. Finally, consider how much money you want to spend.”}},{“@type”: “Question”,”name”: “What Tools And Materials Are Necessary For Properly Installing Wide Plank Hardwood Flooring? “,”acceptedAnswer”: {“@type”: “Answer”,”text”: “To install wide plank hardwood flooring, you need a few important tools and materials. First, get a measuring tape to measure your space. You also need a saw to cut the wood pieces to fit. Don’t forget a hammer or a nail gun to secure the planks. Finally, you’ll need some wood glue and a level to make sure everything is even.”}},{“@type”: “Question”,”name”: “How Do I Prepare My Subfloor Before Laying Wide Plank Hardwood Planks? “,”acceptedAnswer”: {“@type”: “Answer”,”text”: “First, you need to clean the subfloor well. Remove any dirt or old glue. Next, check for squeaks or holes. You can fix these with screws or wood filler. Then, make sure the floor is flat and dry. Use a level tool to help. Finally, add a moisture barrier if the subfloor is concrete. This will protect your new planks!”}},{“@type”: “Question”,”name”: “What Are Some Common Mistakes To Avoid When Diy-Ing Wide Plank Hardwood Flooring? “,”acceptedAnswer”: {“@type”: “Answer”,”text”: “When putting down wide plank hardwood flooring, avoid a few common mistakes. First, measure your space carefully. If you don’t measure right, the flooring might not fit! Next, let the wood adjust to the room’s temperature. This helps prevent warping. Lastly, make sure the planks aren’t too close together. If they are, they might buckle when they expand.”}},{“@type”: “Question”,”name”: “How Can I Maintain And Care For My Wide Plank Hardwood Flooring To Ensure Its Longevity? “,”acceptedAnswer”: {“@type”: “Answer”,”text”: “To care for your wide plank hardwood flooring, you should sweep or vacuum it regularly to remove dirt and dust. Use a damp mop with a wood-safe cleaner to clean spills right away. Avoid wearing shoes with high heels or heavy shoes on the floor to prevent scratches. You can also place rugs in busy areas to protect the wood. Lastly, keep the room’s humidity between 30% and 50% to stop the wood from warping.”}}]}