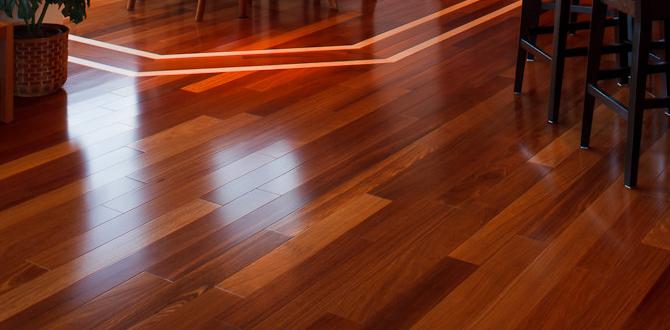
Have you ever walked across a beautiful, natural wood floor and wondered how it was made? Unfinished hardwood installation is an exciting process that many people don’t know about. Imagine stepping into a home where the floors are clean, fresh, and waiting for you. That’s the magic of unfinished hardwood.
When you choose unfinished hardwood, you get to customize the color. You can create a unique look just for your space. Some people love the rich tones of dark wood, while others prefer a light, airy vibe. Have you thought about how much fun it would be to pick your own finish?
Here’s a fun fact: Did you know unfinished hardwood can help reduce allergens in your home? Unlike carpets, which trap dust and pet hair, hardwood floors are easy to clean. Does that sound appealing to you?
In this article, we’ll explore how to install unfinished hardwood. We’ll share tips, tricks, and everything you need to know to get started. Are you ready to transform your home with a stylish wooden floor? Let’s dive in!
Table of Contents
Unfinished Hardwood Installation: Benefits And Tips For Success

Unfinished Hardwood Installation
Many homeowners explore unfinished hardwood installation to create stunning floors. This method allows you to customize color and finish, making your space uniquely yours. Did you know that unfinished hardwood can also cover small imperfections in the wood? Proper preparation is key. Make sure your subfloor is clean and dry before laying the wood. Once installed, don’t rush the finishing process; allow for drying and curing. With patience and care, you can transform any room with beautiful hardwood floors.
Understanding Unfinished Hardwood
Definition and characteristics of unfinished hardwood. Advantages and disadvantages compared to prefinished hardwood.
Unfinished hardwood is raw wood flooring that hasn’t been stained or sealed yet. This gives it a natural look that many people love. It allows for custom staining, so you can make your floor match your favorite shirt—or maybe not, your choice! One big perk is the ability to fix scratches easily. However, it can take longer to finish the job.
On the flip side, prefinished hardwood comes ready to go, saving you time but limiting your color choices. Here’s a quick comparison:
| Feature | Unfinished Hardwood | Prefinished Hardwood |
|---|---|---|
| Custom Staining | Yes | No |
| Installation Time | Longer | Quicker |
| Repairing Scratches | Easy | Harder |
So, whether you’re feeling crafty or just need a fast fix, there’s an option for you!
Planning Your Unfinished Hardwood Installation
Assessing the space: measurements and layout considerations. Choosing the right species of hardwood.
Before diving into your hardwood project, take a close look at your space. Measure the room and decide how to lay out the boards. A well-planned layout avoids mistakes and extra cuts, which can be a real party pooper! Next, you’ll need to choose the right hardwood species. Some woods are hard as a rock, while others are softer than a marshmallow. Make sure you pick one that fits your style and needs!
| Wood Species | Durability | Best For |
|---|---|---|
| Oak | High | High-traffic areas |
| Pine | Low | Casual spaces |
| Maple | Medium | Living rooms |
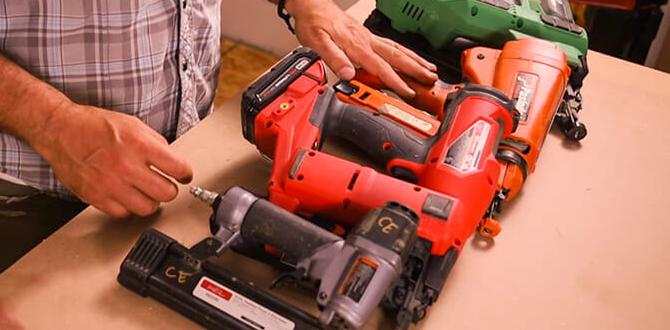
Required Tools and Materials
List of essential tools for installation. Types of finishes and stains to consider.
Every project needs the right tools, and installing hardwood is no different! You’ll need a few essentials to get started. A hammer, saw, and measuring tape are must-haves. Don’t forget a nail gun—unless you have a passion for thumb injuries!
After installation, the fun begins with finishes and stains! Choosing the right color can be like picking a favorite ice cream flavor. You have many options, from rich mahogany to light maple. Each brings its own charm to the room!
| Essential Tools | Types of Finishes |
|---|---|
| Hammer | Polyurethane |
| Saw | Oil-Based |
| Nail Gun | Water-Based |
| Measuring Tape | Stains (Various) |
So, grab your tools and your imagination. Let’s make that floor shine like a star on the red carpet!
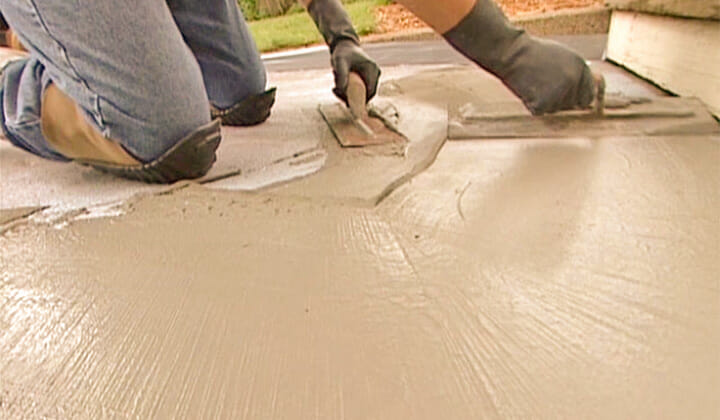
Preparation of the Subfloor
Steps for ensuring a clean and level subfloor. Importance of moisture testing in installation success.
Before you lay down that beautiful hardwood, make sure your subfloor is ready. First, clean it up like you’re hosting a tea party for squirrels! Remove dirt, dust, and anything that could mess with your floor. Next, check if it’s flat. Uneven floors can make your fancy wood look like a roller coaster ride!
It’s also important to test for moisture. Too much moisture, and your wood could warp. Nobody wants a wavy floor! A simple moisture meter can help here. Aim for a moisture level of less than 12%. This keeps your flooring happy and your home dry.
| Step | Action |
|---|---|
| Clean | Remove dust and debris |
| Check Level | Ensure subfloor is flat |
| Test Moisture | Use a moisture meter |
Remember, a clean and level subfloor leads to successful unfinished hardwood installation. So get that subfloor ready, and your hardwood will thank you with beautiful floors!
Installation Techniques for Unfinished Hardwood
Different methods: naildown, gluedown, and floating techniques. Stepbystep guide to each installation method.
Different methods work for unfinished hardwood installation. Let’s explore three key techniques: naildown, gluedown, and floating. Each method has steps to follow for best results. Here’s a quick guide:
- Naildown: Wood planks are secured to the subfloor using nails.
- Gluedown: Planks are attached with strong adhesive.
- Floating: No nails or glue; planks simply fit together.
Choosing the right technique matters. Each method can create a beautiful floor. Stay tuned to learn more about each technique!
What is the best method for installation?
The best method depends on your room and preferences. Floating is easy, while gluedown is strong. Consider your space and choose!
Finishing and Sealing Process
Types of finishes: oilbased vs. waterbased. Application techniques for a smooth and durable finish.
Choosing the right finish can feel like picking your favorite ice cream flavor—so many options! Oil-based finishes are tough and give a warm glow. Water-based finishes dry faster and are easier to clean up. It’s like comparing tortoises and hares! For a smooth look, use long brush strokes and avoid big splashes like a painter at a food fight.
| Type of Finish | Advantages | Disadvantages |
|---|---|---|
| Oil-Based | Durable, rich color | Long drying time, stronger smell |
| Water-Based | Quick drying, low odor | Less durable, may need more coats |
Ultimately, pick a finish that makes you happy! Whether you want long-lasting strength or quick drying time, there’s a perfect choice for your wood. Go ahead, seal the deal with a smooth, shiny finish that even your dog would admire!
Maintaining Your Unfinished Hardwood Floors
Cleaning and upkeep tips for longevity. Addressing common issues and repairs.
Keeping your unfinished hardwood floors looking sharp is easier than you might think! Regular cleaning is key. Use a damp mop and gentle soap to wipe away dirt. Avoid water puddles, as hardwoods dislike swimming! For repairs, watch out for scratches. Simply sand them down and apply a new finish. Here’s a helpful table to keep everything organized:
| Task | Frequency | Tip |
|---|---|---|
| Clean Floor | Weekly | Use a damp mop |
| Inspect for Scratches | Monthly | Sand and refinish |
| Deep Clean | Every 6 Months | Use a hardwood cleaner |
With some simple love and care, your floors will shine like new! Why not treat them like royalty? After all, they deserve the royal treatment!
Cost Considerations for Unfinished Hardwood Installation
Breakdown of costs: materials, labor, and finishing. Budgetfriendly tips for installation and maintenance.
Installing unfinished hardwood can be a fun adventure, but it’s important to know the costs involved. First, let’s look at materials and labor. You’ll need to buy wood, which can vary in price. Usually, the average cost is about $3 to $12 per square foot. Labor can add another $1 to $3 per square foot. Finally, finishing costs can range from $0.50 to $2 per square foot. That adds up quickly!
| Cost Breakdown | Price Range per Square Foot |
|---|---|
| Wood | $3 – $12 |
| Labor | $1 – $3 |
| Finishing | $0.50 – $2 |
To save some cash, consider doing part of the work yourself. Maybe you can put on that hardhat and channel your inner contractor! Regular cleaning and maintenance can also extend the life of your floors, which means fewer worries and more happy dances on your shiny wood. Remember, staying within your budget keeps the floor as happy as you are!
Common Mistakes to Avoid
Pitfalls during the installation process. How to choose a reliable contractor if hiring out.
During unfinished hardwood installation, several common mistakes can lead to headaches later. One big blunder is skipping the prep work. Always make sure your subfloor is clean and dry. Otherwise, you could end up with warped wood, which is no fun at all! Also, if you’re hiring a contractor, take your time. Check their reviews and ask for examples of their work. Remember, a good contractor can be the difference between a masterpiece and a floor that squeaks louder than your grandma’s favorite chair!
| Mistake | Solution |
|---|---|
| Skipping Subfloor Prep | Clean and dry before installation |
| Ignoring Acclimation | Let wood adjust to room climate |
| Poor Contractor Choice | Check reviews and past work |
Frequently Asked Questions
Common queries about unfinished hardwood installation. Expert answers and clarification on misconceptions.
Many folks wonder about unfinished hardwood installation. It’s like solving a puzzle! Some of the most common questions include: How long does it take? And, will it be super hard to maintain? The answers are simpler than you might think. Experts say, it generally takes about a week to install. Plus, with proper care, these floors can shine for years! Here’s a quick table of FAQs:
| Question | Answer |
|---|---|
| How long does installation take? | About a week! |
| Is it difficult to maintain? | No! Just clean regularly. |
| Can I finish it myself? | Yes, but it’s a bit tricky! |
Remember, if you have questions, ask them! It’s better than trying to guess and possibly stepping on a nail!
Conclusion
In summary, unfinished hardwood installation offers you flexibility in design and finish. It’s a great choice for a custom look. Remember to prepare your space properly and understand the finishing process. If you’re ready to enhance your home, consider this option. We encourage you to read more about the steps involved to make your project successful!
FAQs
What Are The Key Benefits Of Installing Unfinished Hardwood Flooring Compared To Pre-Finished Options?
Unfinished hardwood flooring gives you more choices for stains and finishes. You can pick exactly how you want it to look. It also lets you hide any small gaps between the wood pieces better. Plus, we can sand it perfectly for a smooth surface. Unfinished wood may also be cheaper than pre-finished options.
What Steps Should Be Taken To Properly Prepare A Subfloor Before Installing Unfinished Hardwood?
To prepare your subfloor for unfinished hardwood, start by cleaning it well. Remove any dust, dirt, or old flooring. Next, check for any squeaks or loose boards and fix them. You should also make sure the floor is level; you can use a leveling compound if it’s not. Lastly, let the subfloor dry completely before putting down the hardwood.
How Do You Achieve A Smooth Finish When Sanding And Finishing Unfinished Hardwood Floors After Installation?
To get a smooth finish on your new hardwood floors, start by sanding them. We use sandpaper with finer grit numbers for a softer touch. This helps remove rough spots and makes the surface even. After sanding, clean dust from the floors. Finally, apply a coat of finish to protect the wood and make it shiny.
What Are The Recommended Types Of Stains And Sealants For Unfinished Hardwood Flooring?
For unfinished hardwood floors, you can use oil-based stains. These give a deep color and last a long time. Water-based stains are another good choice because they dry quickly. For sealing, use polyurethane. It protects the wood and makes it shiny.
How Long Does It Typically Take For Unfinished Hardwood Flooring To Acclimate Before Installation?
Unfinished hardwood flooring usually needs to acclimate for about 3 to 7 days before you install it. This time helps the wood get used to the room’s temperature and humidity. You should keep the boards in the room where they will go. This way, they will fit better when you lay them down.
{“@context”:”https://schema.org”,”@type”: “FAQPage”,”mainEntity”:[{“@type”: “Question”,”name”: “What Are The Key Benefits Of Installing Unfinished Hardwood Flooring Compared To Pre-Finished Options? “,”acceptedAnswer”: {“@type”: “Answer”,”text”: “Unfinished hardwood flooring gives you more choices for stains and finishes. You can pick exactly how you want it to look. It also lets you hide any small gaps between the wood pieces better. Plus, we can sand it perfectly for a smooth surface. Unfinished wood may also be cheaper than pre-finished options.”}},{“@type”: “Question”,”name”: “What Steps Should Be Taken To Properly Prepare A Subfloor Before Installing Unfinished Hardwood? “,”acceptedAnswer”: {“@type”: “Answer”,”text”: “To prepare your subfloor for unfinished hardwood, start by cleaning it well. Remove any dust, dirt, or old flooring. Next, check for any squeaks or loose boards and fix them. You should also make sure the floor is level; you can use a leveling compound if it’s not. Lastly, let the subfloor dry completely before putting down the hardwood.”}},{“@type”: “Question”,”name”: “How Do You Achieve A Smooth Finish When Sanding And Finishing Unfinished Hardwood Floors After Installation? “,”acceptedAnswer”: {“@type”: “Answer”,”text”: “To get a smooth finish on your new hardwood floors, start by sanding them. We use sandpaper with finer grit numbers for a softer touch. This helps remove rough spots and makes the surface even. After sanding, clean dust from the floors. Finally, apply a coat of finish to protect the wood and make it shiny.”}},{“@type”: “Question”,”name”: “What Are The Recommended Types Of Stains And Sealants For Unfinished Hardwood Flooring? “,”acceptedAnswer”: {“@type”: “Answer”,”text”: “For unfinished hardwood floors, you can use oil-based stains. These give a deep color and last a long time. Water-based stains are another good choice because they dry quickly. For sealing, use polyurethane. It protects the wood and makes it shiny.”}},{“@type”: “Question”,”name”: “How Long Does It Typically Take For Unfinished Hardwood Flooring To Acclimate Before Installation? “,”acceptedAnswer”: {“@type”: “Answer”,”text”: “Unfinished hardwood flooring usually needs to acclimate for about 3 to 7 days before you install it. This time helps the wood get used to the room’s temperature and humidity. You should keep the boards in the room where they will go. This way, they will fit better when you lay them down.”}}]}