Imagine walking into a room where the wood floors and walls fit perfectly together. This neat and tidy look comes from using a special method called tongue and groove. However, what happens when these lovely wooden pieces start to break or wear out?
Many homeowners face this problem. It can feel overwhelming. But don’t worry! Tongue and groove wood repair is simpler than you might think. You can bring your wood back to life with just a few tools and steps.
Did you know that some people enjoy repairing their wood as a fun hobby? It can be a relaxing way to spend time and learn new skills. Plus, fixing the wood means saving money on expensive replacements.
Ready to dive into the world of tongue and groove wood repair? Let’s explore how to keep your wooden projects looking great for years to come!
Table of Contents
Effective Tongue And Groove Wood Repair Techniques

Tongue and Groove Wood Repair
Tongue and groove wood repair is a simple way to fix damaged boards. Imagine pulling out a puzzle piece that doesn’t fit right anymore. Repairing tongue and groove joints can save your favorite wood projects. You’ll learn which tools to use and the steps to take for a perfect repair. Did you know that a slight gap can lead to bigger issues? Proper repair helps keep your wood surfaces secure and beautiful!Understanding Tongue and Groove Construction
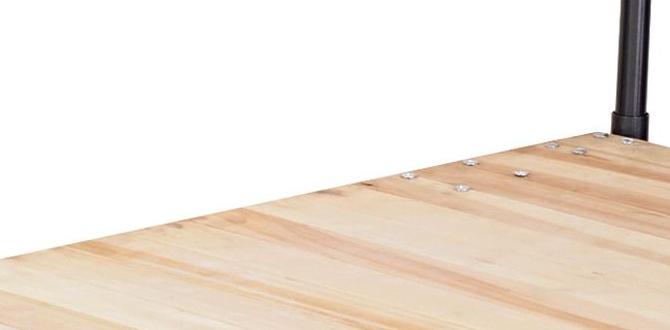
Definition and how tongue and groove joints work. Common applications in flooring, paneling, and cabinetry.Tongue and groove construction is a clever way to join two pieces of wood. One piece has a small protrusion, called a tongue, and the other has a groove. These fit snugly together, creating a strong bond. You often see it in flooring, paneling, and cabinetry. It not only looks great, but it also helps keep everything aligned. So, your floor won’t laugh at you when you trip over a crooked board!
| Application | Description |
|---|---|
| Flooring | Provides a smooth, seamless surface. |
| Paneling | Delivers a stylish and stable wall finish. |
| Cabinetry | Ensures durability and simple assembly. |
Identifying Common Issues in Tongue and Groove Wood
Types of damage: warping, cracking, and splitting. Signs to look for during inspection.Checking tongue and groove wood can help you spot common problems. These issues include:
- Warping: This happens when the wood bends out of shape.
- Cracking: Small breaks appear on the surface.
- Splitting: The wood separates into pieces.
Look for signs like gaps or uneven surfaces. These can indicate that your wood needs some attention. If you catch these issues early, repairs can be easier!
What are the common signs of damage in tongue and groove wood?
Some signs to check are: gaps between boards, uneven surfaces, and visible cracks. Regular inspections are important to keep your wood looking great!
Tools and Materials Needed for Repairs
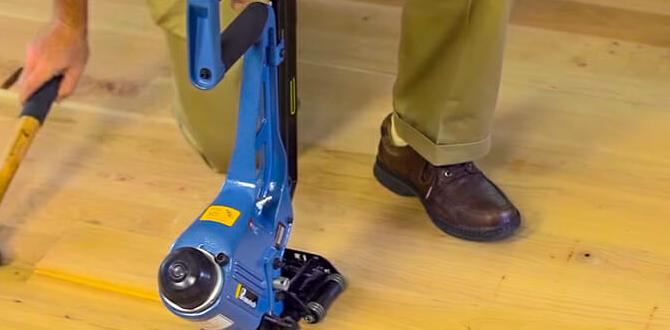
Essential tools: saws, sanders, and adhesives. Recommended types of wood for patching.To fix tongue and groove wood, you need the right tools and materials. Essential tools include:
- Saws: For cutting wood to size.
- Sanders: To smooth rough surfaces.
- Adhesives: For strong bonds between pieces.
For patching, use durable woods like oak or maple. These types are strong and blend well with other wood. Make sure to gather everything before you start your repairs. Ready, set, fix!
What tools do I need for tongue and groove wood repair?
You will need a saw, a sander, and wood adhesive. These tools help make the repair easy and strong. Using quality tools ensures a better result.
Step-by-Step Guide to Repairing Tongue and Groove Boards
Preparation: Cleaning and assessing the damage. Repair techniques for different types of issues.Start by cleaning the tongue and groove boards. Use a damp cloth to wipe away dirt. Check each board carefully for cracks or breaks. Small issues can often be fixed easily. For cracks, use wood glue, and for larger holes, consider wood filler. Make sure to sand down any rough spots for a smooth finish. This way, your repairs will look as good as new!
What are some common tongue and groove wood issues and how do you fix them?
Common issues include cracks, splintering, and warping. These problems can be fixed with glue for cracks, filler for splintering, and more care in storing the wood to prevent warping. Regular checks can help find these issues early.
Preventative Measures for Tongue and Groove Longevity
Proper installation practices. Maintenance tips to avoid future damage.To keep your tongue and groove wood looking great, start with proper installation. Make sure each piece fits snugly. If your wood is dancing like a funky chicken, it won’t last long! After installation, give it some love. Keep it clean and dry to avoid pesky mold. Check for cracks often, especially after a wild storm. Treat it with a sealant to boost its strength. Remember, a little maintenance can make your wood party last longer!
| Tip | Description |
|---|---|
| Fit | Ensure each board is snugly in place. |
| Clean | Keep it free from dirt and moisture. |
| Inspect | Look for any damage regularly. |
| Seal | Apply a sealant for extra protection. |
When to Seek Professional Help
Indicators that warrant expert intervention. Benefits of hiring a professional for complex repairs.Sometimes, things get tricky. If you notice gaps, cracks, or water damage in your tongue and groove wood, it might be time to call in the big guns! An expert can spot issues we may miss, like twisted boards or structural problems.
Hiring a professional can save you stress and time. They have special tools and skills to tackle complex repairs quickly. Plus, your wood will look good as new—no more embarrassing squeaks during family gatherings!
| Indicators for Professional Help | Benefits of Hiring an Expert |
|---|---|
| Visible Damage | Quick Repairs |
| Gaps in Wood | Specialized Tools |
| Water Damage | Expert Eye |
Frequently Asked Questions (FAQs) about Tongue and Groove Repair
Common queries regarding repair methods and costs. Tips for choosing the right materials for repairs.Many people wonder about the best ways to repair tongue and groove wood. How much will it cost? Prices can vary based on materials, but expect around $2 to $5 per square foot for good quality wood. What’s the best wood to use? Aim for durable types that match the existing wood. Softwoods are easier to work with, but hardwoods last longer. Remember, using matching colors helps keep your project looking sharp – or at least as sharp as a squirrel on caffeine!
| Question | Answer |
|---|---|
| How much does repair cost? | About $2 to $5 per square foot. |
| What wood should I choose? | Durable woods that match the original. |
Conclusion
In summary, tongue and groove wood repair is an easy way to fix damaged wood pieces. You can replace or reattach the grooves for a snug fit. Always clean the areas first for the best results. If you’re unsure, seek help or read more about DIY repairs. With practice, you can restore your wood projects like a pro!FAQs
What Are The Common Signs That Indicate A Tongue And Groove Wood Joint Needs Repair?You can tell a tongue and groove wood joint needs repair by looking for gaps. If you see cracks or splits, that’s a sign too. Sometimes, the wood can feel loose when you touch it. You might also notice water damage or stains. If the joint looks uneven, it’s time to fix it.
What Tools And Materials Are Necessary For Repairing Damaged Tongue And Groove Wood?To repair damaged tongue and groove wood, you need a few tools and materials. First, get a hammer and a chisel. You will also need wood glue to hold things together. A sandpaper will help smooth rough edges, and a paint or wood finish can make it look nice again. Lastly, don’t forget some clamps to hold the pieces while the glue dries!
How Can I Properly Re-Align And Secure A Misaligned Tongue And Groove Joint?To fix a misaligned tongue and groove joint, first, remove any screws or nails holding the boards together. Then, gently pull them apart to realign the edges so they fit snugly. Once they’re lined up, use wood glue in the groove and press them back together. After that, secure the joint with screws or nails again. Let the glue dry completely before using the wood.
What Techniques Can I Use To Replace A Damaged Tongue Or Groove Without Compromising The Integrity Of The Surrounding Wood?To replace a damaged tongue or groove, you can use a few simple steps. First, carefully remove the damaged part without hurting the wood around it. Next, cut a new piece that fits perfectly where the old one was. You can use wood glue to stick it in place. Finally, sand it smooth to match the surrounding wood.
How Can I Prevent Future Damage To Tongue And Groove Wood Joints In High-Moisture Areas?To prevent damage to tongue and groove wood joints in wet areas, we can take some steps. First, use a waterproof sealant on the wood. This helps keep moisture out. Also, make sure to keep the area dry by wiping up spills and using a dehumidifier. Finally, check the wood regularly for any signs of damage.