Have you ever thought about making something beautiful for yourself? A simple wooden jewelry box might be the perfect project for you. With just a few tools and some imagination, you can craft elegance at home.
Imagine opening a box filled with your favorite treasures. Each piece of jewelry tells a story. What if you could create a special place for them? A wooden jewelry box can offer a personal touch to your collection.
Did you know that people have made wooden boxes for centuries? They were once treasures in themselves, showing care and skill. Today, you can join this tradition. Building your own simple wooden jewelry box is not just fun; it’s a way to express yourself.
So, why wait? Brighten up your space with a handmade box. It’s a great way to keep your things organized and show off your creativity. Let’s dive into how you can create your very own wooden jewel box today!
Table of Contents
Simple Wooden Jewelry Box: Craft Elegance At Home Today

Simple Wooden Jewelry Box: Craft Elegance at Home
Creating a simple wooden jewelry box lets you blend creativity and functionality. Imagine transforming a few pieces of wood into a beautiful storage solution. This project is great for beginners! You can personalize it with colors and designs that reflect your style. Did you know that wooden boxes have been used for centuries to protect treasures? Building one at home not only adds charm but also serves as a memorable gift for someone special.Materials Needed
List of essential materials for crafting a wooden jewelry box.. Suggestions for sourcing highquality wood and tools..To create your own wooden jewelry box, you’ll need some specific items. Here’s a simple list:
- Wood (like pine or cedar)
- Wood glue
- Sandpaper
- Wood finish or paint
- Hinges
- Basic tools (saw, drill, screwdriver)
You can find quality wood and tools at local hardware stores or online. Look for pieces that are smooth and free of knots. High-quality materials make your box strong and beautiful.
What tools do I need to make a wooden jewelry box?
You will need a few basic tools like a saw, drill, and screwdriver. These tools help shape and bring your jewelry box to life!
Step-by-Step Crafting Process
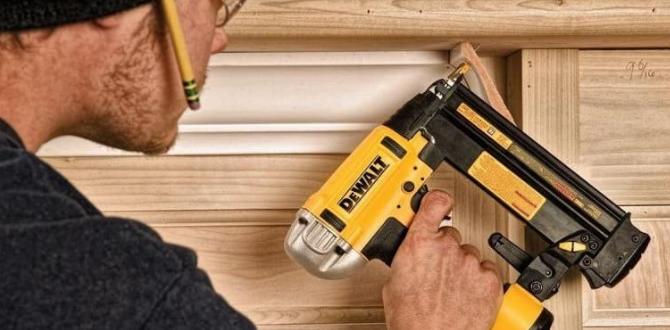
Detailed instructions on designing the jewelry box.. Techniques for cutting, sanding, and assembling the box..Creating your wooden jewelry box is easier than you think! Start by sketching your design. Grab a piece of wood and measure carefully to cut pieces with a saw. Make sure your cuts are neat. After cutting, it’s time to sand the edges. Yes, it can be a little dusty, so wear a mask unless you want to look like a cloud! Then, assemble the pieces using wood glue or small nails. Here’s a simple guide:
| Step | Action |
|---|---|
| 1 | Design your box shape. |
| 2 | Cut the wood pieces. |
| 3 | Sand the edges smooth. |
| 4 | Assemble with glue or nails. |
Before the paint party begins, make sure the glue dries completely. Your box will be sturdy and ready to shine! Remember, it’s all about having fun and letting your creativity flow!
Finishing Touches
Suggestions for stains, paints, and finishes to enhance appearance.. Tips for protecting the wood and ensuring durability..Adding the finishing touches makes your wooden jewelry box shine! Choose stains that deepen the wood’s beauty, like walnut or mahogany. Paint can give it a fun twist; bright colors brighten any room. To protect the wood, use a clear coat. This helps keep it safe from scratches and spills. Remember, a happy box is a durable one! Don’t let it age like that old cheese in the fridge.
| Finish Type | Benefits |
|---|---|
| Stain | Enhances natural wood grain |
| Paint | Adds fun colors |
| Clear Coat | Protects and adds shine |
Storage Ideas for Jewelry Boxes
Creative ways to organize jewelry within the box.. Customization options, such as compartments and trays..Keeping jewelry tidy can be a fun adventure! Organizing your treasures in a simple wooden jewelry box can turn chaos into calm. Consider using tiny compartments and trays to separate rings, earrings, and necklaces. It’s like giving each piece its own cozy bed. You can even customize the box with colorful felt or cute stickers. Who knew being organized could look so stylish? Here’s a quick table with some ideas:
| Jewelry Type | Storage Idea |
|---|---|
| Necklaces | Hanging hooks |
| Earrings | Small holes or slots |
| Rings | Soft padded compartments |
With a little creativity, your jewelry box can be the talk of the town, or at least your closet!
Maintenance Tips
Best practices for cleaning and maintaining wooden jewelry boxes.. How to repair scratches and wear over time..Keeping your wooden jewelry box looking great is easy with a few simple steps. Clean it gently with a soft, dry cloth. Water and wood aren’t best friends; avoid soaking it. If scratches appear, use a bit of walnut or almond oil. It works like magic! Don’t forget to apply a coat of beeswax every few months for added shine and protection. A happy jewelry box makes for happy jewels!
| Tip | Action |
|---|---|
| Clean Regularly | Use a soft cloth |
| Fix Scratches | Apply walnut oil |
| Protect Finish | Use beeswax every few months |
Benefits of DIY Wooden Jewelry Boxes
Advantages of crafting your own jewelry box vs. buying one.. Discussion on the personal touch and customization..Making your own wooden jewelry box is more exciting than buying one! You get to choose everything, from colors to designs. It’s like a fun craft project where you show off your style. Imagine a box that matches your favorite shirt or that sparkly dress. Customization means it can fit all your treasures perfectly. Plus, it’s a special keepsake. Your friends will say, “Wow, did you really make that?” Bonus points for looking crafty and cool!
| Benefits | Buying One | DIY Crafting |
|---|---|---|
| Unique Style | Default designs | Personal touch |
| Perfect Fit | Random sizes | Custom sizes |
| Fun Activity | Shopping stress | Creative outlet |
So, grab some wood and let your imagination run wild! You’ll have a one-of-a-kind jewelry box in no time!
Common Mistakes to Avoid
List of frequent pitfalls in woodworking projects and how to avoid them.. Tips for improving woodworking skills through practice..Woodworking can be fun, but mistakes can happen. Here are some common pitfalls:
- Measuring incorrectly: Always double-check your measurements before cutting.
- Neglecting safety: Wear goggles and gloves to protect yourself.
- Using dull tools: Sharp tools make cleaner cuts and are safer to use.
- Skipping sanding: Smooth surfaces look better and feel nicer.
- Not practicing regularly: The more you work with wood, the better you’ll get.
To improve your skills, try smaller projects first. Build simple items before tackling something big. Remember, practice makes perfect!
How can I improve my woodworking skills?
Practice regularly, start with small projects, and learn from mistakes. Join woodworking groups or watch tutorials for extra tips!Conclusion
In conclusion, a simple wooden jewelry box adds elegance to your home. You can easily craft one with basic tools. This project helps organize your jewelry and showcases your creativity. We encourage you to try making your own box. Explore online tutorials for tips and ideas. Let’s start crafting and enjoy the beauty of handmade items together!FAQs
What Materials Are Needed To Create A Simple Wooden Jewelry Box At Home?To make a simple wooden jewelry box, you need a few materials. First, get some wood boards or plywood. You will also need wood glue to stick the pieces together. Don’t forget screws to hold everything tight. Finally, gather sandpaper to smooth the box and some paint or finish if you want to decorate it.
What Are Some Basic Woodworking Techniques Required For Constructing A Wooden Jewelry Box?To build a wooden jewelry box, you need to learn a few basic techniques. First, use a saw to cut the wood pieces to the right size. Then, use sandpaper to smooth the edges so they feel nice. You can also use glue or nails to hold the pieces together. Finally, finish it with paint or a clear coating to make it look pretty!
How Can One Personalize A Wooden Jewelry Box Through Painting Or Engraving?You can make a wooden jewelry box special by painting or engraving it. First, choose your favorite colors and paint fun designs, like flowers or stars. For engraving, you can use tools to carve your name or a favorite word into the wood. Both ways show your style and make the box truly yours!
What Safety Precautions Should Be Taken When Working With Tools And Materials For Woodworking Projects?When working with tools for woodworking, always wear safety goggles to protect your eyes. Make sure your hair is tied back and you are wearing a dust mask to avoid breathing in dust. Always keep your hands away from blade edges, and use clamps to hold wood instead of your fingers. Finally, clean up your workspace to prevent trips and falls. Safety first helps keep everyone safe!
Are There Specific Design Styles Or Inspirations That Can Enhance The Aesthetic Appeal Of A Wooden Jewelry Box?Yes, there are many design styles that can make a wooden jewelry box look beautiful. You might like a classic style with elegant carvings. A modern look with clean lines can also be nice. Nature-inspired designs, like leaves or flowers, can add a fun touch. Bright colors and patterns can make the box stand out, too!