Have you ever faced a problem with your siding nailer? You’re not alone. Many people struggle with trigger issues, making projects frustrating. A faulty trigger can delay your work and lead to mistakes.
Imagine you’re excited to start a new siding job. You feel ready and prepared, but your nailer just won’t work right. What a letdown! Fortunately, replacing the trigger on your siding nailer can be simple.
Did you know that a quick trigger replacement can save you time and money? It’s true! By learning how to do it yourself, you can keep your projects on track without hiring help.
In this article, we’ll guide you through the steps of siding nailer trigger replacement. You’ll find helpful tips and easy instructions. Get ready to dive into this homeowner’s skill that’s more manageable than it seems.
Table of Contents
Siding Nailer Trigger Replacement: A Simple Guide

Siding Nailer Trigger Replacement
Replacing the trigger on a siding nailer can seem tricky, but it’s essential for smooth project flow. Did you know that a faulty trigger can cause misfires? This leads to wasted materials and frustration. Properly maintaining your tools not only boosts efficiency but also prolongs their life. Following simple steps, like turning off the compressor and removing the cap, makes the process safer. With the right care, your siding nailer can keep performing optimally, saving you time and effort.Understanding Siding Nailers
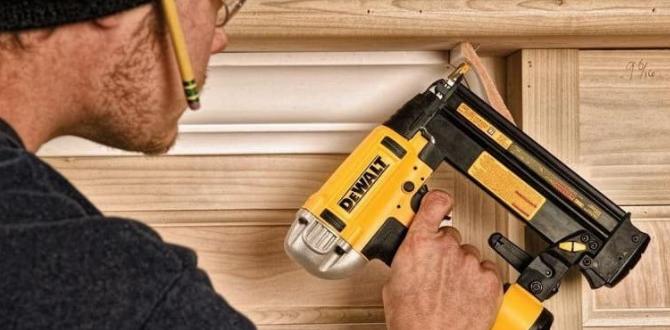
Definition and purpose of siding nailers. Types of siding nailers available on the market.Siding nailers are special tools used for putting up siding on houses. They help workers attach boards quickly and securely. This makes the job easier and faster. There are two main types of siding nailers:
- Electric siding nailers – These run on electricity and are great for indoor work.
- Pneumatic siding nailers – These use air pressure and are powerful for outdoor projects.
Using a siding nailer can save time and ensure your home looks great with strong siding!
What are the benefits of siding nailers?
They can help save time and make work easier, giving a professional finish to homes.
Common Signs You Need a Trigger Replacement
Symptoms of a malfunctioning trigger. Safety risks associated with a faulty trigger.Have you ever felt a strange shake when using your siding nailer? That might be a sign the trigger is on the fritz. Another clue is a nail not firing when you pull the trigger. If it sounds like a cat purring, you’re in trouble! A faulty trigger can lead to safety issues, like misfired nails. Yikes! Check out the table below for common problems:
| Symptom | Solution |
|---|---|
| Nail not firing | Check if the trigger is stuck. |
| Random nail firing | Replace the trigger immediately! |
| Poor control | Inspect for damage. |
Ignoring these signs can be risky. Remember, a working trigger is key to both safety and smooth projects.
Tools and Materials Needed for Trigger Replacement
List of essential tools for the repair. Recommended replacement parts and materials.Replacing the trigger on your siding nailer sounds tricky, but gathering the right tools makes it easy-peasy! You’ll need a trusty screwdriver, a fresh replacement trigger, and a pair of pliers. Don’t forget your safety goggles—they protect your eyes and make you look like a super spy! Here’s a handy list of essential tools:
| Tools | Description |
|---|---|
| Screwdriver | To remove screws and open your nailer. |
| Pliers | Perfect for gripping and adjusting parts. |
| Replacement Trigger | The star of the show! Make sure it fits. |
Always ensure you have the right parts before you start. You want your siding nailer to work like new, not like a squeaky toy! And remember: Safety first, fun second!
Step-by-Step Guide to Replacing the Trigger
Detailed breakdown of the replacement process. Safety precautions to take during the replacement.Replacing a trigger can feel like a wild ride, but don’t worry! First, unplug your siding nailer. Safety first, folks! Next, gather your tools, like a screwdriver and replacement trigger. Follow these steps:
| Step | Action |
|---|---|
| 1 | Remove the old trigger carefully. |
| 2 | Insert the new trigger snugly in place. |
| 3 | Secure it with screws. |
| 4 | Test the trigger gently. |
Don’t forget your safety goggles! Replacing a trigger is easier than making a sandwich, but just as messy if you skip safety! So, roll up those sleeves and follow these steps like a pro!
Troubleshooting Post-Replacement Issues
Common problems after trigger replacement. Tips for ensuring proper functionality.Replacing the trigger of a nailer can be tricky. After the replacement, some issues may pop up. Common problems include misfiring or jamming. Strings of nails might not feed correctly. Here are some quick tips to ensure your tool works well:
- Check the trigger assembly for proper alignment.
- Make sure the air pressure settings are correct.
- Inspect for any blocked parts or debris.
By following these steps, you can avoid headaches and keep your nailer running smoothly!
What should I do if my siding nailer doesn’t work after the trigger replacement?
If your nailer has issues after the replacement, first check the trigger assembly and air pressure. Sometimes, loose parts or low pressure can cause problems.
Maintenance Tips for Longevity of Your Siding Nailer
Best practices for regular maintenance. Importance of routine checks and care.Keeping your siding nailer in good shape is crucial for its lifespan. Regular maintenance ensures it works well every time. Here are some best practices:
- Clean the tool after each use.
- Check for any loose parts or damage.
- Lubricate moving parts as needed.
- Store the nailer in a dry place.
Routine checks help catch problems early. This way, you can avoid costly repairs. A little care goes a long way!
Why is regular maintenance important?
Regular maintenance keeps your siding nailer running smoothly and prevents breakdowns. It also helps you work safely and efficiently.
FAQs About Siding Nailer Trigger Replacement
Commonly asked questions from users. Expert answers to help users make informed decisions.When it comes to siding nailer trigger replacement, many users have questions. Here are some common ones with clear answers:
What tools do I need for a trigger replacement?
You will need basic tools like a screwdriver and pliers. These tools help you safely remove and replace the trigger.
How often should I check my trigger?
It’s best to check the trigger every few months. Regular checks help ensure it’s working well, preventing problems.
Can I do it myself?
Yes! Many users successfully replace triggers themselves. You can find helpful videos online to guide you.
What if my nailer still doesn’t work after replacing the trigger?
If it doesn’t work, the problem might be with other parts. It’s a good idea to get professional help then.
Understanding these points can make your siding nailer experience better. Staying informed helps you make great choices!
Conclusion
In conclusion, replacing your siding nailer trigger can improve your tool’s performance. Always check the compatibility before buying a new trigger. Follow safe practices when doing the replacement. You can make the process easier by watching tutorial videos or reading guides online. With the right steps, you’ll keep your siding nailer in top shape for your projects.FAQs
What Are The Signs That Indicate A Siding Nailer Trigger Needs To Be Replaced?You might need to replace your siding nailer trigger if it gets stuck often. If the nails don’t fire or misfire, that’s a sign too. You should also check for any cracks or damage on the trigger. If you hear strange noises when you use it, that could mean it’s broken. Always be careful and check your tools!
How Can I Safely Remove And Replace The Trigger On My Siding Nailer?To safely remove and replace the trigger on your siding nailer, first unplug it or take out the battery. Make sure there are no nails inside. Use a screwdriver to take off the cover that hides the trigger. Carefully lift out the old trigger and place in the new one. Finally, put the cover back on and plug it in or add the battery again.
What Tools Are Required For A Trigger Replacement On A Siding Nailer?To replace the trigger on a siding nailer, you need a few tools. First, get a screwdriver to remove screws. You might also need pliers to grip small parts. Sometimes, a wrench can help if you need to take off any bolts. Make sure you have a clean workspace to keep everything organized!
Are There Different Types Of Triggers Available For Siding Nailers, And How Do I Choose The Right One?Yes, there are different types of triggers for siding nailers. The most common types are contact triggers and sequential triggers. Contact triggers let you shoot nails quickly by touching the tool to the surface. Sequential triggers require you to pull the trigger and push the tool down, which is safer. When choosing a trigger, think about how you plan to use it. If you want more control, go for a sequential trigger.
What Maintenance Steps Should I Follow After Replacing The Trigger On My Siding Nailer?After you replace the trigger on your siding nailer, you should check for any loose parts. You can tighten screws if needed. Next, clean the tool to remove dust and debris. Finally, add some oil to the moving parts to keep it running smoothly. Always test the nailer on scrap wood to make sure it works well.
{“@context”:”https://schema.org”,”@type”: “FAQPage”,”mainEntity”:[{“@type”: “Question”,”name”: “What Are The Signs That Indicate A Siding Nailer Trigger Needs To Be Replaced? “,”acceptedAnswer”: {“@type”: “Answer”,”text”: “You might need to replace your siding nailer trigger if it gets stuck often. If the nails don’t fire or misfire, that’s a sign too. You should also check for any cracks or damage on the trigger. If you hear strange noises when you use it, that could mean it’s broken. Always be careful and check your tools!”}},{“@type”: “Question”,”name”: “How Can I Safely Remove And Replace The Trigger On My Siding Nailer? “,”acceptedAnswer”: {“@type”: “Answer”,”text”: “To safely remove and replace the trigger on your siding nailer, first unplug it or take out the battery. Make sure there are no nails inside. Use a screwdriver to take off the cover that hides the trigger. Carefully lift out the old trigger and place in the new one. Finally, put the cover back on and plug it in or add the battery again.”}},{“@type”: “Question”,”name”: “What Tools Are Required For A Trigger Replacement On A Siding Nailer? “,”acceptedAnswer”: {“@type”: “Answer”,”text”: “To replace the trigger on a siding nailer, you need a few tools. First, get a screwdriver to remove screws. You might also need pliers to grip small parts. Sometimes, a wrench can help if you need to take off any bolts. Make sure you have a clean workspace to keep everything organized!”}},{“@type”: “Question”,”name”: “Are There Different Types Of Triggers Available For Siding Nailers, And How Do I Choose The Right One? “,”acceptedAnswer”: {“@type”: “Answer”,”text”: “Yes, there are different types of triggers for siding nailers. The most common types are contact triggers and sequential triggers. Contact triggers let you shoot nails quickly by touching the tool to the surface. Sequential triggers require you to pull the trigger and push the tool down, which is safer. When choosing a trigger, think about how you plan to use it. If you want more control, go for a sequential trigger.”}},{“@type”: “Question”,”name”: “What Maintenance Steps Should I Follow After Replacing The Trigger On My Siding Nailer? “,”acceptedAnswer”: {“@type”: “Answer”,”text”: “After you replace the trigger on your siding nailer, you should check for any loose parts. You can tighten screws if needed. Next, clean the tool to remove dust and debris. Finally, add some oil to the moving parts to keep it running smoothly. Always test the nailer on scrap wood to make sure it works well.”}}]}