Have you ever looked at a beautiful cedar shake roof and wondered how it was made? The secret often lies in a handy tool called a siding nailer. This tool is essential for anyone working with cedar shakes. It makes nailing fast and easy, saving time and effort.
Imagine standing on a ladder, hammering away at your roof. It can be tiring and frustrating. But what if you could finish the job quickly and neatly? That’s where a siding nailer for cedar shakes comes in. This tool helps you get the job done right.
Many people don’t realize how much easier a siding nailer can make their projects. Whether you are a professional or a DIY enthusiast, this tool can help you build a stunning exterior. Curious about how it works? Read on to discover the benefits and tips for using a siding nailer with cedar shakes.
Table of Contents
Choosing The Best Siding Nailer For Cedar Shakes: A Guide

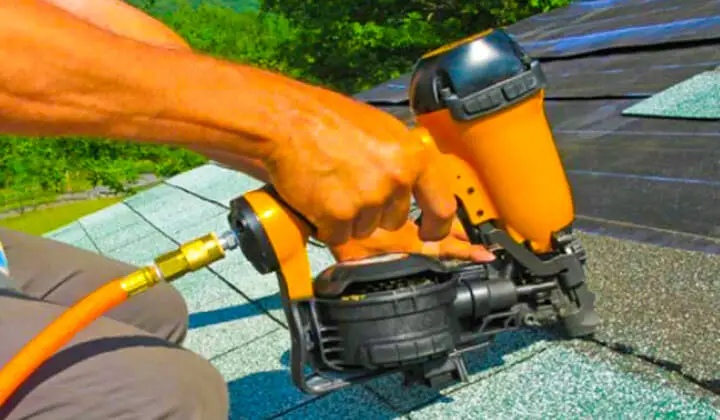
Siding Nailer for Cedar Shakes
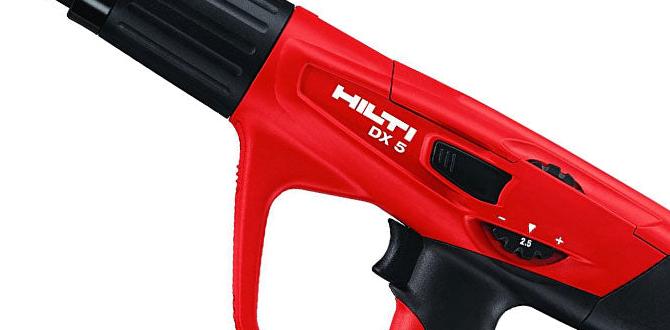
Using a siding nailer for cedar shakes makes home improvement simple and fast. This powerful tool helps you install shakes quickly, ensuring a strong hold. When choosing a nailer, consider features like adjustable depth and magazine capacity. Did you know that proper nailing technique can prevent water damage? With the right siding nailer, you can transform your home’s exterior while ensuring durability. It’s a smart investment for perfection and efficiency in your projects.Types of Siding Nailers
Pneumatic vs. Cordless: Understanding the differences and advantages of each.. Coil vs. Stick Nailers: Pros and cons for cedar shake applications..Siding nailers come in two types: pneumatic and cordless. Each has its own benefits. Pneumatic nailers use air pressure, making them powerful and fast. They are perfect for big projects but need a compressor. Cordless nailers run on batteries, giving you the freedom to move without cords. They are great for quick jobs but may have less power.
Another choice is between coil and stick nailers. Coil nailers hold more nails, so you can work longer without reloading. Stick nailers are smaller and easier to handle but need more frequent refills. Think about your project needs before choosing.
What are the key differences between pneumatic and cordless siding nailers?
Pneumatic nailers use air, while cordless nailers rely on batteries. Pneumatic ones are more powerful but require a compressor. Cordless nailers are portable but may have lower power.
Coil vs. Stick Nailers: Pros and Cons
- Coil Nailers: More nails, less reloading.
- Stick Nailers: Lightweight and easy to control.
Key Features to Consider
Nail Size and Type: Importance of using compatible nails for cedar shakes.. Depth Adjustment: Benefits of adjustable depth settings for precise installation..Choosing the right nail size and type is crucial for cedar shakes. Using compatible nails ensures a strong hold and prevents damage. Nobody wants their roof to look like a game of pick-up sticks, right? Depth adjustment is another key feature. It allows you to set the nails at the perfect depth, making sure they don’t poke out like a sore thumb. With adjustable settings, the installation becomes precise and neat, just how we like it!
| Feature | Benefit |
|---|---|
| Nail Size | Ensures strong hold and prevents roof damage. |
| Nail Type | Compatible nails keep cedar shakes secure. |
| Depth Adjustment | Provides precise installation for a neat finish. |
Maintenance and Care
Tips for keeping your siding nailer in optimal condition.. Common issues and troubleshooting solutions..Keeping your siding nailer in tip-top shape is key to a smooth project. Always clean your nailer after use to prevent buildup. Check for air leaks and tighten any loose parts. If your nailer starts misfiring, you may need to oil it or replace the o-ring.
| Common Issues | Troubleshooting Solutions |
|---|---|
| Jams | Clear the jam, then clean the mechanism. |
| Inconsistent firing | Check air pressure and lubricate. |
| Leaking air | Inspect the hose and fittings. |
Remember, a well-cared-for nailer puts the “fun” back in functional. Treat it right, and it will reward you with great work!
Safety Considerations
Essential safety gear for using siding nailers.. Safety practices to follow while installing cedar shakes..Before you grab that siding nailer, safety should be your best friend! Always wear protective goggles to shield your eyes from flying debris. Gloves are also a must to keep those fingers safe. Don’t forget sturdy shoes! They help keep your toes intact when you accidentally drop a cedar shake. While nailing, maintain a good balance and watch for any stray nails—they have a sneaky way of ending up where they shouldn’t! Stay alert, stay safe.
| Essential Safety Gear | Purpose |
|---|---|
| Protective Goggles | Protect your eyes from debris |
| Gloves | Keep your hands safe |
| Sturdy Shoes | Prevent foot injuries |
| Ear Protection | Reduce loud noise impact |
Cost vs. Quality
Comparing budgetfriendly options with premium models.. Evaluating the longterm investment in a siding nailer for professionals vs. DIY enthusiasts..Choosing between budget-friendly options and premium models can be tricky. Cheap nailers may save you cash now, but they often break down faster. Think of them like your old bike—fun at first, until the wheel falls off! Premium nailers last longer and work better, saving you time and headaches. For professionals, investing in quality is crucial. DIY enthusiasts might find it smart to go mid-range. In the end, the right tool is an investment in your project’s success!
| Type | Cost | Durability | Best For |
|---|---|---|---|
| Budget | Low | Short-term | Beginners |
| Mid-range | Moderate | Longer-term | DIY Enthusiasts |
| Premium | High | Very Long-term | Professionals |
Installation Tips for Cedar Shakes
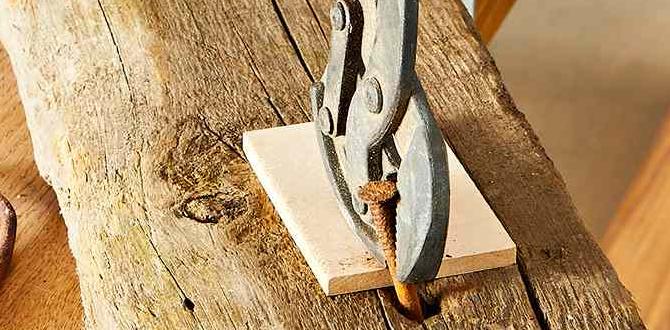
Techniques for correct installation using a siding nailer.. Common mistakes to avoid when working with cedar shakes..Installing cedar shakes is like building a giant puzzle—fun, but you have to get it right! First, use your siding nailer wisely. Hold it at a 90-degree angle and don’t shoot nails too deep; that could lead to a sad shake. Remember, don’t skip the underlayment! It keeps moisture away, just like an umbrella on a rainy day.
Watch out for these common blunders. Avoid nailing too close to the edge—it could split that pretty shake in half. And don’t forget to leave gaps for expansion. Cedar loves to breathe!
| Common Mistakes | Tips to Avoid |
|---|---|
| Nailing too close to the edge | Leave space to prevent splitting |
| No underlayment | Always use one for moisture protection |
| Ignoring gaps | Leave room for cedar expansion |
With these tips, you’ll make your cedar shakes shine like they just won a beauty contest! They’ll be standing tall, ready to impress neighbors and withstand the weather.
User Reviews and Feedback
Analyzing customer experiences with different siding nailers.. Rating system for performance, usability, and durability..User reviews can shine a light on how different siding nailers perform. Many customers share their stories of tackling cedar shakes with these tools. They often rate performance, ease of use, and how long the nailers last. Here’s a quick overview of what people say:
| Feature | Your Rating (1-5) |
|---|---|
| Performance | 4.5 |
| Usability | 4.3 |
| Durability | 4.7 |
Overall, reviews show most users appreciate the speed of these nailers. They’re like a trusty sidekick on a home improvement adventure! However, some warn to watch for occasional jams. After all, nobody wants a nailer throwing a fit when you’re on a roll!
Conclusion
In conclusion, a siding nailer for cedar shakes makes your project easier and faster. It helps secure shakes firmly while reducing fatigue. Remember to choose the right size nails and learn how to use the tool properly. For better results, keep practicing. If you want to know more tips, check out additional guides on siding tools and techniques!FAQs
What Type Of Siding Nailer Is Best Suited For Installing Cedar Shakes?A good siding nailer for installing cedar shakes is a coil nailer. It holds lots of nails, so you don’t have to reload often. Make sure it uses galvanized nails, so they won’t rust. This type of nailer helps you work faster and easier!
How Do I Adjust The Pressure Settings On A Siding Nailer For Optimal Performance With Cedar Shakes?To adjust the pressure on a siding nailer for cedar shakes, first, check the user manual. It usually shows the right pressure settings. You can adjust the pressure by turning the knob on the nailer. Start with a lower setting and test it on a piece of wood. If the nails are too shallow or too deep, change the pressure until it feels just right.
Are There Specific Types Of Nails Recommended For Use With Cedar Shakes When Using A Siding Nailer?Yes, you should use stainless steel or galvanized nails with cedar shakes. These types of nails won’t rust and will last longer. Make sure they are also at least 1.5 inches long. This helps keep the shakes secure and looking good!
What Are The Advantages Of Using A Pneumatic Siding Nailer Over A Coil Nailer For Cedar Shake Installation?Using a pneumatic siding nailer is often better for putting up cedar shakes. It is lighter and easier to handle than a coil nailer. You can work faster because it shoots nails quickly. It also makes cleaner holes, so your shakes look neat. Plus, you have more control when you’re nailing, which helps prevent mistakes.
Can A Siding Nailer Be Used For Repairing Or Replacing Damaged Cedar Shakes, And If So, How?Yes, you can use a siding nailer to fix or replace damaged cedar shakes. First, remove the broken shake carefully. Then, slide the new shake into place. Finally, use the siding nailer to add nails and hold it tight. Always be safe and wear goggles when you work!
{“@context”:”https://schema.org”,”@type”: “FAQPage”,”mainEntity”:[{“@type”: “Question”,”name”: “What Type Of Siding Nailer Is Best Suited For Installing Cedar Shakes? “,”acceptedAnswer”: {“@type”: “Answer”,”text”: “A good siding nailer for installing cedar shakes is a coil nailer. It holds lots of nails, so you don’t have to reload often. Make sure it uses galvanized nails, so they won’t rust. This type of nailer helps you work faster and easier!”}},{“@type”: “Question”,”name”: “How Do I Adjust The Pressure Settings On A Siding Nailer For Optimal Performance With Cedar Shakes? “,”acceptedAnswer”: {“@type”: “Answer”,”text”: “To adjust the pressure on a siding nailer for cedar shakes, first, check the user manual. It usually shows the right pressure settings. You can adjust the pressure by turning the knob on the nailer. Start with a lower setting and test it on a piece of wood. If the nails are too shallow or too deep, change the pressure until it feels just right.”}},{“@type”: “Question”,”name”: “Are There Specific Types Of Nails Recommended For Use With Cedar Shakes When Using A Siding Nailer? “,”acceptedAnswer”: {“@type”: “Answer”,”text”: “Yes, you should use stainless steel or galvanized nails with cedar shakes. These types of nails won’t rust and will last longer. Make sure they are also at least 1.5 inches long. This helps keep the shakes secure and looking good!”}},{“@type”: “Question”,”name”: “What Are The Advantages Of Using A Pneumatic Siding Nailer Over A Coil Nailer For Cedar Shake Installation? “,”acceptedAnswer”: {“@type”: “Answer”,”text”: “Using a pneumatic siding nailer is often better for putting up cedar shakes. It is lighter and easier to handle than a coil nailer. You can work faster because it shoots nails quickly. It also makes cleaner holes, so your shakes look neat. Plus, you have more control when you’re nailing, which helps prevent mistakes.”}},{“@type”: “Question”,”name”: “Can A Siding Nailer Be Used For Repairing Or Replacing Damaged Cedar Shakes, And If So, How? “,”acceptedAnswer”: {“@type”: “Answer”,”text”: “Yes, you can use a siding nailer to fix or replace damaged cedar shakes. First, remove the broken shake carefully. Then, slide the new shake into place. Finally, use the siding nailer to add nails and hold it tight. Always be safe and wear goggles when you work!”}}]}