Have you ever watched a skilled carpenter easily fit crown molding in a room? The clean lines and perfect angles make a space feel polished. But, have you considered how they achieve that sharp look?
Using a nailer for crown molding can make all the difference. It helps attach the molding quickly and securely. Plus, it saves you from sore fingers! But, what if you don’t know how to use it correctly? Don’t worry; we have tips to help you master it.
Imagine standing in your living room. You see bare walls and dream of elegant crown molding. With a few simple tips and the right tools, this dream can become a reality! Let’s dive into how to use a nailer for crown molding like a pro.
Table of Contents
Nailer For Crown Molding Tips: Expert Advice For Success

Nailer for Crown Molding Tips
Using the right nailer for crown molding makes a big difference. First, choose a nailer with enough power for different crown sizes. A brad nailer or finish nailer works well. Measure carefully; this avoids awkward gaps. Did you know that slightly angling the nails can help with stability? Practice on scrap wood before starting your project. This way, you’ll feel more confident. Happy decorating! Your crown molding will look professional and stunning.Understanding Crown Molding
Definition and purpose of crown molding. Different types of crown molding materials.Crown molding adds beauty to a room. It is a decorative trim that connects the wall and ceiling. It frames the space and gives it a classic look. There are many types of crown molding materials. Each one has its own style and price. Common materials include:
- Wood: Traditional and strong.
- MDF: Affordable and easy to paint.
- Polyurethane: Light and moisture resistant.
- Plaster: Offers detailed patterns.
Choosing the right type depends on your budget and style. Crown molding is more than decoration; it transforms a room!
What is the purpose of crown molding?
The main purpose of crown molding is to add elegance and character to a room. It hides gaps between walls and ceilings, making your space look polished.
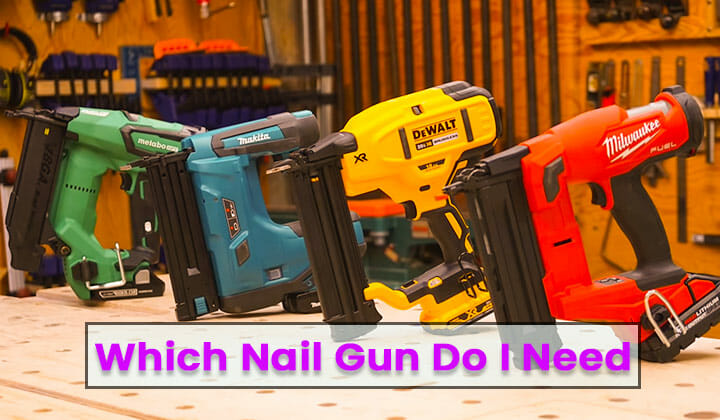
Choosing the Right Nailer for Crown Molding
Types of nailers: Finish nailers vs. Brad nailers. Key features to look for in a nailer.Picking a nailer for crown molding can feel like choosing a favorite candy—so many options! Finish nailers are great for heavier tasks, while brad nailers work well for lighter jobs. Look for features like adjustable depth settings and a comfort grip. These will make your task smoother. Remember, a good nailer should feel more like a buddy holding your hand rather than a clumsy friend stepping on your toes!
| Nailer Type | Best For |
|---|---|
| Finish Nailer | Thicker moldings |
| Brad Nailer | Thin moldings |
Preparation for Installing Crown Molding
Tools and materials needed. Measuring and cutting crown molding accurately.Gathering your tools is key before kicking off your crown molding adventure! You’ll need a miter saw, a nail gun, and some safety glasses. Don’t forget the crown molding itself, of course!
| Tool/Material | Purpose |
|---|---|
| Miter Saw | To cut angles accurately |
| Nail Gun | For quick, strong nailing |
| Crown Molding | Your star of the show! |
| Safety Glasses | To protect your eyes, because they’re priceless! |
Next, measuring is super important. Use a tape measure to get the length of your walls, and then cut your crown molding at the right angles. Aim to keep it angled like you’re posing for a super cool selfie—everyone wants to look good!
Remember, a sloppy cut leads to a sad crown, and nobody wants that! So take your time, and soon your ceiling will really shine.
Technique Tips for Nailing Crown Molding
Proper nail placement and spacing. Angling techniques for optimal nail penetration.Nailing crown molding can be easy with the right techniques. Place nails every 12 to 16 inches along the molding. This spacing will give it a strong hold. For best results, angle your nails slightly inward. This helps them grip the wall better. Proper nail placement ensures your molding stays secure and looks great.
How do I nail crown molding correctly?
To nail crown molding correctly, position nails every 12-16 inches and angle them slightly inwards for a strong grip.
Quick Tips:
- Use a nail gun for clean and fast work.
- Practice on a scrap piece first.
Common Mistakes to Avoid
Poor measurement and alignment errors. Overnailing or undernailing applications.Avoiding common mistakes is key for great results. First, measure twice and cut once to prevent poor measurement and alignment errors. This can save time and materials. Second, watch out for nailing too much or too little. Overnailing can split the wood, while undernailing leaves crown molding loose. Keep these tips in mind:
- Check your measurements.
- Align everything carefully.
- Aim for even pressure while nailing.
- Inspect your work after each step.
What is overnailing and undernailing?
Overnailing is putting too many nails in, which can damage the wood. Undernailing means not using enough nails, making it unstable.Aftercare and Finishing Touches
Filling nail holes and finishing options. Painting or staining crown molding for best results.After installing crown molding, it’s time to make it perfect. Start by filling nail holes with caulk or wood filler. This step hides any marks and makes the molding look smooth. Next, think about the color. Painting or staining enhances its beauty and fits your room’s style.
- Use primer before painting to help colors pop.
- For a natural look, apply a stain that matches your furniture.
- Always choose high-quality paint for durability.
These finishing touches not only hide imperfections but also leave a lasting impression. Take your time, and you’ll enjoy the results!
How can I fill nail holes in crown molding?
Fill nail holes with wood filler or caulk to smooth the surface. Once dry, sand lightly for a clean finish.
What is the best paint for crown molding?
Use high-quality, semi-gloss paint for a durable and attractive finish. This type reflects light and adds elegance to your room.
Maintenance Tips for Nailers
Regular cleaning and maintenance requirements. Troubleshooting common nailer issues.Taking care of your nailer doesn’t have to feel like a chore. Regular cleaning is key; wipe it down after each use. It keeps the dust bunnies away and makes sure your nailer works like a charm. If it starts shooting nails sideways, don’t panic! Check for jams and clear them out. Use the table below for quick tips:
| Maintenance Task | Frequency |
|---|---|
| Clean the nailer | After each use |
| Check for jams | Every use |
| Oil moving parts | Every month |
Keep an eye on the magazine. If it feels empty but you see nails, you may need to adjust it. Following these simple tips can extend your nailer’s life and keep your crown molding project fun!
Additional Resources and References
Recommended brands and models of nailers. Links to instructional videos and detailed guides.Looking for the best nailers for crown molding? You’re not alone! Many people want reliable tools. Here’s a quick list of recommended brands:
| Brand | Model |
|---|---|
| DeWalt | DCN681B |
| Bostitch | N62FNK-2 |
| Hitachi | NT65MA4 |
These options promise excellent performance. For visual learners, check out some great instructional videos online. Channels like Home Repair Tutor and DIY Creators provide step-by-step guides. Learning can be fun, especially when you’re not trying to figure out how to hold a nail while dancing the cha-cha!
Conclusion
In conclusion, using a nailer for crown molding makes your project easier and neater. Remember to choose the right nailer and practice your technique. Don’t forget safety gear, like goggles and gloves. You can create beautiful crown molding with a bit of effort. For more tips, check out guides or videos online. Get started and have fun with your project!FAQs
Sure! Here Are Five Related Questions On The Topic Of Nailers For Crown Molding:Nailers for crown molding help us attach the molding to walls. They use air or electricity to shoot nails. This makes it easier and faster than using a hammer. When we use them, we need to be careful and wear safety gear, like goggles. These tools help us make our rooms look nice and finished!
Of course! Please provide the question you’d like me to answer.
What Type Of Nailer Is Best For Installing Crown Molding: A Brad Nailer Or A Finish Nailer?To install crown molding, a finish nailer is best. It uses thicker nails that hold better. You will get a stronger, neater finish. A brad nailer works too, but it might not hold as well. So, for crown molding, choose a finish nailer.
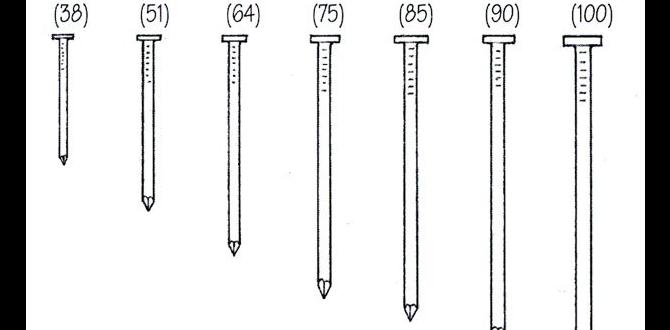
How Do I Determine The Appropriate Nail Length To Use When Installing Crown Molding With A Nailer?To choose the right nail length for crown molding, you need to think about thickness. First, measure the thickness of the molding. Then, pick a nail that is about two and a half times longer than that thickness. This helps the nail hold well without sticking out. Make sure to use a nailer to easily attach the molding to the wall.
What Are Some Tips For Achieving Clean And Accurate Nail Placement With A Nailer For Crown Molding?To get clean and accurate nail placement when using a nail gun for crown molding, start by measuring carefully. Make sure to hold the mold tight against the wall and ceiling. Use your other hand to steady the nail gun. Check that the gun is straight before you shoot the nail. Finally, practice on some scrap wood first if you can!
Should I Use Compressed Air Or A Battery-Powered Nailer For Crown Molding Installation, And What Are The Pros And Cons Of Each?You can use either a compressed air nailer or a battery-powered nailer for crown molding. With a compressed air nailer, you’ll need an air compressor. This tool is usually lighter and the nails go in very smoothly. But, it can be messy with hoses everywhere, and you need to set up the compressor. A battery-powered nailer is easy to move around. You don’t need extra tools or hoses, and it’s quick to use. However, the battery might run out, so you could stop working until it charges. Both tools are good, but it depends on what you need and prefer!
What Safety Precautions Should I Take When Using A Nailer For Crown Molding Projects?When using a nailer, you should always wear safety goggles to protect your eyes. Keep your fingers away from the nail area to avoid getting hurt. Make sure the nailer is pointed away from you and others. Always check that the tool is turned off when not in use. Lastly, follow the instructions carefully to stay safe while working.
{“@context”:”https://schema.org”,”@type”: “FAQPage”,”mainEntity”:[{“@type”: “Question”,”name”: “Sure! Here Are Five Related Questions On The Topic Of Nailers For Crown Molding:”,”acceptedAnswer”: {“@type”: “Answer”,”text”: “Nailers for crown molding help us attach the molding to walls. They use air or electricity to shoot nails. This makes it easier and faster than using a hammer. When we use them, we need to be careful and wear safety gear, like goggles. These tools help us make our rooms look nice and finished!”}},{“@type”: “Question”,”name”: “”,”acceptedAnswer”: {“@type”: “Answer”,”text”: “Of course! Please provide the question you’d like me to answer.”}},{“@type”: “Question”,”name”: “What Type Of Nailer Is Best For Installing Crown Molding: A Brad Nailer Or A Finish Nailer?”,”acceptedAnswer”: {“@type”: “Answer”,”text”: “To install crown molding, a finish nailer is best. It uses thicker nails that hold better. You will get a stronger, neater finish. A brad nailer works too, but it might not hold as well. So, for crown molding, choose a finish nailer.”}},{“@type”: “Question”,”name”: “How Do I Determine The Appropriate Nail Length To Use When Installing Crown Molding With A Nailer?”,”acceptedAnswer”: {“@type”: “Answer”,”text”: “To choose the right nail length for crown molding, you need to think about thickness. First, measure the thickness of the molding. Then, pick a nail that is about two and a half times longer than that thickness. This helps the nail hold well without sticking out. Make sure to use a nailer to easily attach the molding to the wall.”}},{“@type”: “Question”,”name”: “What Are Some Tips For Achieving Clean And Accurate Nail Placement With A Nailer For Crown Molding?”,”acceptedAnswer”: {“@type”: “Answer”,”text”: “To get clean and accurate nail placement when using a nail gun for crown molding, start by measuring carefully. Make sure to hold the mold tight against the wall and ceiling. Use your other hand to steady the nail gun. Check that the gun is straight before you shoot the nail. Finally, practice on some scrap wood first if you can!”}},{“@type”: “Question”,”name”: “Should I Use Compressed Air Or A Battery-Powered Nailer For Crown Molding Installation, And What Are The Pros And Cons Of Each?”,”acceptedAnswer”: {“@type”: “Answer”,”text”: “You can use either a compressed air nailer or a battery-powered nailer for crown molding. With a compressed air nailer, you’ll need an air compressor. This tool is usually lighter and the nails go in very smoothly. But, it can be messy with hoses everywhere, and you need to set up the compressor. A battery-powered nailer is easy to move around. You don’t need extra tools or hoses, and it’s quick to use. However, the battery might run out, so you could stop working until it charges. Both tools are good, but it depends on what you need and prefer!”}},{“@type”: “Question”,”name”: “What Safety Precautions Should I Take When Using A Nailer For Crown Molding Projects?”,”acceptedAnswer”: {“@type”: “Answer”,”text”: “When using a nailer, you should always wear safety goggles to protect your eyes. Keep your fingers away from the nail area to avoid getting hurt. Make sure the nailer is pointed away from you and others. Always check that the tool is turned off when not in use. Lastly, follow the instructions carefully to stay safe while working.”}}]}