Have you ever tried using a nail gun, only to find out it won’t shoot? It can be really frustrating! Often, the problem lies with the spool valve. This small part plays a big role in how the nail gun works.
Replacing the nail gun spool valve might seem hard, but it’s not as tricky as it sounds. Imagine you’re on a big project, and your nail gun stops working. You could waste hours waiting for someone to fix it. Instead, you can learn to do it yourself!
In this article, we will dive into the steps for replacing the spool valve in your nail gun. You’ll learn how to easily fix this issue and get back to your project. Plus, you’ll feel proud knowing you did it yourself!
Table of Contents
Nail Gun Spool Valve Replacement: A Step-By-Step Guide

Nail Gun Spool Valve Replacement
If your nail gun isn’t firing, the spool valve might be to blame. Replacing this part is simpler than it sounds. First, gather your tools and safety gear. Carefully dismantle the nail gun according to the manual. Remember to take pictures as you go; they help when you reassemble. Installing the new valve can restore your tool’s function. Did you know that a faulty spool valve is a common issue? Understanding this can save you time and money!Understanding the Spool Valve Function
Explanation of the spool valve’s role in a nail gun. Common issues caused by a faulty spool valve.The spool valve is very important in a nail gun. It controls the airflow to make the gun fire nails. Without it working well, you might face problems like misfires or jams. A faulty spool valve can lead to:
- Misfiring: Nails may not shoot when you pull the trigger.
- Jamming: Nails can get stuck inside the gun.
- Leaks: Air may escape, reducing power.
These issues can make your nail gun less useful. Understanding how the spool valve works can help keep your tool in great shape!
What does a spool valve do in a nail gun?
The spool valve directs airflow. This controls when the nail gun fires.
Signs Your Spool Valve Needs Replacement
Identifying symptoms of a malfunctioning spool valve. Differences between spool valve issues and other nail gun problems.Is your nail gun acting like it’s gone on strike? Look for these signs that your spool valve may be in trouble. If your tool doesn’t fire or misfires often, it’s time to investigate. A stuck spool valve can cause air leaks, making you feel like you’re blowing bubbles instead of driving nails. You might notice a weak pressure gauge that leaves you feeling deflated. Don’t confuse these spool valve issues with other nail gun problems like low air supply or worn-out O-rings. A quick check can save you a head-scratching repair session!
| Symptoms | Spool Valve Issue | Other Problems |
|---|---|---|
| Tool Doesn’t Fire | Yes | No |
| Frequent Misfires | Yes | No |
| Weak Pressure Gauge | Yes | Sometimes |
Gathering the Required Tools and Materials
List of necessary tools for the replacement process. Details on sourcing the appropriate spool valve.Before diving into the fun of replacing that spool valve, you’ll need some trusty tools. Think of them as your superhero squad! Here’s what you’ll need:
| Tool | Purpose |
|---|---|
| Wrench | To loosen tight screws |
| Screwdriver | For those pesky screws |
| Replacement spool valve | The star of the show! |
| Safety goggles | To protect those peepers |
Now, where can you find this shiny new spool valve? Check your local hardware store or order it online. Most sellers have many options. Don’t be shy! Ask a store worker for help if you need it. Trust me, they’re way less scary than they look!
Step-by-Step Replacement Process
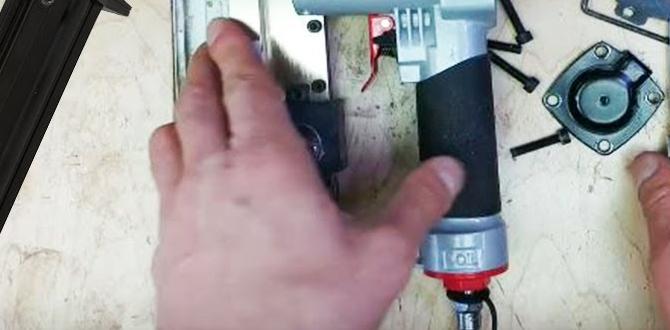
Detailed instructions for disassembling the nail gun. Stepbystep guide to removing the old spool valve. Installation process for the new spool valve.Start by turning off your nail gun and unplugging it. Next, use a screwdriver to remove the housing cover. Carefully take out any old parts that are in the way. Now, focus on the spool valve. Gently pull it out to replace it. Once the old valve is out, insert the new spool valve in its place. Secure everything and put the cover back on. Finally, connect the nail gun again.
How do you replace the spool valve in a nail gun?
To replace the spool valve, follow these steps: disassemble the nail gun, remove the old valve, and install the new one.
Testing the Nail Gun After Replacement
Guidelines to properly test the nail gun functionality. Tips for troubleshooting any postreplacement issues.After you replace the spool valve, it’s time to test your nail gun. First, make sure you wear safety goggles to protect your eyes. Then, follow these steps to check its function:
- Connect the nail gun to air.
- Check for leaks around the new valve.
- Test firing the gun on a scrap piece of wood.
- Listen for any odd sounds.
If the nail gun isn’t working right, don’t panic! Here are some tips for troubleshooting:
- Ensure the air pressure is correct.
- Check the nails are loaded properly.
- Look for any blockages in the nozzle.
By following these steps, you can be sure your nail gun is ready for action!
What should I do if my nail gun jams after replacing the spool valve?
If your nail gun jams, first turn it off and release the pressure. Then, check the nails and clear any blockage. If it still jams, the problem might be with the valve installation.
Maintenance Tips for Longevity
Best practices for maintaining your nail gun’s spool valve. Recommendations for regular checkups and preventative care.Taking care of your nail gun can save you time, money, and a few surprises! First, check the spool valve regularly to keep it running smoothly. Clean it often because dirt loves to hang around, and we don’t want it crashing the party! A little oil goes a long way—think of it as a spa day for your tool. Aim for regular checkups every few months; your nail gun will thank you! Here’s a handy table for your maintenance schedule:
| Maintenance Task | Frequency |
|---|---|
| Inspect spool valve | Every month |
| Clean internal parts | Every 3 months |
| Apply lubricant | Every 6 months |
Remember, a well-maintained nail gun is like a superhero—full of power and ready to save the day!
FAQs About Spool Valve Replacement
Commonly asked questions related to spool valve issues. Clarifications on replacement parts and warranty concerns.Many people ask about spool valve issues. Here are some common questions:
What are common signs of spool valve failure?
Look for air leaks, slow firing, or uneven nails. These may mean you need a replacement.
Do I need special parts for replacement?
Yes, always use quality parts made for your nail gun. This ensures safety and performance.
Does the warranty cover spool valve replacement?
Check your manual. Some warranties cover parts if they fail due to a manufacturer problem.
Understanding these questions can help keep your nail gun in good shape.
Conclusion
In conclusion, replacing a nail gun spool valve is important for smooth operation. First, check your nail gun manual for specific instructions. Next, gather the right tools to make the job easier. Remember, safety comes first, so wear protective gear. If you’re unsure, consider asking a professional for help or looking up video tutorials. Happy nailing!FAQs
What Are The Signs That Indicate A Spool Valve In A Nail Gun Needs To Be Replaced?You might need to replace the spool valve in your nail gun if you notice some problems. First, if it leaks air or oil, that’s a sign. Second, if the nail gun won’t fire properly, it could be the spool valve. Lastly, if you hear strange sounds when using it, something might be wrong. These signs mean it’s time to check the spool valve!
How Do You Properly Disassemble A Nail Gun To Access The Spool Valve For Replacement?To disassemble a nail gun, first, unplug it or remove the battery. Next, use a screwdriver to take off the screws holding the front cover. Carefully pull off the cover to see inside. You should find the spool valve there. Just remember to keep track of all the screws you remove!
What Tools And Materials Are Necessary For Replacing The Spool Valve In A Nail Gun?To replace the spool valve in a nail gun, you will need some tools and materials. First, grab a screwdriver to open the nail gun. You will also need pliers to help remove the old spool valve. Make sure you have a new spool valve to put in. Don’t forget safety glasses to protect your eyes while you work!
Are There Specific Safety Precautions To Take When Replacing A Spool Valve In A Nail Gun?Yes, there are safety precautions when replacing a spool valve in a nail gun. First, make sure the nail gun is unplugged or the air is released. Always wear safety glasses to protect your eyes. Keep your hands away from the nail gun’s opening while you work. Finally, read the user manual carefully to follow all the steps safely.
Where Can I Find A Replacement Spool Valve That Is Compatible With My Specific Nail Gun Model?You can find a replacement spool valve for your nail gun at hardware stores. Check the store’s tool aisle or ask a worker for help. You can also look online at websites like Amazon or the nail gun’s brand website. Be sure to enter your nail gun model when searching. This way, you find the right part easily!