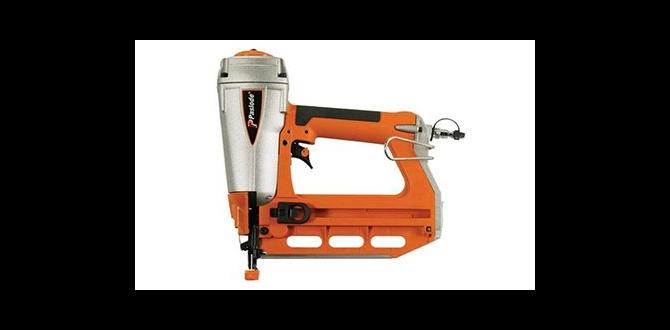
Have you ever wondered how to store a finish nailer properly? Many people don’t think about the best way to keep their tools. They just toss them in a corner or a dirty toolbox. But did you know that storing your finish nailer the right way can keep it in great shape?
Imagine getting ready to start a project, only to find your tools are rusty or broken. That’s frustrating! A finish nailer is a handy tool for any DIY lover. It helps you attach pieces of wood quickly and neatly. However, improper storage can lead to big problems.
Here’s a fun fact: Did you know that a well-cared finish nailer can last for years? Just like a car, it needs the right care and storage. Storing your finish nailer carefully helps you avoid clogs and jams when you need it most. Let’s explore the best ways to keep your finish nailer safe and sound.
Table of Contents
How To Store Finish Nailer: Tips And Best Practices

How to Store Finish Nailer
Storing a finish nailer properly can extend its life and keep it safe. First, always empty the air compressor and remove all nails. Next, clean the tool to remove dust and resin. A cool, dry place is best for storage. Are you worried about damaging it? Try using a carrying case to protect it from falls. Who knew that good care could help your tool work better and last longer? Proper storage matters!Choosing the Right Storage Location
Assessing environmental conditions. Avoiding exposure to moisture and extreme temperatures.Finding the best spot to store a finish nailer is important. Look for a dry area. Moisture can cause damage. Avoid spots with extreme heat or cold. Such conditions can harm your tool. Think about these factors:
- Humidity: Keep it away from damp places.
- Temperature: Choose a climate-controlled space.
A clean, dry garage or a shed is ideal. This helps the nailer last longer and work better.
How can I protect my finish nailer from moisture?
To protect your nailer, keep it in a dry place. Try using silica gel packets to absorb moisture.
Cleaning Your Finish Nailer Before Storage
Removing debris and residue. Lubricating essential parts.Before storing your finish nailer, cleaning it is crucial. Removing debris and residue helps the tool work better. Use a soft cloth to wipe off any dirt or dust. Next, ensure you lubricate essential parts. A little oil can keep the moving parts smooth. Check the manual for oiling points. Keeping your finish nailer clean will help it last longer and perform well.
Why is cleaning important before storing?
Cleaning helps your finish nailer stay in good shape. A well-maintained tool is safer and lasts longer.
Quick Cleaning Tips:
- Dust off the exterior.
- Check for any stuck nails.
- Oil the moving parts with suitable lubricant.
Using a Protective Case or Bag
Benefits of using a hard case vs. soft bag. How to select the right protective storage solution.Keeping your finish nailer safe is key to making it last. A hard case can protect it from bumps and drops, while a soft bag is light and easy to carry. Think of a hard case like a knight’s armor—strong and sturdy! A soft bag is more like a cozy blanket—comfortable, but it won’t save you from a dragon. Choose based on your needs. If you travel often, a soft bag is your buddy. If you stack tools like pancake stacks, go for a hard case!
| Storage Type | Benefits |
|---|---|
| Hard Case | Durable, shock-resistant, weatherproof |
| Soft Bag | Lightweight, portable, compact |
Pick your protection wisely, and your nailer will thank you by not getting scratched or squished!
Coiling and Storing Air Hose Properly
Techniques for coiling to prevent damage. Choosing the right space for the air hose.Coiling your air hose correctly is important. Use the figure-eight method. It helps prevent kinks and damage. Find a safe space to store it, like a dry garage or shed. Avoid areas with sharp edges. Keep your hose off the ground. This can help it last longer.
- Use the figure-eight method for coiling.
- Store in a dry, cool area.
- Keep off the ground to avoid damage.
How to prevent damage to the air hose?
Coiling it properly and choosing a safe storage place are key steps. A good environment helps maintain quality and function.
Periodic Maintenance During Storage
Recommended maintenance schedule. Signs of disrepair to watch for.Taking care of your finish nailer during storage helps it work well. Check the tool every few months. Look for rust or wear on parts. Clean the nailer gently. Store it in a dry place to avoid damage. If you hear strange noises or see broken parts, it might need fixing. Early attention can save you time and money later. Keep your tools in top shape!
How often should I check my finish nailer?
It’s best to check your finish nailer every three to six months. This keeps it in good shape and ready to use.
Signs to watch for:
- Rust or corrosion
- Strange noises
- Loose parts
Documenting Your Storage Process
Keeping an inventory of tools and accessories. Recording maintenance activities for reference.Keeping track of your tools is key. Make a list of your finish nailer and its accessories. This helps you know what you have and what you might need. Record each maintenance activity you do. It allows you to see when your tools were last checked or fixed. Consistent documentation makes finding problems easier.
- List tools and accessories.
- Note maintenance dates.
- Check for damages regularly.
Why is documenting important?
Documenting helps you remember your tool’s history. It prevents accidents and makes repairs quicker. A well-kept record can guide your future tool needs.
Conclusion
In conclusion, storing your finish nailer properly protects it and keeps it ready for use. Remember to clean it after each project, release the air, and store it in a dry place. You can also keep it in its original case for extra safety. Following these tips will help you work efficiently next time! For more advice, keep reading!FAQs
Sure! Here Are Five Related Questions On The Topic Of How To Store A Finish Nailer:To store a finish nailer, first make sure it’s empty and unplugged. Then, find a safe, dry place to keep it. A toolbox or a shelf works well. Always keep it out of reach of small children. This way, we keep it safe and ready for the next project!
Sure! Please go ahead and ask your question, and I’ll be happy to answer it for you!
What Are The Best Practices For Cleaning A Finish Nailer Before Storage?First, unplug the finish nailer or remove the battery for safety. Next, use a soft cloth to wipe off any dust or dirt. Make sure to check and remove any stuck nails. Apply a few drops of oil to the moving parts to keep it smooth. Finally, store it in a dry place, away from kids.
How Should A Finish Nailer Be Stored To Prevent Damage To Its Components?To store a finish nailer, make sure it is clean and dry. You should keep it in a cool, dry place. Use its original case or a sturdy box to protect it. Always remove the nails and battery, if it is cordless. This way, it will stay in good shape for your next project!
Is It Necessary To Store The Finish Nailer With The Pressure Released, And If So, Why?Yes, it’s important to store the finish nailer with the pressure released. This keeps it safe and prevents accidents. If we leave it pressurized, it might accidentally shoot a nail. By releasing the pressure, we can protect ourselves and keep the tool in good shape.
What Type Of Storage Conditions (Temperature, Humidity) Are Ideal For Maintaining The Longevity Of A Finish Nailer?To keep a finish nailer in good condition, store it in a cool, dry place. The best temperature is around 70 degrees Fahrenheit. Make sure the humidity is low, around 30 to 50 percent. This helps prevent rust and keeps the tools working well. Remember to check it regularly!
Should Nails And Other Fasteners Be Stored With The Finish Nailer, And What Are The Best Ways To Organize Them?Yes, you should store nails and other fasteners with your finish nailer. This helps you find everything easily when you need it. You can use small boxes to keep different types of nails together. Label each box so you know what’s inside. Keeping them organized will save you time and make your projects easier!