Have you ever seen wood soaked by rain? It can look sad and worn out. But what if I told you there’s a way to make wood water resistant? Yes, you heard right! Wood can be protected from water. This can save your outdoor furniture or wooden projects.
Imagine a beautiful picnic table that lasts for years. With the right tips and techniques, you can keep it looking fresh. You don’t need to be a woodworking expert to learn how to make wood water resistant. Simple steps can make a big difference.
Curious about what those steps might be? You might be surprised to know that some everyday items can help. In this article, we’ll explore expert tips that anyone can use. Get ready to turn your wood projects into water-resistant wonders!
Table of Contents
How To Make Wood Water Resistant: Expert Tips & Techniques

How to Make Wood Water Resistant: Expert Tips & Techniques
Making wood water-resistant is essential for keeping your projects durable and beautiful. Start by choosing the right wood type; some woods are naturally more resistant. Consider using sealants like polyurethane or marine varnish for added protection. Did you know that regular oil treatments can also enhance water resistance? Applying a coat of wax can help too! With these expert techniques, you can confidently protect your wooden items from moisture and enhance their lifespan.Understanding Wood and Water Resistance
Importance of water resistance for wood products. Common challenges faced by untreated wood.Wood is a beautiful material used in many products. However, wood needs to be water-resistant to last longer. Without it, wood faces challenges like rotting and warping. Here are some common problems untreated wood faces:
- Absorbs water easily.
- Develops mold and mildew.
- Weakens over time.
Water resistance helps keep wood strong and attractive. Protecting wood ensures it stays in great shape for years. Think of water resistance as a shield for your wooden items!
Why is water resistance important for wood?
Without water resistance, wood can quickly break down. It may lose its beauty and strength, leading to expensive repairs or replacements.
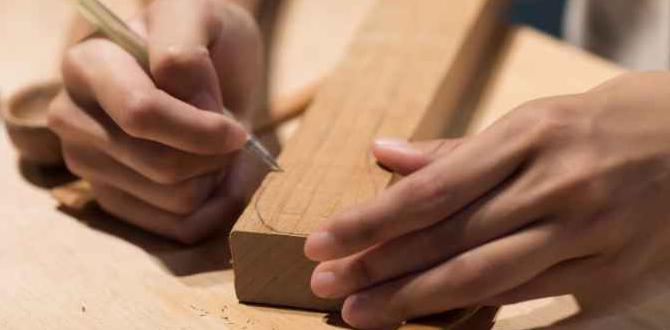
Preparing Wood for Treatment
Steps for cleaning and sanding wood surfaces. Importance of drying and humidity considerations.Start by cleaning the wood surface. Remove dirt and dust using a damp cloth. For tough spots, you can use a little soap. After cleaning, let the wood dry completely. This is important! Moist wood won’t hold treatments well.
Next, sand the wood to make it smooth. Use fine-grit sandpaper to avoid scratches. Sanding improves the way treatments stick.
Monitor humidity too. High humidity can slow down drying times. Keep the wood in a dry place before treating it.
What are the steps to clean and sand wood?
The steps include cleaning with a damp cloth, allowing it to dry, sanding with fine-grit sandpaper, and ensuring low humidity for drying.
Cleaning and Sanding Tips:
- Use a damp cloth for cleaning.
- Let the wood dry completely.
- Sand with fine-grit paper.
- Check humidity levels.
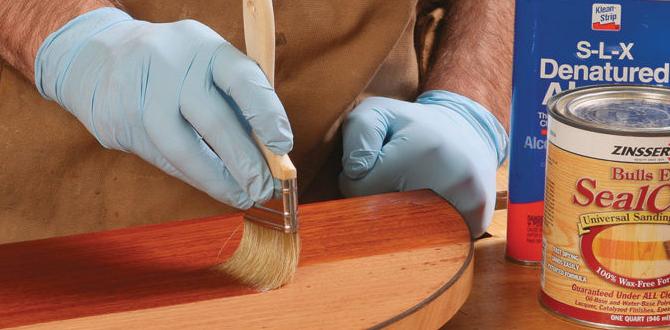
Applying Water-Resistant Treatments
Detailed guidance on application techniques for various treatments. Recommended tools and equipment for best results.To protect wood from water, you need to apply special treatments. Use the right tools for the best results. Here are some steps to follow:
- Clean the surface: Remove dirt and dust for better adhesion.
- Choose your treatment: Options include oils, paints, and sealants.
- Use a brush or sprayer: Apply evenly and avoid puddles.
- Allow it to dry: Follow the drying time on the product label.
For best results, tools like brushes, rollers, and spray guns are useful. Regular maintenance helps keep the wood strong and water-resistant!
What tools do you need to treat wood?
Essential tools include paintbrushes, rollers, and spray guns. A clean cloth is great for wiping excess product too!
Maintenance of Water-Resistant Wood
Tips for maintaining the treated wood over time. Signs of wear and when to reapply treatments.To keep your wood water-resistant, regular maintenance is key. Check for signs like peeling, fading, or rough spots. These mean it’s time to show your wood some love! Apply a new treatment every couple of years, or sooner for high-traffic areas. Remember, happy wood is healthy wood!
| Signs of Wear | When to Reapply Treatments |
|---|---|
| Peeling Finish | Every 1-3 years |
| Faded Color | Check annually |
| Rough Texture | When noticed |
Don’t forget to give it a good clean before reapplying. Think of it as a spa day for your wood—it deserves it!
DIY vs. Professional Services
Factors to consider when deciding between DIY and hiring a professional. Cost comparisons and potential longterm savings.Choosing between DIY and hiring a professional can be tricky. Do you have the skills? If you feel confident, DIY can save money. But consider time and effort too. Professionals can finish jobs quickly and neatly. Also, think about future costs. A good job now might prevent expensive repairs later. Here’s a quick look:
- DIY: Lower upfront cost, potential for mistakes.
- Professional: Higher cost, often better results.
Long-term savings might be worth it!
What are the advantages of DIY vs. hiring a professional?
DIY allows personal touch and creativity. However, professionals offer expertise and can solve problems quickly.
Common Mistakes to Avoid
List of frequent errors made during the waterproofing process. Tips for ensuring the effectiveness of treatments.Many folks make simple mistakes while making wood water-resistant. First, skipping cleaning the wood is a big no-no. Dust and dirt can mess up the seal. Another error is using the wrong products. Not all sealers are made equal! Remember to apply *even coats*—too thick can cause bubbles. Finally, forgetting to wait for it to dry completely can lead to a soggy surprise. It’s like trying to wear wet socks; not comfy!
| Common Mistakes | Tips for Success |
|---|---|
| Not cleaning the wood | Always start with a clean surface! |
| Using wrong products | Choose the right sealer for your wood type. |
| Applying too thick | Go for *thin, even coats*. |
| Rushing the drying process | Be patient, wait for it to dry completely. |
Environmental Considerations
Discussion on ecofriendly waterproofing options. Impact of treatments on the environment and sustainability practices.It’s important to think about our planet while making wood water resistant. Many eco-friendly options exist, like natural oils and waxes, which are safer for our environment. Some chemical treatments can harm plants and animals. So, choosing green methods not only protects your wood but also Mother Earth. Remember, every drop counts! Connect your wooden projects with sustainable choices, and they’ll last longer and save the planet. Here’s a quick comparison:
| Treatment Type | Eco-Friendliness | Durability |
|---|---|---|
| Natural Oil | High | Moderate |
| Wax | Very High | Low |
| Chemical Sealants | Low | High |
Using eco-friendly methods boosts sustainability. In fact, even the best wood needs some love! Choose wisely, and your wooden treasures can be good for you and the environment.
Conclusion
In conclusion, making wood water resistant is essential for its protection. You can use sealants, oils, or wax. Each method has unique benefits. Remember to prepare the wood properly before applying any treatment. With these expert tips, you’ll keep your wood looking great for years. Try these techniques yourself and explore more tips to enhance your projects!FAQs
What Are The Best Wood Finishes For Making Wood Water Resistant?To make wood water resistant, you can use some great finishes. Varnish works well because it creates a hard, shiny layer. Polyurethane is another option; it’s super strong and protects from water. You can also try marine oil, which keeps the wood looking nice while blocking water. Just remember to apply it carefully for the best results!
How Do Different Types Of Wood Vary In Their Natural Water Resistance, And How Can This Influence Treatment Choices?Different types of wood can resist water in various ways. Some woods, like cedar and redwood, are naturally good at keeping water out. Other woods, like pine, can soak up water easily. This difference helps us decide how to treat the wood. We might use special coatings or paints on wood that absorbs water quickly to keep it safe and strong.
What Are The Step-By-Step Techniques For Applying A Water-Resistant Sealant On Wood Surfaces?First, gather your supplies: a water-resistant sealant, a brush, sandpaper, and a clean cloth. Start by sanding the wood surface gently to make it smooth. Next, wipe off any dust with the clean cloth. Then, use the brush to apply the sealant evenly over the wood. Let it dry as shown on the sealant can, usually for a few hours. Finally, apply a second coat for extra protection and let it dry again.
How Can Diy Methods, Like Using Oil Or Wax, Enhance The Water Resistance Of Wood?DIY methods like using oil or wax can help protect wood from water. When you rub oil or wax on wood, it forms a barrier. This barrier keeps water from soaking in. As a result, the wood stays dry and lasts longer. Plus, it can look shiny and pretty, too!
What Maintenance Tips Should Be Followed To Ensure Long-Lasting Water Resistance In Treated Wood?To keep treated wood water-resistant for a long time, regularly check for damage. You should clean it with soap and water to remove dirt. Apply a special wood sealant every few years to protect it better. Try to keep it covered from heavy rain or snow. Also, make sure air can flow around it to avoid mold.