Have you ever gazed at a beautiful wooden surface and wondered how it got that shiny look? Oil-based polyurethane can create that stunning finish. It’s like giving your wood a magical coat that protects and brings out its natural beauty.
Imagine you just finished a lovely DIY project. You want to keep it safe and make it shine. But how do you apply oil-based polyurethane the right way? Don’t worry! In this step-by-step guide, we will show you just how to do it.
Did you know that oil-based polyurethane is super tough and lasts a long time? This makes it perfect for furniture and floors. It can handle spills, scratches, and everyday wear and tear. Sounds great, right?
In this article, we’ll walk you through each part of the process. You’ll learn easy tips and tricks to get the best results. By the end, you will be ready to add that lovely finish to your project. Excited to get started? Let’s dive in!
Table of Contents
How To Apply Oil Based Polyurethane: A Step-By-Step Guide

How to Apply Oil Based Polyurethane: A Step-by-Step Guide
Applying oil-based polyurethane can be a fun project that transforms your wood surfaces. Start by preparing the area and gathering tools like brushes and sandpaper. Did you know that proper sanding helps the finish stick better? Apply the polyurethane in thin layers for a smooth look. Always let each layer dry completely before sanding again. By following these steps, you’ll create a beautiful and durable finish that enhances the natural beauty of your wood.Understanding Oil Based Polyurethane
Definition and purpose of oil based polyurethane. Benefits of using oil based polyurethane over other finishes.Oil-based polyurethane is a protective finish for wood. It seals and protects surfaces, making them shine. This finish is strong and lasts a long time. It works well on floors, furniture, and cabinets. Here are some benefits:
- Durability: It resists scratches and wear.
- Water Resistance: It protects against spills.
- Rich Color: It brings out the natural beauty of wood.
Many people prefer oil-based polyurethane because it sticks well and creates a lovely finish. This makes it popular for both home and professional use.
What is the main purpose of oil-based polyurethane?
The main purpose of oil-based polyurethane is to protect wooden surfaces and enhance their appearance. It prevents damage and keeps wood looking good for years.
Preparing the Surface for Application
Necessary tools and materials for preparation. Steps to properly sand and clean the surface.Before diving in, gather your tools! You’ll need sandpaper, a vacuum, a clean cloth, and safety gear. Start by sanding the surface smoothly—think of it as giving your wood a nice spa day. Wipe it clean afterward. Dust is like a pesky mosquito, and we want to shoo it away! Here’s a handy table to keep track of your materials:
| Tools | Purpose |
|---|---|
| Sandpaper | Smoothens the surface |
| Vacuum | Cleans up the dust |
| Clean cloth | Wipes away remaining particles |
| Safety gear | Protects you while working |
Make sure to sand in the direction of the grain. This way, you won’t have those awkward marks staring back at you. A clean surface = a happy finish. You’re just one step closer to making your wood shine!
Choosing the Right Product
Different types of oil based polyurethane. Factors to consider in selecting the right product for your project.There are many types of oil-based polyurethane. Selecting the right one is key to your project’s success. Here are some common types:
- Regular Polyurethane: Good for most surfaces.
- Water-Resistant Polyurethane: Great for areas that might get wet.
- Professional Grade: Best for heavy use and durability.
Factors to consider include:
- What you are finishing, like wood or tile.
- The look you want, like glossy or matte.
- Your budget and project size.
What should I know before choosing oil-based polyurethane?
Look for a product that fits your needs. Consider the surface type and finish you want. Check reviews to find reliable brands.
Application Techniques for Oil Based Polyurethane
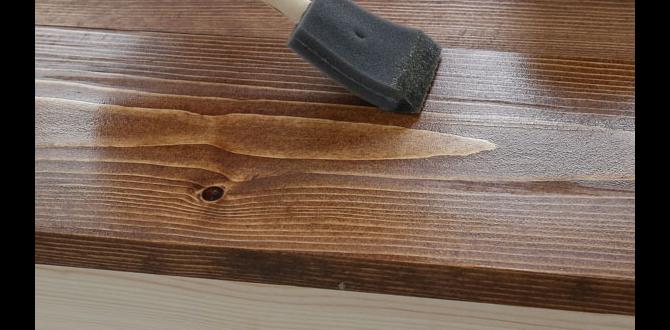
Recommended tools for application (brushes, rollers, etc.). Stepbystep guide on applying the first coat.Applying oil-based polyurethane can be simple if you have the right tools. Use high-quality brushes and rollers. A foam brush works well for edges. For the main areas, a roller can speed things up. Here’s how to apply the first coat:
- Start with a clean surface.
- Use a brush to cut in along edges.
- Apply the roller to large surfaces.
- Even out the finish with your brush.
- Let it dry completely before applying more coats.
Each step is important for a smooth finish. Enjoy the process!
What tools do I need to apply oil-based polyurethane?
You need brushes and rollers. A foam brush is good for edges. Use a roller for big areas. This makes your work easier and faster.
Drying and Curing Times
Average drying times for oil based polyurethane. Factors affecting drying and curing times.When you apply oil-based polyurethane, patience is key. Generally, it takes about 6 to 8 hours for the finish to dry to the touch. However, full curing might need up to 30 days. Several factors can slow down this process. For instance, humidity, temperature, and even air flow can make a big difference. If it’s too humid, your project might end up taking a vacation longer than expected! Check out the table below for a quick look at drying times and factors that affect them:
| Condition | Drying Time | Impact on Curing |
|---|---|---|
| Low Humidity | 6 Hours | Speeds Up |
| High Humidity | 12+ Hours | Slows Down |
| Warm Temperature | 6 Hours | Speeds Up |
| Cold Temperature | 12+ Hours | Slows Down |
So, think of drying and curing times like a turtle race. Some conditions can speed it up, while others put it into slow-motion!
Applying Additional Coats
When and how to apply subsequent coats. Tips for achieving a smooth finish with multiple layers.After the first coat dries, it’s time for more! Wait at least 24 hours to let the first layer set. To add those magical extra coats, sand lightly with fine-grit paper. This creates a smooth path for the next layer. Apply the polyurethane in thin, even strokes. Remember, too much at once can cause drips—nobody wants a surprise waterfall on their project!
| Step | Tip |
|---|---|
| Wait | At least 24 hours after each coat |
| Sand | Lightly with fine-grit paper |
| Apply | Thin layers with steady strokes |
This will ensure a nice, smooth finish. Remember, patience is key! More layers can lead to an even shinier outcome. Happy coating!
Proper Cleanup and Maintenance
Instructions for cleaning tools and workspace after application. Maintenance tips for surfaces finished with oil based polyurethane.After you’ve applied oil-based polyurethane, the cleanup is crucial. Grab some mineral spirits to clean your brushes and tools. Remember, your brush feels like a superhero, but it can’t fight off grime without your help! For your workspace, wipe down surfaces to make them shine. Also, let’s talk maintenance—avoid harsh cleaners on those beautifully finished surfaces. A soft cloth and mild soap do the trick. Your furniture will thank you!
| Tool | Cleanup Method |
|---|---|
| Brushes | Use mineral spirits. |
| Spills | Wipe with a damp cloth. |
| Surfaces | Clean with mild soap and water. |
For surfaces, avoid harsh chemicals that can dull your finish. Regular dusting will keep things looking spiffy! Polish with a soft cloth, and you’ll enjoy a gleaming finish. Think of it as pampering your furniture—everyone loves a spa day!
Common Mistakes to Avoid
List of frequent errors during application. How to troubleshoot issues with the finish.Many people make mistakes when applying oil-based polyurethane. It’s important to know these to avoid problems. Common errors include:
- Skipping surface preparation
- Using too much or too little product
- Applying in humid conditions
- Not allowing adequate drying time
- Using the wrong brush type
If you face issues with the finish, don’t worry. Here’s how to fix them:
- Smooth out bubbles with sandpaper
- Apply another coat to cover uneven spots
- Check for dust and clean before the next layer
Taking care to avoid these common mistakes will help you achieve a great finish!
What are the frequent errors during polyurethane application?
Common mistakes include skipping surface prep and applying in humid weather. Using too much or too little can also lead to problems.
Conclusion
In conclusion, applying oil-based polyurethane is straightforward. Remember to prepare the surface well, use smooth strokes, and sand between coats. Always work in a well-ventilated area. With practice, you can achieve a beautiful finish. So grab your materials and start working on your project! For more tips, check out additional resources on woodworking and finishes.FAQs
What Tools And Materials Do I Need To Apply Oil-Based Polyurethane Effectively?To apply oil-based polyurethane, you need a few basic tools and materials. First, get a clean cloth for wiping surfaces. You also need a paintbrush or foam brush for spreading the finish. Make sure to have sandpaper to smooth the wood before applying. Finally, use a container to hold the polyurethane and a stir stick to mix it.
How Should I Prepare The Surface Before Applying Oil-Based Polyurethane?Before putting on oil-based polyurethane, start by cleaning the surface. Use a vacuum to remove dust and dirt. Then, sand the surface lightly to make it smooth. After sanding, wipe it with a damp cloth to remove any dust. Make sure it’s dry before you apply the polyurethane.
What Is The Recommended Application Technique For Oil-Based Polyurethane?To apply oil-based polyurethane, you should use a clean brush or a foam applicator. Start at one corner and move in long, even strokes. Make sure to cover every part without leaving puddles. Let it dry completely before adding more coats, usually two or three. Always remember to work in a well-ventilated space!
How Many Coats Of Oil-Based Polyurethane Should I Apply, And How Do I Know When To Apply Additional Coats?You should apply two or three coats of oil-based polyurethane. Wait for the first coat to dry before adding the next one. You’ll know it’s dry when it feels hard and isn’t sticky. If it looks shiny and smooth, you’re ready for another coat.
What Safety Precautions Should I Take When Working With Oil-Based Polyurethane?When working with oil-based polyurethane, you should wear gloves to protect your hands. Use a mask to keep harmful fumes out of your lungs. Work in a well-ventilated area, like a garage with doors open. Keep pets and kids away from where you are working. Finally, always follow the instructions on the can for safe use.


