Have you ever wondered how many coats of tung oil you need to make your wood projects shine? Tung oil is amazing. It makes wood look rich and beautiful while protecting it from wear and tear. But how do you know when you’ve applied enough?
Imagine a lovely wooden table. It catches the light and invites everyone to sit down. That perfect finish didn’t happen by accident. It took careful work and just the right amount of tung oil.
Applying this oil can feel tricky. Too few coats can leave your wood looking dull and rough. Too many coats can make it look too shiny or sticky. So, what’s the secret to getting just the right finish?
In this article, we will explore how many coats of tung oil you should use. You’ll discover tips and tricks to achieve the perfect finish every time. Let’s dive in and unlock the beauty of your wood projects!
Table of Contents
How Many Coats Of Tung Oil: Achieve A Perfect Finish

How Many Coats of Tung Oil: Achieve a Perfect Finish
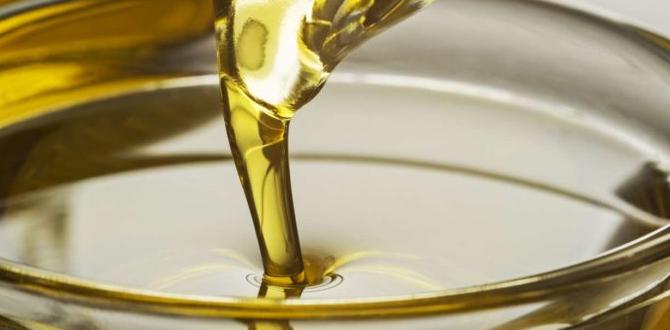
Tung oil can give your wood projects a beautiful finish. But how many coats are really needed? Usually, three to four coats work best for a strong protective layer. Each coat should dry completely before adding the next. Did you know that applying too few coats can leave wood vulnerable? Remember, patience pays off! For a stunning look, take your time, and enjoy the process of achieving that perfect finish.Understanding Tung Oil
Definition and origin of tung oil. Benefits of using tung oil for wood finishing.Tung oil is a natural finish made from the seeds of the tung tree. Originating in China, it has been used for centuries to protect wood from water and enhance its beauty. One of the great benefits of tung oil is its ability to penetrate deep into the wood fibers, creating a strong barrier against moisture. This means your furniture won’t play hide-and-seek with damage! Plus, it dries clear, keeping the natural color of the wood intact. Think of it as a superhero cape for your favorite wooden items!
| Benefit | Description |
|---|---|
| Water Resistant | Protects wood from moisture, preventing warping. |
| Natural Look | Enhances wood’s color without changing its appearance. |
| Durability | Creates a tough finish that lasts a long time. |
Factors Influencing the Number of Coats
Type of wood and its absorption rate. Desired finish and sheen level.The type of wood you use plays a big role in how many coats of tung oil you need. Softwoods like pine soak up oil faster than hardwoods. This means less coats! Your desired finish also matters. If you want a shiny look, expect to apply more coats. Think of it like adding frosting to a cake—more layers equal a tastier treat! So, choose wisely for the best outcome.
| Type of Wood | Absorption Rate |
|---|---|
| Softwoods | High |
| Hardwoods | Moderate to Low |
Remember, the thicker the coat, the shinier the finish! Too much can make it look like a greased pig. Balance is key!
Recommended Number of Coats for Different Applications
Furniture vs. cabinetry vs. flooring. Outdoor vs. indoor projects.Choosing the right number of coats depends on what you’re finishing. For furniture, two to three coats give a shiny look without being too thick. Cabinets need about three coats to stand strong against spills and splashes, while flooring likes four to five coats for extra toughness. Now, if you’re working outdoors, you might want an extra coat, especially if Mother Nature likes to throw tantrums. The table below shows suggested coats for different projects:
| Application | Coats Recommended |
|---|---|
| Furniture | 2-3 |
| Cabinets | 3 |
| Flooring | 4-5 |
| Outdoor Projects | 4-6 |
So, stay focused on your project type. You’ll end up with a finish that makes your friends jealous and your DIY projects the talk of the town!
Preparation Before Applying Tung Oil
Surface preparation steps: sanding, cleaning, etc.. Importance of testing on a small area first.Getting ready to apply tung oil is important for a great finish. First, sand the surface to make it smooth. Use fine grit sandpaper for the best results. Next, clean the surface. Remove dust and dirt with a cloth. This step helps the oil stick better. Always test on a small area first. You want to see how the wood reacts. This way, you avoid surprises later!
What if I don’t test the tung oil first?
If you skip testing, you might get a finish you don’t like. It is best to know how the wood looks before applying to the whole piece. Testing takes a little time but saves big headaches!
Application Techniques for Tung Oil
Tools and materials needed for application. Best practices for applying each coat.To apply tung oil smoothly, gather the right tools. You will need:
- Soft cloths or rags
- Brushes (natural bristle works best)
- Fine sandpaper
- Gloves for hand protection
Start with a clean surface. Apply thin coats to avoid drips. For best results, use long strokes and go with the wood grain. Wait a full day between coats for drying. This helps create a strong finish.
What is the best way to apply tung oil?
For the best finish, always work in a well-ventilated area. Thin your oil with mineral spirits for easier application. Use light coats and build up gradually. This helps you achieve a beautiful sheen.
Drying Times and Curing Process
Typical drying times between coats. Full curing time for a durable finish.After applying each coat of tung oil, waiting is important. Typically, you should wait about 24 hours between coats. This allows the oil to dry properly. For a truly strong finish, full curing may take up to 30 days. This step ensures your surface is durable and looks great.
How long do I wait between coats?
The answer is 24 hours between coats for optimal results.
How long does it take for tung oil to cure?
It takes about 30 days for full curing to ensure a strong and lasting finish.
Common Mistakes to Avoid
Overapplication and its effects. Ignoring weather conditions during application.Avoiding some common mistakes can make a big difference in your project. Overapplication of tung oil is one. It can lead to a sticky, uneven finish. Instead, apply thin coats and let them dry fully. Also, don’t forget about the weather. Applying oil in wet or humid conditions can ruin your work. Wait for dry days to ensure a smooth finish.
What are the results of overapplication?
Overapplication can cause sticky surfaces and uneven finishes. This means your project won’t look good.
Important points to remember:
- Use thin layers of oil.
- Wait for each coat to dry completely.
- Check the weather before applying.
Maintenance of Tung Oil Finished Surfaces
Cleaning and care tips for longevity. How to reapply or refresh the finish over time.Keeping your tung oil finish looking good is like taking care of a pet. You need to clean it regularly and show it some love! Use a damp cloth to wipe away dirt. Avoid harsh cleaners, or your finish might get upset. For a happy surface, reapply tung oil every 6 months. This keeps the shine alive! Think of it as giving your surfaces a refreshing drink. They’ll thank you with a long-lasting glow!
| Maintenance Step | Action |
|---|---|
| Clean | Use a damp cloth, no harsh chemicals! |
| Reapply Tung Oil | Every 6 months or as needed. |
Conclusion
To achieve a perfect finish with tung oil, apply at least three coats. Each coat adds depth and protection. Always sand lightly between coats for a smoother look. Remember to let each coat dry fully before adding the next. For best results, practice and patience are key. We encourage you to try this on a small project first!FAQs
What Factors Influence The Number Of Coats Of Tung Oil Needed For Optimal Coverage And Protection?The number of coats of tung oil you need depends on a few things. First, the type of wood you are using matters; some woods soak up oil more than others. Second, how rough or smooth the wood’s surface is can change how well the oil goes on. Lastly, the climate and humidity can affect drying times, so you might need more coats in damp places. You’ll usually know it’s time for another coat when the wood looks dull.
How Does The Type Of Wood Affect The Application Of Multiple Coats Of Tung Oil?The type of wood changes how tung oil works. Softer woods, like pine, soak up oil quickly. This means you might need fewer coats. Harder woods, like oak, take longer to absorb oil. You may need to apply more coats to get a nice finish.
What Is The Recommended Drying Time Between Coats Of Tung Oil For Achieving A Smooth Finish?When you use tung oil, you should wait about 24 hours between each coat. This gives the oil time to dry well. If you try to add a new coat too soon, it won’t look smooth. Always check that the previous coat is dry before adding more. This will help you get the best finish!
How Can I Tell When I’Ve Applied Enough Coats Of Tung Oil For My Project?You’ll know you’ve used enough coats of tung oil when the surface looks smooth and shiny. Usually, two to three coats are good. Touch the surface; it should feel dry and not sticky. If it looks dull or feels rough, add one more coat. Always let each coat dry completely before adding another.
Are There Any Techniques To Enhance The Finish Of Tung Oil When Applying Multiple Coats?Yes, you can enhance the finish of tung oil. After each coat dries, lightly sand the surface with fine sandpaper. This helps make it smooth. Then, wipe off the dust before applying the next coat. You can also add a little extra tung oil to the last coat for a shiny look.