Table of Contents
Framing Nailer Drive Blade Replacement: A Complete Guide

Framing Nailer Drive Blade Replacement
Replacing the drive blade in a framing nailer can seem tricky, but it’s simple. Did you know that a worn blade can affect performance? Understanding how to replace it helps maintain your tool’s efficiency. First, ensure you have the correct replacement part. Then, follow safety tips like wearing gloves. Properly aligning the new blade is key. This small maintenance task can prevent big problems later. Take care of your tools, and they’ll last longer!Signs That Indicate Drive Blade Replacement is Needed
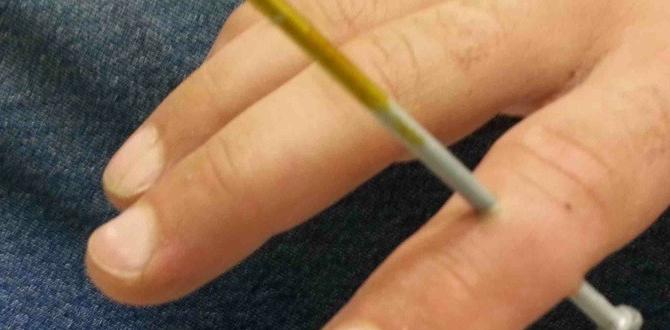
Symptoms of a worn or damaged drive blade. Impact on nail gun performance and safety.Replace the drive blade when you notice some clear signs. A worn or damaged blade can cause issues. Look for these symptoms:
- Nails miss the target.
- The nail gun jams often.
- You hear strange sounds while using it.
- There is excessive wear on the blade.
These problems can impact both performance and safety. Your nail gun may not work well, and it could be dangerous to use. Pay attention to these signs to ensure safe and effective use!
What are the signs that the drive blade needs replacing?
Common signs include nails getting stuck, unusual noises, or a reduction in firing speed. If you notice these issues, check the drive blade right away!
Tools Required for Drive Blade Replacement
List of essential tools for the replacement process. Safety equipment to consider.Replacing the drive blade on your framing nailer needs some tools. Gathering everything before starting helps a lot. You will need the following items:
- Replacement drive blade
- Wrench or pliers
- Screwdriver (flat or Phillips)
- Safety goggles
- Work gloves
- Protective mask
Always wear safety gear. It protects you from small pieces and dust. Working safely makes the job easier and more fun.
What safety equipment should you consider?
Use the right safety gear to stay protected. Safety goggles keep your eyes safe from flying debris. Work gloves protect your hands. Lastly, a protective mask helps you breathe easier if there’s dust.
Step-by-Step Guide to Replacing the Drive Blade
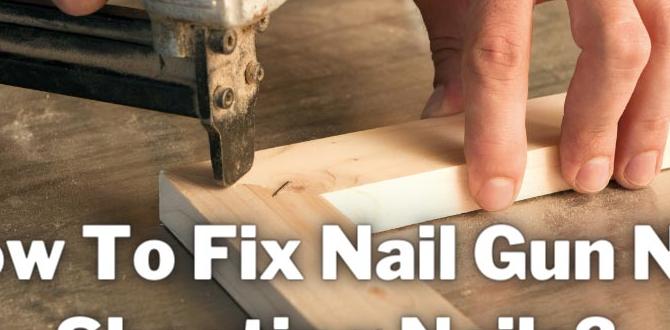
Detailed instructions on how to safely disassemble the nailer. Procedure for removing the old drive blade and installing the new one.First, unplug your nailer. Safety first! Begin by removing the screws to open it up. Be careful; we don’t want any flying parts! Next, take out the old drive blade. Grab the new one and slide it into place. Ensure it fits snugly—like your favorite pair of shoes! Finally, put everything back together. Plug it in and test it out. Who knew replacing a drive blade could be this fun?
| Step | Action |
|---|---|
| 1 | Unplug the nailer. |
| 2 | Remove screws and open the nailer. |
| 3 | Take out the old drive blade. |
| 4 | Install the new drive blade. |
| 5 | Reassemble and test! |
Choosing the Right Drive Blade for Your Nailer
Factors to consider when selecting a replacement drive blade. Recommended brands and models for specific nailers.Selecting a drive blade for your nailer is tricky but fun! First, think about compatibility. Make sure the blade fits your specific nailer model. Next, consider durability. A tough blade lasts longer and saves money. Also, look for brands that are well-known, like DeWalt or Hitachi. They make reliable blades that are worth your time. To help you out, here’s a quick table of recommended brands and models:
| Brand | Model |
|---|---|
| DeWalt | D51844 |
| Hitachi | NT65M2S |
| Bostitch | N62FNK2 |
Finally, don’t forget to check reviews! A blade with good ratings is usually a smart choice. Remember, a happy nailer makes for a happy builder!
Maintenance Tips for Extending Drive Blade Life
Best practices for keeping your framing nailer in optimal condition. Routine maintenance tasks to perform regularly.Keeping your framing nailer in great shape helps it work better. Follow these tips to extend the life of your drive blade:
- Clean the tool after use. Dirt can harm the blade.
- Check the air pressure. It should match the tool’s needs.
- Lubricate moving parts regularly. This keeps everything running smoothly.
- Inspect the drive blade for damage. Replace it if it shows wear.
Taking these steps can help your nailer last longer and work well!
How can I maintain my framing nailer?
Regular cleaning, lubrication, and inspecting for damage are key steps for maintaining your framing nailer.
Common Mistakes to Avoid During Replacement
Errors that can lead to improper installation. Tips for ensuring a successful replacement.Replacing your framing nailer drive blade can be tricky. Avoid common errors for a smooth installation. Here are some tips:
- Check if the new blade matches your old one.
- Use the right tools for the job.
- Don’t skip safety gear, like gloves and goggles.
- Make sure everything is clean before starting.
- Follow the manufacturer’s instructions closely.
Small mistakes can lead to big problems. Take your time and double-check your work. This will help ensure a successful replacement.
What is the most common mistake when replacing a drive blade?
The most common mistake is not checking if the new blade is the correct type and size for your framing nailer.
Tips to remember:
- Always compare the new blade with the old one.
- Consult the user manual for specifics.
FAQs About Drive Blade Replacement
Addressing common questions and misconceptions. Expert advice on troubleshooting issues after replacement.Many people wonder about the tricky process of changing a drive blade. Questions pop up like popcorn! For starters, make sure the new blade fits snugly. An ill-fitting blade can cause all sorts of mishaps. If your nailer still acts up, check for jammed nails or debris. 90% of issues are linked to simple problems! Remember, humor helps; changing the drive blade is less about watching paint dry and more about giving your nailer a new lease on life!
| Common Questions | Answers |
|---|---|
| How often should I replace my drive blade? | Every 6 to 12 months depending on use. |
| What tools do I need for replacement? | Basic tools like screwdrivers and pliers. |
| Can I repair a damaged blade? | Not really! Replacing is safer! |
Conclusion
In conclusion, replacing your framing nailer drive blade is essential for its performance. Regular checks can prevent issues and ensure safety. You can follow simple steps to complete the replacement yourself. Remember to use the right tools and safety gear. For more detailed instructions, consider looking up guides or videos. Let’s keep your projects running smoothly and efficiently!FAQs
What Are The Signs That Indicate It’S Time To Replace The Drive Blade In A Framing Nailer?You should replace the drive blade in your framing nailer if you see dents or cracks on it. If nails don’t go in straight or get stuck often, that’s another sign. If you hear strange noises while using it, that can also mean something’s wrong. Finally, if the nailer isn’t working well like before, it’s time for a change.
How Do You Safely Remove And Install The Drive Blade In A Framing Nailer?To safely remove the drive blade from a framing nailer, first, unplug it. Then, use a screwdriver to take off the cover. Carefully lift out the drive blade. To install it, place the new blade in the same spot. Finally, put the cover back on and plug the nailer in again. Always remember to keep your fingers away from moving parts!
What Tools And Materials Are Needed For Replacing The Drive Blade In A Framing Nailer?To replace the drive blade in a framing nailer, you need a few tools. First, get a screwdriver to remove screws. Then, use pliers to help pull out the old blade. You will also need the new drive blade as a replacement. Finally, having safety glasses is important to protect your eyes while you work.
Can Using An Incorrect Drive Blade Type Affect The Performance Of A Framing Nailer?Yes, using the wrong drive blade type can change how well your framing nailer works. If the blade doesn’t fit right, it can cause jams or make nails crooked. This can slow you down and make your work harder. Always use the correct blade to get the best results!
How Can I Troubleshoot Issues Related To A Malfunctioning Drive Blade In My Framing Nailer?To fix a problem with the drive blade in your framing nailer, first, make sure the tool is unplugged or the battery is removed. Check if the drive blade is bent or stuck. If it looks damaged, you might need to replace it. Also, look for any dirt or debris inside the tool and clean it out. If it still doesn’t work, ask an adult for help or check the instruction manual.