Have you ever looked at beautiful crown molding and wondered how to achieve that look in your own home? A finish nailer for crown molding can help you do just that. Imagine turning any room into a stunning space with just a few simple tools. Sounds great, right?
Using a finish nailer makes the task faster and easier. It lets you attach crown molding quickly, so you can enjoy your work sooner. Did you know that crown molding can add value to your home? Many buyers love the elegant touch it gives!
In this article, we will explore why a finish nailer is essential for your crown molding project. We’ll also share tips and tricks to make your installation smooth and enjoyable. Are you ready to transform your home with beautiful crown molding?
Table of Contents
The Best Finish Nailer For Crown Molding Projects Explained

Understanding the Finish Nailer for Crown Molding
Using a finish nailer for crown molding makes DIY projects easier and more professional-looking. This tool shoots nails quickly, saving you time and effort. It is perfect for attaching crown molding to your walls without the fuss of hammers. Have you ever struggled with uneven molding? A finish nailer helps avoid that problem! Plus, it can save you from damaging the delicate wood. Ensure you choose the right size nails to make your project shine!Specifications to Consider
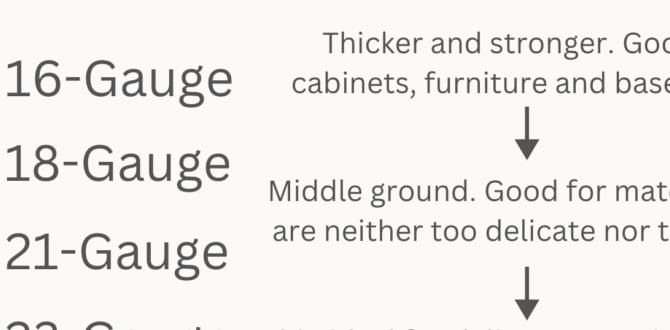
Nail size and gauge suitable for crown molding.. Power and depth adjustment features..Choosing the right finish nailer for crown molding is key for a smooth job. Here are some important specifications to think about:
- Nail Size and Gauge: Use nails from 18 to 23 gauge for strong hold.
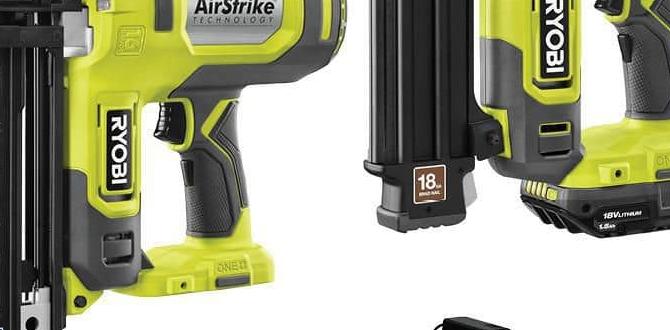
- Power Features: Look for tools that use air or battery for ease and speed.
- Depth Adjustment: This feature helps you control how deeply the nail goes in, preventing damage.
Having the right features ensures neat and long-lasting results.
What size nails should I use for crown molding?
Use nails that are 18 to 23 gauge, as they offer strength without splitting the wood.
What is the best power source for a finish nailer?
Air-powered nailers are popular for their power, but battery-operated tools are great for flexibility.
How do I adjust the depth of my finish nailer?
Most finish nailers have a simple depth adjustment dial, making changes easy for beginners.
Essential Features for Crown Molding
Specific features to look for: adjustable exhaust, selective actuation, and magazine capacity.. Importance of lightweight design for maneuverability..Choosing a nailer for crown molding can feel like a puzzle. Key features make a world of difference. First up is an adjustable exhaust. This lets you direct air away from your face and not into it—yikes! Next, look for selective actuation. This means you can switch between single or bump firing. It’s like having a remote control for your work! Also, consider magazine capacity; a bigger one means less reloading. Lastly, go for a lightweight design. If your tool feels like a brick, your arms might launch it across the room! Keeping these features in mind will make your crown molding project fun and easy!
| Feature | Benefit |
|---|---|
| Adjustable Exhaust | Direct air away from you |
| Selective Actuation | Choose firing mode easily |
| Magazine Capacity | Less frequent reloading |
| Lightweight Design | Easy to maneuver |
Top Finish Nailers for Crown Molding
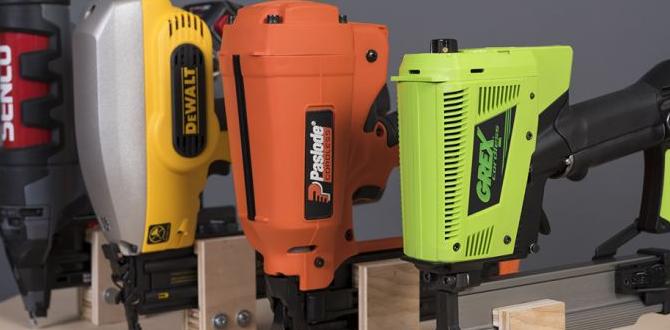
Review of the top three finish nailers on the market.. Comparison of features, prices, and user ratings..Finding the right tool for crown molding can feel tricky, but a good finish nailer makes it easier. Here are three top choices that brightened many DIYers’ days. The DeWalt DCN680D1 shines with its battery power and fast performance, but watch the price tag! Next up, the Porter-Cable PCC790LA offers solid value and user-friendly features. It’s like the friendly dog of nailers. Lastly, the BOSTITCH BTFP71917 flaunts a 5-in-1 design, making it a versatile friend in the workshop. Here’s a quick look:
| Brand | Features | Price | User Ratings |
|---|---|---|---|
| DeWalt DCN680D1 | Battery-powered | $349 | 4.8/5 |
| Porter-Cable PCC790LA | User-friendly | $199 | 4.5/5 |
| BOSTITCH BTFP71917 | 5-in-1 design | $229 | 4.6/5 |
Choose wisely, and crown your molding project with confidence! Remember, a happy nailer means a happy DIYer.
Tips for Using a Finish Nailer with Crown Molding
Best practices for nailing techniques and angles.. Safety precautions when using a finish nailer..Using a finish nailer for crown molding can be easy and fun. Here are some tips to get it right:
- Keep the nailer steady and straight. This helps the nails go in straight.
- Nail at a slight angle for better hold. Aim for 45 degrees if possible.
Safety is important! Always wear protective glasses. Make sure to keep fingers clear from the nail path. Double-check the area before nailing to avoid accidents.
What is the best angle to use a finish nailer?
For finishing crown molding, use a 45-degree angle. This angle allows the nails to grip better and makes your work stronger.
Common Mistakes to Avoid
Highlighting frequent errors made in crown molding installation.. How to troubleshoot issues that may arise..Crown molding can look amazing, but mistakes happen. Here are some common errors to avoid:
- Not measuring correctly can lead to crooked cuts.
- Using the wrong nail length may cause pieces to pop out.
- Skipping primer or paint leads to a dull finish.
- Forgetting to secure corners properly results in gaps.
If problems arise, try these tips:
- Check measurements twice before cutting.
- Use a finish nailer for strong, neat connections.
- Fill gaps with caulk for a smooth look.
What should I do if my crown molding doesn’t fit?
Measure the area again and cut the molding to match that size.
Staying careful will make your project successful!
Maintenance and Care for Finish Nailers
Basic maintenance tips to prolong the life of your nailer.. Recommended cleaning routines and checks for optimal performance..Taking care of your finish nailer helps it last longer and work better. First, make sure to keep it clean. Wipe it down after each use to remove dust and debris. Check the air filter regularly. If it’s dirty, replace it to keep air flowing nicely. Also, lubricate moving parts often. This keeps things from squeaking like a mouse! Remember, a happy nailer means happy molding!
| Task | Frequency |
|---|---|
| Clean body | After every use |
| Check air filter | Every month |
| Lubricate parts | Weekly |
So, follow these tips to keep your tool working like a charm. Your finish nailer will be grateful, and you’ll be building beautiful crown molding without any hiccups!
Conclusion
In summary, a finish nailer is a great tool for installing crown molding. It helps you work faster and more accurately. We recommend choosing a lightweight model for easy use. Always practice safety when operating tools. You can improve your skills by watching tutorials or reading guides. Start your crown molding project today and enjoy beautiful results!FAQs
What Gauge Finish Nailer Is Recommended For Installing Crown Molding?For installing crown molding, we recommend using a 16-gauge finish nailer. This tool drives nails that are strong enough for the job. A 16-gauge nailer helps keep the molding tight and secure. It also leaves a cleaner look when finished. You can find these nailers at most home improvement stores.
How Long Should The Finish Nails Be For Securing Crown Molding Effectively?When securing crown molding, finish nails should be about 1.5 to 2.5 inches long. If the molding is thicker, use longer nails. This helps keep it in place without breaking it. Make sure you hammer them in straight for the best hold.
Are There Specific Types Of Finish Nailers (Cordless Vs. Pneumatic) That Work Better For Crown Molding?When you attach crown molding, both cordless and pneumatic (air-powered) finish nailers can work well. Cordless nailers are easy to move around because they don’t need a hose. Pneumatic nailers can drive nails faster and deeper, but you must use a compressor. If you’re a beginner, a cordless nailer might be easier for you to handle. Choose what feels best for you!
What Tips Can Help Ensure Precise Nail Placement When Using A Finish Nailer For Crown Molding?To get precise nail placement, start by measuring carefully where you want to place the crown molding. Use a pencil to mark those spots lightly. Hold the finish nailer steady and straight when you press the trigger. Make sure the nailer is against the molding before you shoot the nail. Lastly, check the nails to ensure they are flush with the wood, so it looks nice!
Should I Use Wood Glue In Addition To A Finish Nailer When Installing Crown Molding For Added Stability?Yes, you can use wood glue with a finish nailer for crown molding. The glue helps keep the molding strong and tight. It fills any gaps and makes sure everything stays in place. Using both will make your work last longer and look better!
{“@context”:”https://schema.org”,”@type”: “FAQPage”,”mainEntity”:[{“@type”: “Question”,”name”: “What Gauge Finish Nailer Is Recommended For Installing Crown Molding? “,”acceptedAnswer”: {“@type”: “Answer”,”text”: “For installing crown molding, we recommend using a 16-gauge finish nailer. This tool drives nails that are strong enough for the job. A 16-gauge nailer helps keep the molding tight and secure. It also leaves a cleaner look when finished. You can find these nailers at most home improvement stores.”}},{“@type”: “Question”,”name”: “How Long Should The Finish Nails Be For Securing Crown Molding Effectively? “,”acceptedAnswer”: {“@type”: “Answer”,”text”: “When securing crown molding, finish nails should be about 1.5 to 2.5 inches long. If the molding is thicker, use longer nails. This helps keep it in place without breaking it. Make sure you hammer them in straight for the best hold.”}},{“@type”: “Question”,”name”: “Are There Specific Types Of Finish Nailers (Cordless Vs. Pneumatic) That Work Better For Crown Molding? “,”acceptedAnswer”: {“@type”: “Answer”,”text”: “When you attach crown molding, both cordless and pneumatic (air-powered) finish nailers can work well. Cordless nailers are easy to move around because they don’t need a hose. Pneumatic nailers can drive nails faster and deeper, but you must use a compressor. If you’re a beginner, a cordless nailer might be easier for you to handle. Choose what feels best for you!”}},{“@type”: “Question”,”name”: “What Tips Can Help Ensure Precise Nail Placement When Using A Finish Nailer For Crown Molding? “,”acceptedAnswer”: {“@type”: “Answer”,”text”: “To get precise nail placement, start by measuring carefully where you want to place the crown molding. Use a pencil to mark those spots lightly. Hold the finish nailer steady and straight when you press the trigger. Make sure the nailer is against the molding before you shoot the nail. Lastly, check the nails to ensure they are flush with the wood, so it looks nice!”}},{“@type”: “Question”,”name”: “Should I Use Wood Glue In Addition To A Finish Nailer When Installing Crown Molding For Added Stability? “,”acceptedAnswer”: {“@type”: “Answer”,”text”: “Yes, you can use wood glue with a finish nailer for crown molding. The glue helps keep the molding strong and tight. It fills any gaps and makes sure everything stays in place. Using both will make your work last longer and look better!”}}]}