Have you ever looked at a house and thought, “Wow, that looks amazing!”? Sometimes, the secret to a stunning home is in the details. One of those details is DIY wood shutters for the exterior. These shutters can boost your home’s curb appeal and make it stand out in your neighborhood.
Imagine walking up to your front door and seeing beautiful shutters framing your windows. They add charm and personality to any house. Plus, making them yourself can be a fun project! It’s a great way to express your style. Did you know that adding shutters can increase your home’s value? It’s true!
In this article, we will explore how you can create your own wood shutters. You’ll learn about the tools you need and some simple steps to follow. Get ready to learn how to enhance your home’s curb appeal with DIY wood shutters!
Table of Contents
Diy Wood Shutters Exterior: Enhance Your Home’S Curb Appeal

DIY Wood Shutters Exterior: Enhance Your Home’s Curb Appeal
Want to make your home stand out? DIY wood shutters can do just that! They are a simple and fun project you can tackle at home. Not only do they add charm, but they also boost your property’s value. Plus, wood shutters come in various styles and colors, allowing you to express your personality. Imagine welcoming guests with a beautiful, updated look. Get ready to transform your home with this creative touch!Why Choose Wood Shutters?
Advantages of wood shutters over other materials. How wood shutters contribute to curb appeal.Wood shutters offer unique benefits that make them stand out. They are strong and durable, unlike vinyl or plastic. Wood can be painted or stained to match your home’s style, adding charm. These shutters can boost your house’s curb appeal, making it look warm and inviting. Visitors often notice these details first.
What makes wood shutters special?
They provide better insulation. This keeps homes cooler in summer and warmer in winter. Plus, wood shutters resist fading better than other materials. They can also be customized easily.
- Wood shutters are eco-friendly.
- They can increase home value.
- They make homes look elegant and classic.
Essential Tools and Materials
List of tools needed for the project. Recommended types of wood and finishes.To build eye-catching wood shutters, gather these essential tools and materials. You will need:
- Measuring tape
- Hand saw or power saw
- Screwdriver
- Sandpaper
- Paintbrush
- Drill
- Level
For wood, choose cedar or pine, as they resist weather well. Finish your shutters with exterior paint or wood stain for added protection and style.
What tools do I need for DIY wood shutters?
You will need tools like a measuring tape, hand saw, and drill. These make the job easier and more fun!
Designing Your Shutters
Tips for measuring and designing custom shutters. Popular styles and architectural considerations.First up, measuring for your shutters is key! Grab a tape measure and check each window’s height and width. You want a snug fit, like a cozy sweater, but not too tight. Next, think about popular styles. Classic raised panel, trendy board and batten, or rustic shaker—the choice is yours! Make sure the style matches your home’s charm. Remember, a funny-looking shutter can be like a bad haircut—everyone notices! Use the table below to find the most common shutter styles!
| Shutter Type | Description |
|---|---|
| Raised Panel | Traditional and elegant, these are great for classic homes. |
| Board and Batten | Perfect for rustic styles, they look like a cozy cabin! |
| Shaker | Simple and stylish, good for modern or minimalist designs. |
Step-by-Step Installation Guide
Prepping your workspace and wood. Detailed steps to assemble and install shutters.First things first, prep your workspace. Grab some old rags because things might get messy! Put down a drop cloth to protect your floor and gather your materials. You’ll need wood, screws, and maybe a snack for energy! Next, let’s assemble your shutters. Cut the wood to size—no need for a magic wand; a saw works just fine. After that, screw the pieces together and check your work. Don’t forget: measure twice, cut once. Finally, hold the shutters up to your windows, and secure them in place. Voilà, you’ve got shutters more charming than a squirrel in pajamas!
| Step | Action |
|---|---|
| 1 | Prepare workspace |
| 2 | Gather materials |
| 3 | Cut wood |
| 4 | Assemble shutters |
| 5 | Install on windows |
Finishing Touches for Your Shutters
Techniques for staining or painting your shutters. Suggestions for hardware and additional accents.After you build your shutters, don’t forget the fun part: decoration! Start by choosing a paint or stain that fits your home’s style. Use a brush or spray gun for smooth coverage. Feeling adventurous? Add a splash of color or go for a classic look.
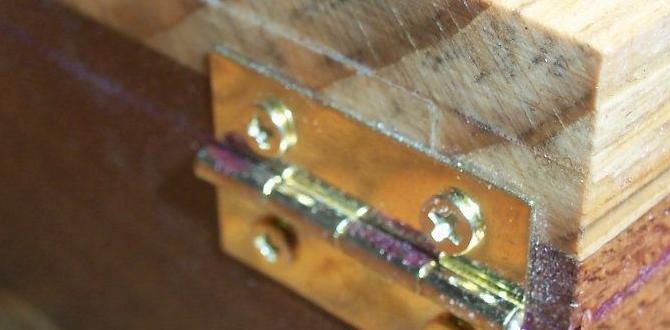
Consider using fun hardware, like unique handles or hinges; they can give your shutters a stylish twist. How about some cool accents, like decorative brackets? They add flair and make your shutters pop!
| Technique | Tip |
|---|---|
| Staining | Choose a color that complements your home. |
| Painting | Use outdoor paint for durability. |
| Hardware | Pick unique styles that stand out. |
These finishing touches will make your shutters look fantastic. Remember, the trick to vibrant shutters is the right mix of color and accessories. Shine bright like your shutters!
Maintenance Tips for Longevity
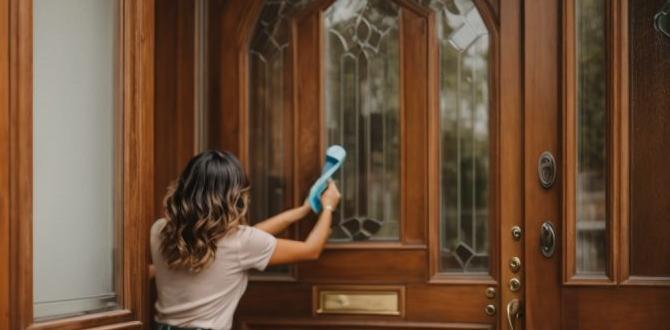
Regular care and maintenance practices. How to address common wear and tear issues.Caring for your DIY wood shutters keeps them looking great. Regularly clean them with soap and water. This helps remove dirt and dust. You should also check for chips or peeling paint. These can make your shutters look old. If you see any, sand and repaint them.
- Inspect shutters every few months.
- Use a soft cloth for cleaning.
- Touch up paint as needed.
Keeping an eye on your shutters will help them last longer and look beautiful.
How often should you maintain your wood shutters?
You should check your shutters every three to six months. Regular checks will help catch any problems early.
Case Studies: Before and After Transformations
Examples of homes that improved curb appeal with wood shutters. Testimonials and visual evidence of impact.Many homeowners have shared amazing stories about transforming their houses with wood shutters. One family, for example, saw a stunning change after adding charming blue shutters to their white house. It’s like they gave their home a cute pair of glasses! Pictures showed a huge difference, making their yard pop with personality. Another homeowner said, “I didn’t think my house could smile until I added those shutters!” Check out the comparison below to see these remarkable changes.
| Home Before | Home After |
|---|---|
 |
 |
Eco-Friendly Considerations
Sustainable wood options for DIY shutters. Tips for reducing waste during the project.Building ecofriendly shutters is a great way to help the planet. Consider using sustainable wood, like cedar or bamboo. These woods grow quickly and are good for the environment. You can also minimize waste by planning your cuts carefully. This helps you use more of the wood and throw away less. Here are some tips to reduce waste:
- Measure twice, cut once.
- Use leftover pieces for small projects.
- Donate unused materials to local groups.
What sustainable wood can be used for DIY shutters?
Cedar and bamboo are great choices for sustainable wood.Conclusion
In conclusion, DIY wood shutters can significantly boost your home’s curb appeal. They add charm and style while being cost-effective. You can choose colors and designs that reflect your personality. We encourage you to explore local materials and online tutorials to get started. Let’s enhance your home together—your creativity is the limit!FAQs
What Materials Are Best For Building Durable Diy Wood Shutters That Can Withstand Outdoor Conditions?To make strong wood shutters for outside, use weather-resistant wood like cedar or redwood. These woods can handle rain and sun without rotting. You should also add outdoor paint or sealant to protect the wood. This helps keep the shutters looking nice for a long time!
How Do You Measure Your Windows Accurately To Ensure A Proper Fit For Your Diy Wood Shutters?To measure your windows for DIY wood shutters, you need a tape measure. First, measure the width of the window at the top, middle, and bottom. Then, measure the height of the window on the left, middle, and right sides. Use the smallest width and height for your shutter size. This way, your shutters will fit just right!
What Are Some Popular Styles And Designs Of Wood Shutters That Can Enhance The Exterior Aesthetics Of A Home?Some popular styles of wood shutters are louvered, raised panel, and board and batten. Louvered shutters have slats that let in light but keep privacy. Raised panel shutters look like small doors with square patterns. Board and batten shutters have wide wooden boards with thinner strips on top. These designs can make your home look beautiful and stylish!
What Finishing Options, Such As Paint Or Stain, Are Recommended For Protecting Wood Shutters From Weathering And Uv Damage?To protect wood shutters, you can use good-quality paint or a special stain. Paint makes a strong barrier against rain and sun. Stain lets the wood show through while adding color and protection. Always choose a finish that is made for outdoor use. This way, your shutters will last longer and stay beautiful!
How Can You Install Diy Wood Shutters Securely And Ensure They Operate Smoothly Without Damaging Your Home’S Exterior?To install DIY wood shutters securely, start by measuring your windows carefully. Next, use screws to attach the shutters to the wall. Make sure they are level so they open and close easily. You can add hinges for smooth movement. Finally, be gentle to avoid scratching or damaging your home’s outside walls.