Have you ever wondered how to keep your birch wood projects looking amazing? Birch wood is beautiful but can be tricky to maintain. Without proper sealing, it can easily get damaged. Imagine spending hours crafting a lovely birch wood table, only to see it fade over time.
Many people do not realize that sealing birch wood is vital for its protection. It helps guard against moisture, dirt, and scratches. Did you know that a good seal can make birch wood last longer and appear shiny? In the following article, we will explore different birch wood sealing techniques. You’ll learn simple steps to protect and enhance your wooden treasures!
Table of Contents
Effective Birch Wood Sealing Techniques For Longevity

Birch Wood Sealing Techniques
Sealing birch wood is essential for its beauty and durability. Different techniques can protect this lovely material from moisture and damage. One popular method is using a clear wood sealant that enhances its natural grain. Did you know that applying oil can also nourish the wood? For best results, sand the surface smoothly before sealing. Properly sealed birch can last for years and looks stunning in any home. Ready to give your birch wood a protective coat?Understanding Birch Wood Properties
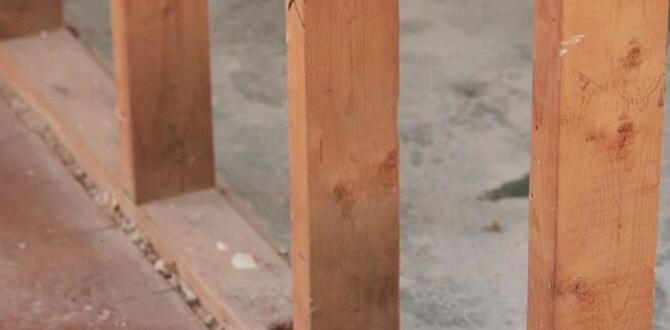
Characteristics of birch wood and its common uses.. Importance of sealing birch wood for durability and aesthetics..Birch wood has some amazing traits! It’s strong, yet lightweight, making it perfect for furniture and cabinets. People love its smooth surface, which is great for carving. Birch is most often used for furniture, plywood, and flooring. But wait! If you don’t seal it, your beautiful birch can suffer from scratches and stains. Sealing protects birch wood, keeping it looking fresh and shiny, and extends its life like a superhero cape!
| Characteristics | Common Uses |
|---|---|
| Strong and lightweight | Furniture |
| Smooth texture | Plywood |
| Good for carving | Flooring |
Sealing birch wood is important for both durability and looks—think of it as fashion for your furniture! A well-sealed piece lasts longer and stays beautiful. So, if you cherish your birch, seal it with care!
Why Seal Birch Wood?
Benefits of sealing birch wood including moisture resistance and protection from UV light.. Consequences of not sealing birch wood..Sealing birch wood saves it from becoming a soggy sponge when rain pours. A good seal keeps moisture out, which means less chance of warping or cracking. Plus, it protects against sneaky UV rays that can fade its natural beauty. If you skip sealing, birch wood can start to look like that old sandwich hiding in your backpack—nasty and sad! You’ll want your wood items to last longer and shine bright, like a star at a talent show.
| Benefits of Sealing Birch Wood | Consequences of Not Sealing |
|---|---|
| Moisture resistance | Warping and cracking |
| Protection from UV light | Fading and discoloration |
| Longer lifespan | Higher maintenance costs |
Preparing Birch Wood for Sealing
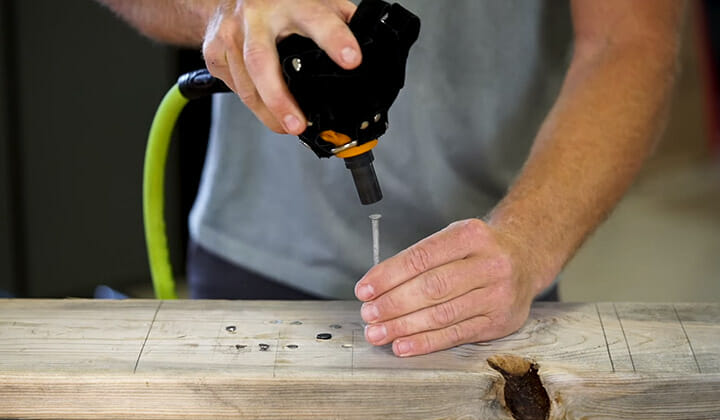
Steps to properly sand and clean birch wood before sealing.. Importance of wood condition and moisture content..To prepare birch wood for sealing, start with sanding. Use medium-grit sandpaper first, then switch to fine-grit. This smooths the surface. After sanding, clean the wood with a damp cloth. Remove dust and debris. A clean surface helps the sealant stick better.
The condition of the wood matters. It should be dry but not too dry. Check the moisture content with a meter. If it’s over 12%, let it dry. This step ensures a tighter seal and a longer-lasting finish.
Why is wood condition important before sealing?
Wood condition is important because properly prepared wood allows the sealant to bond effectively. If the wood is dirty or damp, the seal won’t work well. This can lead to problems like peeling, bubbling, or early damage.
Step-by-Step Birch Wood Sealing Techniques
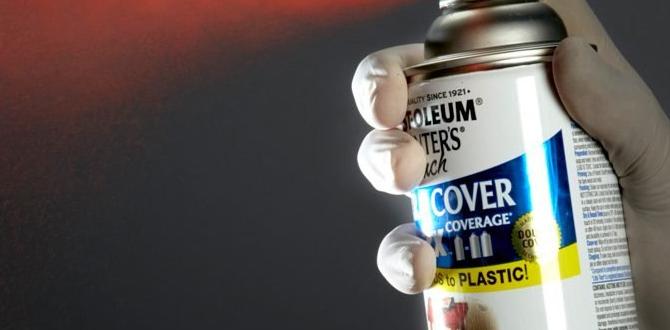
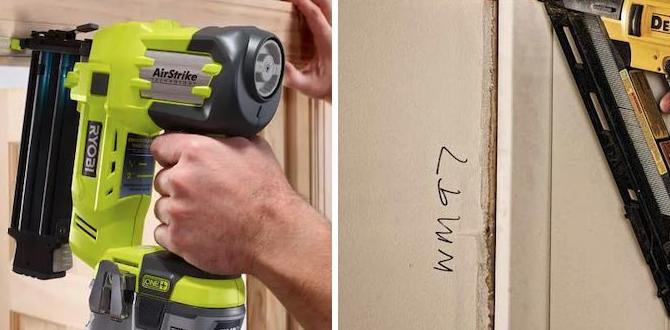
Detailed instructions for applying each type of sealant.. Tips for achieving an even finish and avoiding common mistakes..To seal birch wood effectively, start with the right sealant. Common choices include polyurethane, lacquer, or oil-based finishes. Apply in thin layers using a brush or roller. Always follow the product instructions, as each sealant can differ. To avoid drips, make nice strokes and keep your work area tidy. If you notice a bump, don’t panic—lightly sand it down and apply another layer. Remember, patience is key; a quick job may end up looking like a raccoon did it!
| Sealant Type | Application Method | Tips |
|---|---|---|
| Polyurethane | Brush or Roller | Use smooth strokes. |
| Lacquer | Spray | Work in a well-ventilated area. |
| Oil-based Finish | Cloth or Brush | Apply multiple thin layers. |
For an even finish, always sand between coats. Avoiding common mistakes, like applying too much sealant at once, will save you time and trouble. So grab your tools, get to sealing, and make that birch wood shine like a star in a talent show!
Maintenance of Sealed Birch Wood
Recommended care practices to prolong the life of the sealant.. Signs of wear and when to reseal birch wood surfaces..To keep sealed birch wood looking great, it’s important to care for it properly. Use a soft cloth to dust off the surfaces. Avoid harsh cleaners that can harm the sealant. Regularly check for signs of wear like scratches or fading. If the wood feels rough or looks dull, it may be time to reseal.
- Dust often to keep it clean.
- Avoid wet cleaning methods.
- Look for scratches or fading.
- Perform resealing every 1-3 years.
What are signs that I need to reseal birch wood?
Look for scratches, rough textures, or dull surfaces. If the wood no longer repels water, resealing may be needed. Regular checks help maintain its beauty and longevity.
Common Problems and Solutions
Issues that may arise with sealing birch wood and how to address them.. Troubleshooting tips for sealant application..Sealing birch wood can be tricky sometimes. You might notice problems like bubbles or uneven surfaces. These can happen if the sealant isn’t applied properly. If you see bubbles, don’t panic! This could mean your sealant was too thick. Thin it out a bit before trying again. Uneven surfaces can be fixed by sanding gently. Remember, patience is key! A calm approach can save the day, just like a superhero with a sponge. Below are some common hiccups and their quick fixes:
| Problem | Solution |
|---|---|
| Bubbles in sealant | Thin the sealant and apply gently. |
| Uneven coat | Smooth it out with fine sandpaper. |
| Drying issues | Ensure proper ventilation for quicker drying. |
Following these tips can help you seal that birch wood like a pro. Always remember, even the best woodworkers face challenges. It’s all part of the fun!
Conclusion
In summary, using the right birch wood sealing techniques is essential for protection and durability. You can choose from oil, varnish, or wax to seal your wood. Each method has its benefits for beauty and strength. We encourage you to try these techniques on your own projects. For more information, explore guides or videos about sealing birch wood. Happy crafting!FAQs
Sure! Here Are Five Related Questions On Birch Wood Sealing Techniques:To seal birch wood, you can use special wood sealers or oils. First, make sure the wood is clean and dry. Then, apply the sealer evenly using a brush or cloth. Let it dry completely before using the wood. This helps protect it from water and damage!
Sure! Just ask me a question, and I’ll provide a simple answer for you.
What Are The Best Sealants Or Finishes To Use For Birch Wood To Enhance Its Natural Beauty And Durability?To make birch wood look beautiful and last long, you can use a few finishes. Clear oil or polyurethane is great because it gives shine and protection. You can also try a water-based finish, which dries quickly and is easy to clean. Always remember to test a small spot first to see how it looks!
How Does The Moisture Content Of Birch Wood Affect The Sealing Process And The Choice Of Sealant?The moisture content of birch wood is very important when sealing it. If the wood is too wet, the sealant might not stick well. This can cause bubbles or cracks later. We need to choose a sealant that works best for the wood’s moisture level. Dry wood usually needs a different type of sealant than wet wood.
What Preparatory Steps Should Be Taken Before Sealing Birch Wood To Ensure Optimal Adhesion Of The Sealant?Before sealing birch wood, you should clean it well. Wipe off any dust or dirt with a damp cloth. Then, let the wood dry completely. Finally, lightly sand the surface to make it smooth. This will help the sealant stick better.
How Can Different Sealing Techniques, Such As Brushing Or Spraying, Impact The Final Appearance Of Sealed Birch Wood?Using different sealing techniques can change how birch wood looks. If you brush on the sealant, you might see more textures and details. Spraying can give a smooth, shiny finish. Each method may show the wood’s color differently, too. So, choose the technique that matches what you want your wood to look like!
What Are Some Common Mistakes To Avoid When Sealing Birch Wood To Prevent Issues Like Peeling Or Uneven Finishes?To avoid problems when sealing birch wood, don’t skip the sanding step. Make sure to clean the wood well before starting. Apply the sealer in thin layers instead of thick ones. Also, let each layer dry completely before adding more. Finally, use a good sealer made for wood. This helps prevent peeling and uneven spots.