Woodworking projects using glue only are achievable for beginners! Smart techniques and the right wood glues allow you to build sturdy, attractive items without nails or screws, perfect for simple DIY furniture and decor.
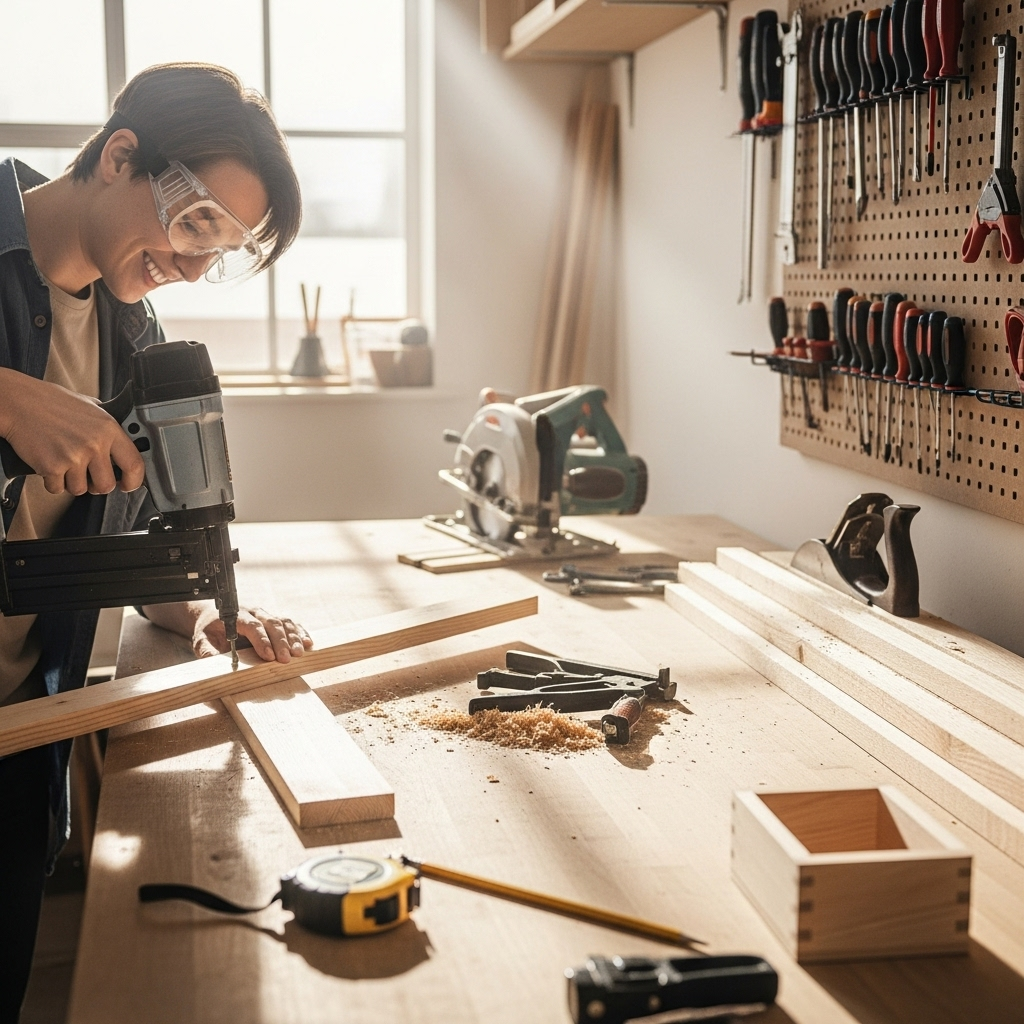
Hey there, fellow woodworkers! Jack Shaffer here from Nailerguy. Have you ever admired a beautiful wooden piece and thought, “Wow, that must have taken a lot of complicated tools and skills”? Maybe you’ve been hesitant to start woodworking because you don’t have every fancy gadget and gizmo. You’re not alone! Many beginners feel a bit intimidated. But what if I told you that you could create some fantastic woodworking projects using just… glue? That’s right, no nails, no screws, just the power of a good wood glue and some clever assembly. It sounds almost magical, doesn’t it? In this guide, we’ll show you exactly how to do it, transforming simple wood pieces into functional art with minimal fuss. Get ready to discover your inner craftsman with these genius glue-only builds!
Table of Contents
Why Glue-Only Woodworking? The Magic of a Strong Bond
There’s a certain elegance and simplicity to woodworking projects that rely solely on glue. For beginners, this method offers a less intimidating entry point into the woodworking world. You can focus on cutting accurately, understanding wood types, and mastering the art of clamping, without the added complexity of driving nails or screws.
Beyond the ease of access, glue-only construction has its own unique advantages:
Clean Aesthetics: Projects look sleek and seamless. There are no visible nail heads or screw holes to fill or cover. This is especially
great for decorative items or minimalist furniture where clean lines are key.
Reduced Tooling: You can bypass the need for nail guns, drills, and screw extractors. This saves money on tools and simplifies your workspace.
Material Versatility: Many different types of wood, from softwoods like pine to hardwoods like oak, can be successfully joined with glue. We’ll talk more about choosing the right wood later.
Precision Focus: Without the distraction of fasteners, you can truly hone your measurement and cutting skills.
Quiet Work: No banging hammers or whirring drills means you can work on your projects without disturbing the whole household!
Thinking about tackling a project with just glue? You’re on the right track to building some seriously cool stuff!
Choosing Your Secret Weapon: The Right Wood Glue
Before we dive into projects, let’s talk about the star of the show: wood glue. Not all glues are created equal, especially when you’re relying on them for structural integrity. For most beginner glue-only projects, you’ll want to focus on PVA (Polyvinyl Acetate) glues, commonly known as “wood glue.”
Here’s what to look for:
Type I, II, or III Waterproofing: For most indoor projects, a Type I (water-resistant) PVA glue is perfectly fine. If your project might get damp (like a bathroom shelf, though I’d still advise caution with glue-only water exposure!), consider Type II (waterproof) or Type III (highly waterproof).
“Extra-Fast” vs. “Standard”: Standard wood glues give you more working time, which is great for beginners ensuring proper alignment. “Extra-fast” glues can be handy for small, quick repairs or when you’re confident in your assembly speed.
Brand Reputation: Stick with well-known brands like Titebond (Original, II, or III), Gorilla Wood Glue, or Elmer’s Wood Glue. They’ve been tested and proven reliable.
Read the Label: Always check the manufacturer’s recommendations for application, drying time, and clamping pressure.
A Note on Other Adhesives: While other adhesives like epoxy or cyanoacrylate (super glue) have their uses, they typically aren’t the primary structural adhesive for most general woodworking projects unless specified. PVA wood glue is the go-to for a reason – it’s strong, forgiving, and easy to clean up.
Essential Tools for Glue-Only Woodworking
You might be surprised at how few tools you need to get started with glue-only projects. The focus shifts from fastening tools to cutting and clamping tools.
Here’s a basic list to get you going:
Measuring Tape and Pencil: For precise marking.
Saw: A simple handsaw is a great starting point. For more accuracy and ease, consider a miter saw (manual or power) or even a circular saw with a guide.
Clamps! Clamps! Clamps! This is your most crucial toolset. You’ll need a variety to hold pieces together snugly while the glue dries.
Bar Clamps or Pipe Clamps: Excellent for larger projects requiring long clamping pressure.
Hand Screw Clamps: Provide even pressure and are great for edges.
Spring Clamps: Useful for smaller pieces or quick holding jobs.
Corner Clamps (Optional but Recommended): These are lifesavers for ensuring 90-degree angles on box-like structures.
Sandpaper and Sanding Block: For smoothing edges and surfaces.
Safety Glasses: Non-negotiable for any woodworking.
Damp Cloth or Paper Towels: For wiping away excess glue.
Wood Glue Applicator (Optional): Some glues come with a fine-tip applicator; otherwise, a small brush or even a toothpick can help with precise application.
Genius Glue-Only Projects for Beginners
Let’s get to the fun part! These projects are designed to be straightforward, relying heavily on precise cuts and effective clamping.
Project 1: Simple Wooden Coasters
These are fantastic for getting a feel for glue-only construction. They’re small, quick, and you get a useful item at the end!
What You’ll Need:
A piece of 1×4 or 1×6 lumber (pine is great for this)
Your chosen wood glue
A saw
Sandpaper (120-grit and 220-grit)
Clamps (spring clamps or small bar clamps work well)
Optional: A sealant or finish (like polyurethane or wax)
Steps:
1. Measure and Cut: Decide on your coaster size. A good starting point is 4 inches by 4 inches. From your 1×4 (which is actually about 3.5 inches wide), you’ll cut four pieces roughly 4 inches long. If you’re using a 1×6 (about 5.5 inches wide), you’ll cut pieces about 4 inches long. Aim for consistent lengths!
2. Arrange Your Pieces: Lay out your four cut squares in a larger 2×2 square pattern, like a tic-tac-toe board.
3. Apply Glue: Carefully apply a thin, even layer of wood glue to the edges where the pieces will meet. Don’t go overboard; excess glue is messy and doesn’t make the joint stronger.
4. Assemble and Clamp: Press the pieces together firmly. Use your spring clamps or bar clamps to hold them in place while the glue dries. Apply just enough pressure to squeeze out a tiny bit of glue along the seams. If you’re using bar clamps, a clamp across the top and bottom of the assembly can help keep it flat.
5. Clean Up: Immediately wipe away any excess glue that squeezes out with a damp cloth. Dried glue is much harder to remove and can interfere with sanding and finishing.
6. Dry Time: Let the glue cure completely according to the manufacturer’s instructions. This is usually at least a few hours, but overnight is best for maximum strength.
7. Sand: Once dry, remove the clamps and sand all the surfaces and edges smooth. Start with 120-grit sandpaper to level any slight imperfections, then move to 220-grit for a silky-smooth finish.
8. Finish (Optional): Apply a protective finish like polyurethane, Danish oil, or paste wax to protect the wood and give it a nice look.
Project 2: Simple Wooden Box / Tray
This project moves up slightly in complexity but is still very manageable. You can use it as a desk organizer, a catch-all tray, or even a small gift box.
What You’ll Need:
A piece of 1×4 or 1×6 lumber
Your chosen wood glue
A saw
Sandpaper (120-grit and 220-grit)
Clamps (bar clamps and corner clamps are ideal here)
Optional: 1/4-inch plywood or hardboard for the bottom
Steps:
1. Determine Dimensions: Decide on the size of your box. Let’s say you want an 8-inch long, 6-inch wide, and 3-inch high box.
2. Cut Your Pieces:
Sides: You’ll need two pieces that are 8 inches long and 3 inches high, and two pieces that are 6 inches long and 3 inches high. If using a 1×4 (actual width ~3.5″), you might need to rip them to 3 inches or adjust your height. Alternatively, you could just use the full 3.5-inch width as your height.
Bottom (if using solid wood): If you’re not using plywood for the bottom, you’ll need to cut it to fit the inside dimensions of your assembled box sides. For our example, this would be about 7.75 inches by 5.75 inches (accounting for the thickness of the side pieces).
3. Prepare for Assembly: Lay out your four side pieces in a rectangle, ensuring the ends of the shorter pieces butt up against the inside faces of the longer pieces (or vice-versa – consistency is key!). The choice here affects the outer dimensions.
4. Apply Glue: Apply a thin, even bead of wood glue to the end grain of the shorter side pieces where they will meet the longer side pieces. Also, apply glue to the edges of the bottom piece if you’re using solid wood.
5. Assemble and Clamp:
Sides: This is where corner clamps are invaluable. They hold your corners at a perfect 90 degrees while you apply bar clamps across the length of the sides. Ensure the joints are tight and the corners are square. Wipe away excess glue.
Bottom: If using solid wood for the bottom, once the sides are glued and clamped, you can carefully slide the bottom into place. If you’re creating a dado groove for the bottom before assembly (more advanced), apply glue inside the groove and press the bottom in. If it’s a simple butt joint, apply glue to the bottom edges of the sides and press the bottom piece on, then clamp.
Plywood Bottom: For a simpler plywood bottom, assemble the four sides first. Then, you can either glue and clamp the plywood directly to the bottom edges of the sides, or you can add small wooden cleats inside the box to support the plywood bottom. Gluing directly is simpler for a truly glue-only build.
6. Dry Thoroughly: Allow ample drying time. Overnight is recommended for a box structure.
7. Sand and Finish: Sand all exterior surfaces smooth, starting with 120-grit and finishing with 220-grit. Sand the interior as well. Apply your desired finish.
Project 3: Simple Wooden Shelf Unit (No Visible Fasteners)
This project might seem ambitious for glue-only, but with careful planning, it’s totally doable and looks fantastic. Think of a simple tiered shelf where the supports pass through the shelves, or cantilevered shelves where the support is hidden. We’ll focus on a simple through-tenon style shelf for a clean look.
What You’ll Need:
Lumber (e.g., 1×8 or 1×10 for shelves, 1×4 or 2×2 for uprights)
Wood glue
Saw (miter saw or handsaw with a miter box for accurate angles)
Drill with spade bits or Forstner bits (for the through-holes)
Sandpaper (120-grit and 220-grit)
Clamps (bar clamps are essential)
Pencil and measuring tape
Safety glasses
Steps:
1. Design Your Shelf: Decide on the number of shelves and the overall height. Let’s plan a simple two-shelf unit where uprights pass through the shelves.
2. Cut Components:
Uprights: Cut two upright pieces to your desired total height.
Shelves: Cut your shelf pieces to the desired width.
3. Mark Shelf Locations: On the uprights, carefully mark the exact locations where each shelf will pass through. Ensure these marks are consistent on both uprights. The center of your shelf’s thickness is a good target for the center of your hole.
4. Drill Through Holes: Using a drill bit that matches the thickness of your shelf material (e.g., if using 3/4-inch thick shelves, use a 3/4-inch bit), drill precise holes through the uprights at your marked locations. A drill press is ideal for perfectly perpendicular holes, but a steady hand and a good jig can work with a handheld drill. Take your time and drill from both sides to meet in the middle for cleaner holes if needed.
5. Prepare Shelves: Ensure the ends of your shelves are cut perfectly square.
6. Dry Fit: Slide the shelves through the holes in the uprights to ensure a snug fit. You want a tight fit, but not so tight that you can’t remove them for glue-up. You might need to do a little fine-tuning with sandpaper.
7. Glue-Up:
Apply a generous, even bead of wood glue around the entire perimeter of the shelf where it will pass through the upright hole.
Apply glue inside the drilled holes on the uprights.
Press the shelves through the uprights, ensuring they are seated all the way.
8. Clamp and Align: This is the trickiest part. You need to clamp the assembly so the shelves are perfectly horizontal and the uprights are vertical. Use bar clamps on the outside of the uprights and place shims or scrap wood to support the shelves from underneath if needed. You might need to clamp diagonally across the structure to prevent racking. For best results, clamp the shelves to a straight edge or workbench to ensure they are level.
9. Clean and Dry: Wipe away excess glue as usual. Let the unit dry thoroughly – 24 hours is a good benchmark for a structure like this.
10. Sand and Finish: Once dry, sand all surfaces smooth. Pay attention to the shelf edges and the uprights. Apply your chosen finish.
Table: Pros and Cons of Glue-Only Woodworking
| Pros | Cons |
| :————————————– | :—————————————————– |
| Clean, seamless aesthetic | Requires very precise joinery |
| No visible fasteners (nails, screws) | Long drying times needed for strength |
| Fewer specialized tools required | Clamping is absolutely critical and can be intensive |
| Great for beginners to practice skills | May not be suitable for extremely heavy-duty structures |
| Cost-effective (saves on fasteners) | Potential weakness if glue joints are poorly made |
| Quieter construction process | Limited in the types of joints that can be used easily |
Understanding Different Wood Types for Glue-Ups
While PVA glue is versatile, the type of wood you use can impact the strength and ease of your glue-only projects.
Softwoods (Pine, Fir, Cedar):
Pros: Inexpensive, easy to cut and shape, widely available. Great for practice projects and items where extreme strength isn’t critical.
Cons: Can dent and scratch easily, may warp more readily than hardwoods.
Glue Performance: Bonds well to softwoods.
Hardwoods (Oak, Maple, Walnut, Cherry):
Pros: More durable, resistant to dents and scratches, often have beautiful grain patterns.
Cons: More expensive, harder to cut and work with, can be heavier.
Glue Performance: Bonds exceptionally well to hardwoods, especially if the wood surfaces are clean and free of dust.
Plywood and MDF:
Plywood: Generally bonds well with wood glue, especially at the edges of the veneers. It’s strong and stable.
MDF (Medium-Density Fiberboard): MDF is porous and can absorb glue readily. It bonds well, but you must use enough glue to penetrate the fibers. MDF can be heavy and doesn’t have a grain pattern, so its finished look is different.
For most beginner glue-only projects like coasters, boxes, and simple shelves, pine or poplar are excellent, affordable choices. If you want something more heirloom-quality, try maple or oak.
Tips for Achieving Superior Glue Joints
A successful glue-only project hinges entirely on the strength of the glue joints. Here are some pro tips to ensure yours are top-notch:
1. Surface Preparation is Key: Ensure all surfaces to be glued are clean, smooth, and free of dust, oil, or old finishes. A light sanding just before gluing can open up the wood pores for better adhesion.
2. Fit the Pieces Perfectly: Before applying glue, do a dry fit. The pieces should fit together snugly with no gaps. Gaps are the enemy of glue joints! If the fit is too loose, the glue alone won’t be strong enough. If it’s too tight, you risk deforming the wood during assembly.
3. Apply Glue Evenly and Sparingly: Use a thin, continuous bead of glue along the entire joint surface. You want enough glue to cover the surface but not so much that it oozes out in large blobs. A good rule of thumb is that a small amount of squeeze-out indicates adequate coverage.
4. Consider Grain Direction: Where possible, try to orient your wood so that end grain is not directly glued to end grain for the primary structural joints. Wood glue is strongest when joining face grain to face grain or edge grain to face/edge grain. End grain can be weaker because it acts like a sponge, allowing the glue to soak in too deeply, or the porous structure doesn’t offer as much surface area for molecular bonding.
5. Clamp with Confidence: This is non-negotiable. Apply enough clamping pressure to bring the joint surfaces tightly together and cause a small amount of glue to squeeze out along the entire length of the joint. Too little pressure, and the joint won’t be fully engaged. Too much pressure can squeeze out too much glue, weakening the joint, or even crush the wood fibers.
6. Use the Right Clamps: Different clamps are suited for different jobs. Use bar clamps for long panels, hand screw clamps for edges where you need controlled, even pressure, and corner clamps for perfect 90-degree angles.
7. Clean Up Promptly: Wipe away any excess glue squeeze-out immediately with a damp cloth. Dried glue is very difficult to sand and can prevent finishes from adhering properly.
8. Allow Adequate Cure Time: Wood glue needs time to cure and reach its full strength. While it might feel dry to the touch after a few hours, it often takes 24 hours or more to reach maximum strength. For critical joints or structural projects, wait the full recommended time. Visit Titebond’s handy tips on proper gluing for more detailed advice.
Frequently Asked Questions About Glue-Only Woodworking
Q1: Can any wood be joined with just glue?
A1: While wood glue bonds to most wood types, extremely oily woods like teak or cocobolo can be more challenging and may require special surface preparation or adhesives. For common woods like pine, oak, and maple, PVA wood glue works very well.
Q2: How do I know if I’m using enough glue?
A2: A good sign of sufficient glue is a small, consistent bead of glue squeezing out from the joint when you apply clamping pressure. If you see no squeeze-out, you might not have applied enough glue to the entire surface. If you see large globs, you’ve used too much.
Q3: What if there’s a small gap in my joint?
A3: Ideally, your joints should fit perfectly with no gaps. For very small, hairline gaps (less than 1/32 inch), wood glue can sometimes bridge them. For larger gaps, it’s best to try and re-cut or adjust the piece for a tighter fit. You can also use specialized wood filler or epoxy mixed with sawdust for repairs, but this isn’t ideal for primary structural joints on a “glue-only” build.
Q4: How long does it take for the glue to dry completely?
A4: Most standard wood glues will feel dry to the touch in 30-60 minutes, and you can often remove clamps after a couple of hours. However, they typically take 24 hours to reach their full strength. For maximum durability, especially for items that will experience stress, wait the full 24 hours before putting them into use.
Q5: Is glue-only construction as strong as using nails or screws?
A5: When done correctly with tight-fitting joints and proper clamping, PVA wood glue joints can actually be stronger than the wood itself. However, the type of joint matters. A well-made glue joint can outperform fasteners, but complex glue-only joints need careful execution. For very heavy-duty or structural applications, mechanical fasteners are often still recommended or used in conjunction with glue.
Q6: How do I prevent my project from warping while the glue dries?
A6: Proper clamping is the best way to prevent warping. Ensure your clamps are distributed evenly and apply consistent pressure. For panels or shelves, using clamps on both sides can help keep them flat. Letting the piece dry flat on a stable, level surface is also important.
Q7: Can I use glue for outdoor projects?
A7: For outdoor projects, you must* use a waterproof wood glue (Type II or Type III). Even then, glue-only constructions might be less durable outdoors than those incorporating fasteners designed for outdoor use. You’ll also need to apply a robust outdoor-rated finish to protect the wood. For best results outdoors, consider fasteners.
Conclusion: Build with Confidence, Glue with Skill
See? Building with wood doesn’t always require a workshop full of power tools and a mastery of joinery techniques. By understanding the power of wood glue and focusing on precision in your cuts and clamping, you can create beautiful, functional woodworking projects with surprising ease.
These glue-only builds are a fantastic way for beginners to gain confidence, develop essential skills like accurate measuring and sanding, and produce satisfying results. Whether you make a set of coasters to protect your furniture or a handy storage box, each project completed will add to your growing woodworking knowledge.
So, grab some wood, get your favorite wood glue, and don’t forget those clamps! You’ve got this. Embrace the simplicity, enjoy the process, and be proud of what you create. Happy building!