Build Your Dream Dining Table: A Beginner’s Woodworking Guide. This guide breaks down designing and building a sturdy, beautiful dining table into simple steps. We’ll cover choosing materials, essential tools, and assembly techniques, empowering you to create a centerpiece for your home with confidence. Get ready to transform wood into a functional work of art!
Hey there, budding woodworkers! Jack Shaffer here from Nailerguy. Ever look at your dining room and wish for a table that’s just right? Maybe your current one is wobbly, or perhaps you have a vision for a piece that truly fits your style. Building your own dining table might sound like a huge undertaking, but I’m here to tell you it’s absolutely achievable, even for beginners. Think of it as a rewarding journey where you craft something both beautiful and incredibly useful. We’ll walk through the whole process, making it easy to understand and tackle. Ready to make your dream dining table a reality?
Table of Contents
Why Build Your Own Dining Table?
Let’s face it, dining tables can get pricey, especially if you’re looking for solid wood construction and a design that speaks to you. Commercial options often force you to compromise on size, style, or quality to fit your budget. Building your own table offers incredible advantages. You get complete control over the dimensions, ensuring it fits your space perfectly. You can select the exact wood species and finish that matches your decor. Plus, there’s an immense sense of satisfaction in creating a functional piece of furniture with your own hands. It’s not just a table; it’s a legacy piece you’ll enjoy for years to come.
Choosing Your Dining Table Project Style
The first step in building your dining table is deciding on the style. This will influence everything from the materials you need to the tools and techniques you’ll employ. For beginners, simpler designs are your best friend. They require fewer complex joints and can be assembled more easily, leading to a higher chance of success and building your confidence.
The Farmhouse Table
The farmhouse style is incredibly popular for a reason – it’s sturdy, classic, and relatively straightforward to build. These tables often feature thick, solid wood tops and substantial legs, sometimes with a slight taper. They rarely use intricate joinery, relying on strong connections that are beginner-friendly.
The Simple Slab Table
This style uses a single, large slab of wood for the tabletop. It’s minimalist and highlights the natural beauty of the wood grain. The main challenge here is sourcing a suitable slab and ensuring it’s properly prepared. The base can be as simple as four legs or a DIY trestle base.
The Mission Style Table
Inspired by the Arts and Crafts movement, Mission tables are characterized by strong, straight lines, square legs, and often, mortise and tenon joinery. While incorporating mortise and tenon joints can be a step up for beginners, many variations simplify these, making them accessible.
Factors to Consider When Choosing a Design:
- Skill Level: Be honest about your current woodworking abilities. Start with something manageable.
- Tools Available: Some designs require more specialized tools than others.
- Time Commitment: More complex designs will naturally take longer to complete.
- Budget: The type and amount of wood, as well as hardware, will impact cost.
- Aesthetics: Choose a style that you’ll love looking at every day!
Selecting Your Wood: The Heart of Your Table
The wood you choose will significantly impact the look, durability, and cost of your dining table. For beginners, it’s wise to select woods that are relatively stable, easy to work with, and readily available. Avoid woods that are excessively prone to warping or difficult to machine.
Beginner-Friendly Wood Options:
- Pine: Inexpensive, lightweight, and easy to cut and sand. It’s a great choice for practice projects. However, it’s softer and can dent more easily.
- Poplar: A bit harder than pine, paints well, and is reasonably priced. It’s straight-grained and easy to work with.
- Maple: Harder than pine or poplar, offering good durability. It has a fine, even texture and takes finishes beautifully. It can be a bit pricier.
- Oak: A classic choice for furniture. It’s strong, durable, and has a beautiful, distinctive grain pattern. Red oak is generally more affordable and easier to find than white oak.
Wood Cheat Sheet:
| Wood Type | Pros | Cons | Best For |
|---|---|---|---|
| Pine | Affordable, lightweight, easy to work, takes paint well. | Soft, dents easily, can have knots. | Practice projects, rustic farmhouse tables. Available at most home improvement stores. |
| Poplar | Stable, affordable, paints exceptionally well, straight grain. | Can be prone to denting if not finished well, not exceptionally beautiful unfinished. | Painted tables, sturdy bases. Often found at lumberyards and home improvement stores. |
| Maple | Hard, durable, smooth finish, attractive grain. | More expensive, can be harder to cut, requires careful finishing to avoid blotching. | Modern or classic tables, long-lasting pieces. |
| Oak (Red/White) | Very strong, durable, beautiful grain, classic look. | More expensive, heavier, can be harder to work with. | Traditional, farmhouse, and mission style tables. Easily found at lumberyards. |
When buying lumber, look for boards that are as straight as possible. Avoid boards with visible cracks, excessive warping, or large knots that might compromise the strength of your tabletop or legs.
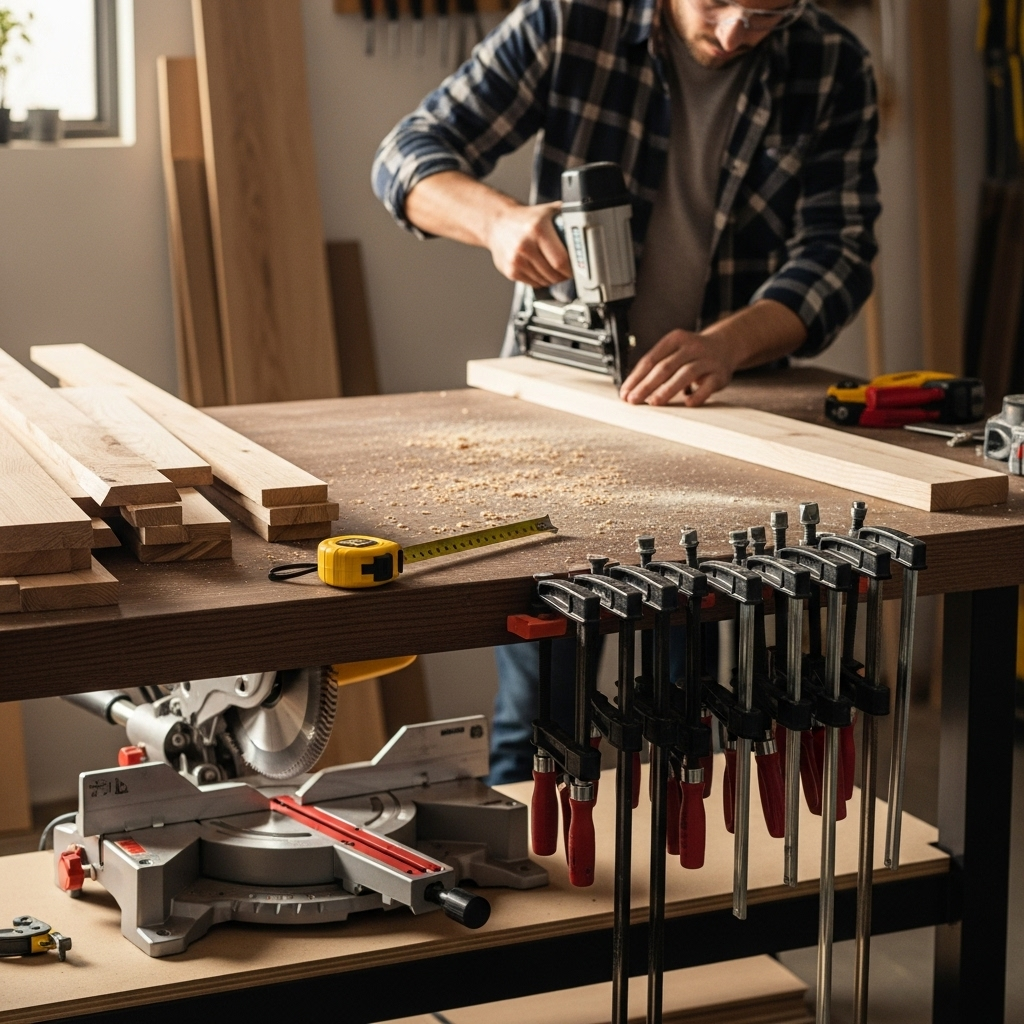
Essential Tools for Building a Dining Table
You don’t need a fully-equipped workshop to build a dining table, but a few key tools will make the job much easier and ensure a professional-looking result. As a tool guy, I can tell you that having the right equipment is half the battle!
Must-Have Tools:
- Measuring Tape & Pencil: For accurate layout and marking.
- Safety Glasses: Non-negotiable! Protect your eyes from sawdust and debris.
- Hearing Protection: Especially when using power tools.
- Saw:
- Circular Saw: Versatile for cutting larger boards to rough length. A guide or straight edge will improve cut accuracy significantly.
- Miter Saw (Optional but Highly Recommended): For precise crosscuts and making repeatable angles, especially for legs and apron pieces.
- Jigsaw (Optional): Useful for cutting curves if your design calls for them.
- Drill/Driver: For pre-drilling holes and driving screws. Having a cordless model is incredibly convenient.
- Clamps: You can never have too many! Bar clamps, pipe clamps, and F-style clamps are all useful for holding pieces together while glue dries.
- Sander: An orbital sander or random orbital sander makes smoothing surfaces much faster and easier than sanding by hand.
- Workbench or Stable Sawhorses: A solid surface to work on is crucial for safety and accuracy.
- Straight Edge or Combination Square: For marking straight lines and checking for squareness.
Helpful, But Not Essential (Initially):
- Router: Great for adding decorative edges, flattening surfaces, or cutting dados.
- Table Saw: Provides the most accurate and repeatable cuts for ripping lumber and cutting joinery.
- Planer: To mill rough lumber to consistent thickness and achieve very smooth surfaces.
Planning Your Dining Table Design: Dimensions and Cut Lists
Before you buy a single piece of wood, you need a solid plan. This involves deciding on the exact size of your table and creating a detailed cut list. Accuracy here prevents costly mistakes later.
Standard Dining Table Dimensions:
These are guidelines; adjust based on your space and needs. A common rule of thumb is to allow at least 24 inches of width for each person seated at the table.
| Table Size (Length x Width) | Seating Capacity (Approximate) | Seating Space per Person (Width) |
|---|---|---|
| 60″ x 36″ | 4-6 | 15″-18″ |
| 72″ x 36″ | 6 | 18″-20″ |
| 72″ x 40″ | 6-8 | 18″-20″ |
| 84″ x 40″ | 6-8 | 20″-22″ |
| 96″ x 42″ | 8-10 | 21″-23″ |
Consider the height as well. Standard dining table height is typically 29-30 inches from the floor to the top of the table. Remember to factor in the thickness of your tabletop when calculating leg length.
Creating Your Cut List:
A cut list details every single piece of wood you’ll need for your project, including its exact dimensions (length, width, and thickness). This is crucial for efficiently buying lumber and making accurate cuts.
Example Cut List for a Simple Farmhouse Table (Tabletop: 72″ x 36″):
- Tabletop Boards: (Assuming 1×6 or 1×8 lumber, plan for 4-6 boards, depending on width) Measure and cut to rough length, e.g., 72.5″
- End Apron Boards: (e.g., 1×6 lumber) 2 pieces, each 36″ long (minus the width of the two side aprons).
- Side Apron Boards: (e.g., 1×6 lumber) 2 pieces, each 60″ long (minus the width of the two end aprons).
- Legs: (e.g., 4×4 lumber) 4 pieces, each 28″-29″ long (adjust for desired table height minus tabletop thickness).
Important Note: Always add a little extra length to your initial cuts, which you can trim down later for perfect final dimensions. This accounts for any small inaccuracies in sawing.
Step-by-Step Guide: Building Your Dining Table
Let’s get building! This guide focuses on a common and beginner-friendly design: a solid wood tabletop attached to a simple apron and leg base. We’ll assume you’ve chosen your wood, have your tools ready, and possess a clear plan and cut list.
Step 1: Prepare Your Lumber
If you bought rough lumber, you’ll need to mill it down to your desired thickness and ensure all edges are square. If you bought pre-dimensioned lumber (like from a big box store), you can often use it as-is, but inspect boards for straightness and squareness.
Tip: For tabletops, you’ll want to joint one edge of each board to make it perfectly straight and square. Then, rip the opposite edge to the same width. This ensures your boards will fit together nicely.
Step 2: Assemble the Tabletop
This is where your tabletop boards come together. Lay out your boards face down on a flat surface, arranging them to get the best grain pattern. You want the edges to meet perfectly.
- Edge Gluing: Apply a quality wood glue (like Titebond II or III) to the joining edges of your boards. Spread it evenly.
- Clamping: Bring the boards together and clamp them firmly. Use as many clamps as you can effectively manage to ensure even pressure across the entire joint. Make sure the top surface remains as flat as possible. A good trick is to use cauls (scrap wood pieces) across the top and bottom of the tabletop to help keep it flat.
- Dry Time: Let the glue cure fully according to the manufacturer’s instructions – usually at least 24 hours. Don’t be tempted to rush this!
- Flattening and Squaring: Once dry, you might have some glue squeeze-out to remove. Then, you’ll need to make the tabletop flat and square. If you have a router with a large surfacing bit or a planer, this is ideal. Otherwise, careful sanding can achieve this. Trim the ends of the glued-up tabletop to achieve your final length and ensure it’s perfectly square.
External Resource: For more on glue-ups and achieving flat surfaces, check out this guide on gluing up panels from Wood Magazine.
Step 3: Build the Apron and Leg Assembly
The apron is the frame that sits just below the tabletop, and the legs attach to it. This provides structural support.
- Cut Pieces: Cut your apron pieces (from Step 1’s cut list) and legs to their final lengths. Ensure leg tops are square to the sides they will attach to.
- Join Apron to Legs: There are several beginner-friendly ways to do this:
- Pocket Holes: This is a very popular and strong method for DIYers. You drill angled holes in the apron pieces and use specialized screws to join them to the legs. This requires a pocket hole jig, but it’s a worthwhile investment.
- Screws and Glue: You can also pre-drill holes through the apron pieces into the legs and secure them with wood glue and screws. Consider using decorative plugs or dowels to hide the screw heads for a cleaner look.
- Corner Braces: While not the most elegant, metal corner braces are an easy way to reinforce apron-to-leg joints on the inside of the frame.
- Ensuring Squareness: As you assemble, constantly check that your base is square using a good framing square. A wobbly base will lead to a wobbly table.
- Assemble the Apron: Join the four apron pieces together to form a rectangle or square, then attach them to the legs.
Step 4: Attach the Tabletop to the Base
This is the moment where your table really starts to look like a table!
- Flip the Apron Assembly: Turn your leg and apron assembly upside down on a protected surface.
- Position the Tabletop: Carefully place your prepared tabletop upside down onto the inverted apron assembly. Center it so there’s an even overhang on all sides.
- Attachment Methods:
- Figure-8 Fasteners: These metal fasteners are excellent for tabletops. They screw into the apron and the underside of the tabletop, allowing for wood movement (expansion and contraction) without stressing the joints.
- Wooden Buttons or Z-Clips: Similar to figure-8 fasteners, these allow for wood movement. They typically fit into a dado (a groove) cut into the apron.
- Pocket Holes (from Apron to Top): While less ideal for allowing wood movement, you can use pocket holes to attach the apron directly to the underside of the tabletop if you’re using a very stable hardwood and are confident in your joinery. However, the fastener methods are preferred for longevity.
Tip: For table tops made of multiple boards, it’s crucial to use fasteners that allow for wood movement. Solid wood naturally expands and contracts with changes in humidity. Not allowing for this movement can cause your tabletop to crack or warp over time.
Step 5: Sanding and Finishing
This is where your table goes from looking like raw wood components to a beautiful finished piece.
- Sanding: Start with a medium grit sandpaper (e.g., 100 or 120 grit) to remove any imperfections, glue residue, and level out the surface. Progress to finer grits (180, then 220 grit) for a smooth finish. Sand all surfaces thoroughly, including the legs and apron. Clean off all dust between grits.
- Pre-stain Conditioner (Optional but Recommended for Pine/Poplar): If you’re using softwoods like pine or poplar and plan to stain, applying a pre-stain conditioner will help prevent blotchy coloring.
- Staining (Optional): Apply your chosen stain with a brush or rag, following the product’s instructions. Wipe off excess stain to achieve your desired color depth.
- Sealing/Top Coat: Apply several coats of a durable finish like polyurethane, varnish, or a tabletop-specific finish. These protect the wood from spills and wear. Lightly sand with very fine grit sandpaper (320 or 400 grit) between coats for a smoother finish, and wipe away dust.
Safety Note: Always work in a well-ventilated area when sanding and finishing. Dispose of rags soaked in finishing products properly, as they can be a fire hazard.
Troubleshooting Common Beginner Issues
Even with the best plans, woodworking can throw some curveballs. Here are a few common issues beginners encounter and how to handle them.
Issue: Wobbly Table
Cause: Uneven leg lengths, the base isn’t square, or the floor is uneven.
Solution: Measure your legs carefully. Check the base for squareness at every assembly stage. If the floor is the culprit, consider adding adjustable feet or felt pads to the bottom of the legs.
Issue: Gaps Between Tabletop Boards
Cause: Boards weren’t jointed perfectly, insufficient clamping pressure, or wood movement.
Solution: For small gaps, you might be able to fill them with wood filler or epoxy after assembly. Going forward, ensure your boards are jointed well before gluing and use ample clamping pressure. If you used fasteners that allow for wood movement, this is less likely to be a permanent problem.
Issue: Uneven Staining/Finishing
Cause: Inconsistent sanding, not removing dust, or applying finish to uneven surfaces.
Solution: Ensure you sand thoroughly and progressively through grits. Always wipe away all dust before applying stain or finish. If it’s a minor issue, you might be able to lightly sand and reapply the finish. For significant blotchiness on softwoods, a pre-stain conditioner is your best friend for future projects.
—
Frequently Asked Questions (FAQ)
Q1: How much wood do I need for a dining table?
A1: The amount of wood depends entirely on the dimensions of your table, the width of the boards you use, and the design of the base. A good starting point is to calculate the surface area of your tabletop and the length of lumber needed for the apron and legs, then add about 10-15% for waste and mistakes.
Q2: What’s the difference between hardwood and softwood, and which should I use?
A2: Hardwoods come from deciduous trees (like oak, maple, walnut) and are generally denser and more durable. Softwoods come from coniferous trees (like pine, fir, cedar) and are typically lighter, easier to work with, and less expensive. For a dining table expecting daily use, hardwoods like oak or maple are excellent choices for durability, but pine or poplar can work well, especially if painted, and are more budget-friendly for beginners.
Q3: Do I really need to use wood glue? Can’t I just use screws?
A3: While screws provide mechanical strength, wood glue, when properly clamped, creates a bond that is often stronger than the wood itself. For structural joints like tabletops and apron-to-leg connections, using both glue and screws (or other joinery) provides the best and most durable result. Glue is essential for strong, long-lasting furniture.
Q4: How important is it to let the wood “move” or account for expansion/contraction?
A4: It’s extremely important, especially for tabletops made from multiple boards or those spanning a significant width. Wood naturally absorbs and releases moisture from the air, causing it to expand and contract across its width. If you rigidly fix all edges of a tabletop to a base, it will eventually crack or warp as it tries to move. Using fasteners that allow for this movement (like figure-8s, Z-clips, or wooden buttons) is key to a durable table.
Q5: Can I build a dining table with just hand tools?
A5: Yes, you absolutely can! Building with hand tools requires more time, effort, and skill in sharpening and using them correctly (like hand saws, chisels, planes). However, it’s a very rewarding experience. For a beginner wanting to get a table done in a reasonable timeframe, a few essential power tools like a circular saw, drill, and sander will significantly speed up the process.
Q6: How can I make sure my tabletop sits flat and doesn’t cup?
A6: When preparing your boards for the tabletop, ensure they are milled flat and square. When gluing up, use strong clamps and consider cauls to keep the panel flat. After the glue-up, if you have access to a planer or router sled, flatten the top. For very wide tabletops, consider using quarter-sawn lumber, which is inherently more stable, or a design that accounts for movement. Proper finishing on both the top and bottom surfaces also helps equalize moisture absorption.
Resource on Wood Movement: Understanding wood movement is critical. Woodworking Network has a great article on why and how wood moves.
Conclusion
You’ve done it! You’ve gathered the knowledge and the confidence to embark on building your very own dining table. From selecting the perfect wood to carefully assembling each component, you’re well on your way to creating a stunning piece of furniture that will be the heart of countless meals and memories. Remember, the journey of building is just as rewarding as the destination. Take your time, embrace the process, and don’t be afraid to learn as you go. Every scratch, every perfect joint, tells the story of your dedication and skill. So grab your tools, put on your safety glasses, and start building that dream dining table. You’ve got this!