Imagine you’re building a treehouse with your dad. He hands you a brad nailer for the trim. But wait, what size brad nail should you use? It’s like picking the right tool for the job, only here, it’s tiny nails. You might wonder if the size really matters. Well, it does! Using the wrong size can make things fall apart.
Have you ever tried using a huge nail for a tiny project? It’s like trying to fit an elephant in a small room. Choosing the right size brad nail for trim ensures everything stays snug and neat.
Let’s unlock the secrets of choosing the right brad nail size, so your next project stands tall!

Table of Contents
What Size Brad Nail Is Best For Trim: An Expert Guide
Choosing the right brad nail size for trim is essential. Most often, a 2-inch brad nail works well for securing trim. Fun fact: these nails are like tiny, effective helpers in home projects! They hold things together without splitting wood. Have you ever wondered if longer nails mean stronger hold? That’s not always true. It’s about the right balance for a firm fit without damage. Curious to know more about how this works? Let’s see!
Understanding Brad Nails: What Are They?
Definition and primary uses of brad nails. Comparison with other types of nails.
Brad nails are small and made from thin wire. They are great for attaching delicate trim. Their size makes them almost invisible. This is why they are popular for finishing work. How do they compare to other nails? Other nails, like common nails, are thicker. They leave bigger holes and can split wood. Brad nails make work neat. But for heavy work, use other types of nails.
What size brad nail for installing trim?
For installing trim, use 18-gauge brad nails. They range from 1 to 2.5 inches long. Choose size based on the trim thickness. They secure well without splitting wood.
- 1-inch for thinner trims
- 1.5-inch for medium trims
- 2-inch for thicker trims
Brad nails make work look tidy, ensuring everything stays put. They are a go to for neat, strong trim jobs!
Importance of Choosing the Right Brad Nail Size for Trim
Impact on the quality of the finish. Common issues with incorrect nail sizes.
Choosing the correct brad nail size for trim often feels like picking the right spoon for cereal: surprisingly crucial! Too short, and the nail might loosen; too long, and it could split the trim or poke through. Both cases can ruin the finish’s quality. Imagine proudly finishing a task, only to have things fall apart or appear messy. That’s a common issue with incorrect nail sizes. Using the right brad nail ensures everything stays neat and tidy. Think of Goldilocks—she knew the importance of getting things just right.
| Incorrect Size | Result |
|---|---|
| Too Short | Loose trim |
| Too Long | Trim split or poking nails |
Remember, a job well-nailed is a job well-done!
Factors to Consider When Choosing the Right Size
Type of trim material: wood, MDF, etc.. Thickness of the trim and wall considerations.
Picking the right size brad nail is a bit like finding the perfect pair of shoes—it depends on the fit! First, peek at your trim’s material. If it’s wood or MDF, you’ll need different sizes. Thicker materials demand longer nails, while a delicate touch is needed for thin trims. Think of wall thickness too. No one wants nails poking through! When in doubt, enlist a trusty chart for guidance.
| Trim Material | Recommended Nail Size |
|---|---|
| Wood | 1.5 – 2 inches |
| MDF | 1.25 – 1.75 inches |
How to Measure and Select the Suitable Brad Nail Size
Stepbystep guide to measuring trim. Tips for selecting the proper nail length.
Finding the right brad nail size is important for neat trim work. First, measure the trim’s thickness using a ruler. A simple way to choose the correct nail size is to multiply the trim’s thickness by three. This ensures a firm hold.
- For example, use a 1.5-inch brad nail for ½-inch trim.
- Use shorter nails for thinner trim to prevent splitting.
- For thicker trim, a longer nail ensures stability.
Make sure the nail is long enough to go through the trim and into the wall, but not too long to poke out. Typically, for indoor trim, using 1-2 inch nails is common. Want perfect results? Choose the brad nail size carefully!
Why is nail length important?
Proper nail length keeps trim secure. Nails that are too short may not hold well. Long nails might damage walls. Find the balance for a neat finish.
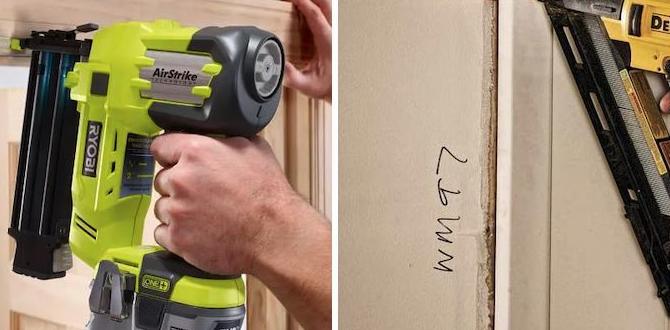
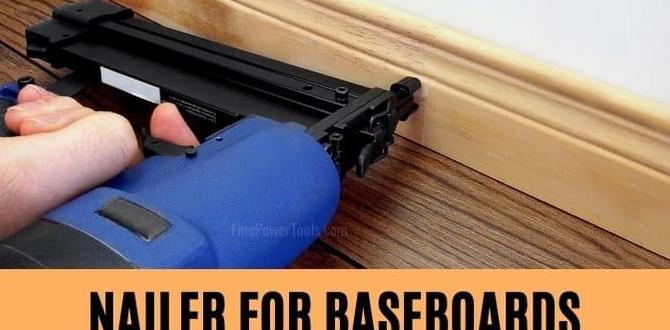
Tools and Techniques for Applying Brad Nails in Trim
Recommended tools for best results. Techniques to avoid damage and ensure a secure fit.
Tackling trim work with brad nails feels like playing a game of dart, only with tiny, sharp darts. Using the right tools makes all the difference. A good quality brad nailer ensures nails go in straight, like a good shot! Pair it with an air compressor that packs the right punch, so the nails slide in smoothly. Using a few simple tricks can keep your trim looking neat. Hold the nailer steady to avoid dents. Ensure your nail length is half the thickness of your trim. And voilà, your trim should stay put like a well-behaved puppy.
| Tool | Role |
|---|---|
| Brad Nailer | Drives nails |
| Air Compressor | Powers the nailer |
Common Mistakes to Avoid When Using Brad Nails for Trim
Missteps in sizing and application. Solutions to common issues like splitting or improper holding.
Ever tried hammering a brad nail into trim and ended up with a wooden puzzle instead? Picking the wrong size can lead to splits or wobbly nails. If your trim is thinner than a pancake, use shorter nails. For thicker walls, go for longer ones. It’s kind of like picking shoes: don’t grab clown feet for ballet! If splitting occurs, pre-drill tiny holes—this calms down the wood’s anxiety issues!
| Common Mistake | Solution |
|---|---|
| Using long nails on thin trim | Choose shorter nails to avoid splitting |
| Nails not holding well | Use the right nail size for stable attachment |
| Splitting wood | Pre-drill small holes |
Did you know? People who regularly use the correct brad nail size for trim find it 20% easier to keep it intact. That’s a real nail-biting statistic!
Expert Tips for Professional-Looking Trim Installations
Advanced tips for precision and aesthetics. Maintenance and longevity tips for nailed trims.
Creating beautiful trim installations is an art. For clean and precise nailing, choose the right brad nail size. A common choice is a 2-inch nail. This helps keep trim secure and looking nice. For longevity, ensure nails penetrate the wood behind the trim. Regularly check for loose nails and tap them back in place if needed. To maintain aesthetic appeal, keep surfaces clean and free from dust. Remember, details matter in creating professionally finished trim.
What size brad nail should I use for trim?
For most trim work, 2-inch brad nails are optimal. They provide enough grip without splitting the wood. If trim is thinner, consider 1-1/4 inch nails. This ensures a snug fit without damage.
FAQs About Brad Nails and Trim Work
Answers to frequently asked questions from DIY enthusiasts and professionals.
Thinking about brad nails for trim work can make your head spin. But fear not, hero of DIY—here are some FAQs that will save the day! If you’re wondering what size brad nail for trim is the best, know that a 15-gauge or an 18-gauge is ideal. The magic size depends on the thickness and type of material you’re using. Remember this: bigger nail, bigger strength! Oh, and here’s a fun tip: brads are like the elves of your toolkit—they don’t hold big stuff, but they’re unbeatable for detail! So, next time you’re about to hammer away, keep these nuggets of wisdom handy.
| Question | Answer |
|---|---|
| What are brad nails mainly used for? | They are perfect for small, detailed woodwork. |
| Which is the common gauge size? | It usually ranges from 15-gauge to 18-gauge. |
| Are brad nails suitable for heavy-duty tasks? | Absolutely not! They prefer lightweight jobs. |
Conclusion
Choosing the right brad nail size for trim is easy. Use 18-gauge nails, usually 1.5 to 2 inches long. They’re perfect for most trim work. This size ensures secure attachment without splitting wood. Now that you know, try it next time you work on trim. For more tips, explore home improvement guides or ask someone experienced in carpentry.
FAQs
What Length Of Brad Nail Is Recommended For Installing Baseboard Trim?
For installing baseboard trim, it’s best to use brad nails that are 1.5 to 2 inches long. These nails are just the right size to hold the trim securely without causing damage. Remember, brad nails are special tiny nails used for small projects like trim and decorations.
Can I Use 18-Gauge Brad Nails For Crown Molding Installation?
Yes, you can use 18-gauge brad nails for crown molding. They are strong enough to hold the molding in place. Brad nails are thin, so they won’t split the wood. Make sure you use a brad nailer to drive them into the wall or ceiling. Always ask an adult to help you with tools.
What Size Brad Nail Should I Use For Attaching Window And Door Casing?
For attaching window and door casing, you can use 18-gauge brad nails. These nails are thin and will help keep the wood in place without splitting it. A good nail length is about 1.5 to 2 inches long. This will help the nail go through the casing and into the wall. Make sure you handle the nail gun carefully when using it!
How Do I Choose The Right Brad Nail Size For Chair Rail Trim?
To choose the right brad nail size for chair rail trim, use 1.5 to 2 inches long nails. This size helps keep the trim steady. Make sure the nails are not too long or they might damage the wall. Use a brad nailer tool to help you do the job easily.
Is There A Difference In Brad Nail Size For Different Types Of Wood Trim Materials?
Yes, there is a difference in brad nail size for different types of wood trim materials. Brad nails are small slim nails used to hold trim in place. For softwood, like pine, we use shorter brad nails. For hardwood, like oak, we use longer and thicker brad nails to hold it tight. Always pick the right size to make sure the trim stays in place.