| Have you ever wondered why some trim work looks so smooth? The secret often hides in the tiny details, like choosing the right finish nails. But how do you know the right length finish nails for trim? Picture a jigsaw puzzle. Each piece needs to fit just right. Picking the wrong nail could be like forcing a square peg into a round hole. |
| Imagine a builder named Sam. Sam needed to finish his sister’s living room trim before her birthday party. But he used nails that were too short. The trim wobbled, and Sam learned the hard way. Isn’t it surprising how something so small as a nail’s length can make such a difference? |
| Let’s explore why the right length finish nails matter for trim work. You’ll soon see how this choice impacts your home projects. Ready to dive in and learn this secret? After all, even small choices matter when creating something beautiful. |
Table of Contents
Choosing The Right Length: Finish Nails For Trim

Choosing the Right Length Finish Nails for Trim
Finding the right finish nails for trim is like choosing the right shoes for an event. You need the perfect size. For most trim work, 15-gauge or 16-gauge nails, ranging from 1 to 2.5 inches, work best. Ever wondered why? It’s because they hold tight without splitting the wood! Imagine crafting a beautiful picture frame only to watch it collapse—nail size matters. Remember, the right nail length ensures both beauty and stability.
The Importance of Choosing the Right Finish Nail Length
Impact on durability and integrity of the trim. Influence on aesthetics and overall finish.
Imagine hanging a picture with a nail the size of a toothpick. It wouldn’t hold, right? Similarly, the finish nail size impacts the trim’s durability and integrity. Nails that are too short can make trims wobbly, while overly long ones might crack the wood. Choose wisely, or your trim might look like it got a bad haircut! Speaking of looks, the right nail length ensures a smooth and clean finish, leaving your trim looking spiffy. It’s all about balance to nail the perfect look!
| Nail Length | Impact on Integrity | Aesthetics |
|---|---|---|
| Too Short | Weak hold | Visible flaws |
| Perfect Fit | Strong and sturdy | Smooth finish |
| Too Long | Wood damage | Unappealing |
If you’re curious, “How long should finish nails be?”, ensure your nail is around 1.5 times the trim thickness. As the saying goes, “Measure twice, nail once!” This helps keep trims intact and looking sharp. And remember, every small detail matters for a perfect trim installation.
Factors to Consider When Selecting Finish Nail Length for Trim
Thickness and material of the trim. Baseboard and wall composition considerations. Nail penetration depth recommendations.
What should you think about when picking the nail length for trim?
Choosing the right nail for trim work is important. Consider the thickness and material of the trim. Thin trim needs shorter nails. For thick or hardwood trim, choose longer nails. The baseboard and wall behind it also matter. If there is drywall, longer nails work best. Nails should go through the trim and firmly hold to the wall. A good rule is to make sure nails go 1 inch into the wall. This keeps the trim safe and looking neat.
Factors to Consider
- Trim Thickness: Thin trim needs shorter nails.
- Trim Material: Hardwood or thick trim requires longer nails.
- Wall Composition: Use long nails for drywall.
- Penetration Depth: Aim for nails to go 1 inch into the wall.
Common Finish Nail Lengths for Different Trim Applications
Recommended nail lengths for baseboards. Suggested nail sizes for crown molding. Appropriate nail dimensions for window and door casings.
Choosing the right nail size is crucial for trim work. For baseboards, it is recommended to use nails that are 1.5 to 2 inches long. Crown molding is best secured with 2 to 2.5-inch nails. When attaching window and door casings, opt for 1.5 to 2-inch nails for a snug fit. Correct nail length ensures a clean, strong finish, preventing any gaps or weak spots.
### What size finish nails for baseboards?
Baseboards should use finish nails that are 1.5 to 2 inches long. This length secures the baseboard firmly to the wall, offering durability and stability. It’s essential for smooth surfaces and to keep the trim from shifting.
### What nail size is ideal for crown molding?
For crown molding, choose nails that are 2 to 2.5 inches. This length is perfect for reaching into studs and holding the molding in place. Ensures a professional look with no loose sections.
### What are the suitable nail lengths for window and door casings?
For window and door casings, use finish nails that are 1.5 to 2 inches long. This size ensures the casing sits tight and flush, preventing movement or gaps over time.
Remember, using appropriate nail dimensions is vital for any trim application. Proper length equals a neat and long-lasting finish. Nails that are either too short or too long can affect the stability and appearance of the trim.
Tools and Techniques for Using Finish Nails in Trim Work
Essential tools for nailing trim. Best practices for driving nails and ensuring solid attachment.
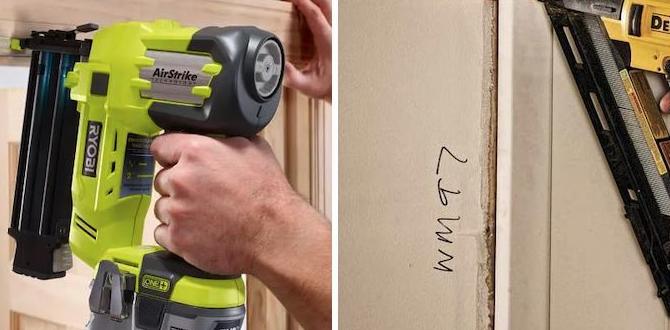
Using finish nails in trim work requires the right tools and methods. A hammer is good for tapping nails, but a nail gun makes it faster. For strong attachment, nails should be driven deeply at slight angles. This helps them hold better.
- A measuring tape ensures correct placement.
- A level keeps trim straight.
Remember to use 1.5- to 2-inch nails for solid results. Always check your work to make sure nails are not sticking out. This keeps everything safe and neat.
What size finish nails do you use for trim?
Finish nails for trim should be between **1.5 inches and 2 inches** long. This length ensures the nail goes through trim and holds tightly to the wall. It keeps the trim secure and avoids gaps.
Are thicker nails better for trim work?
Thicker nails can damage trim. Always choose the right size. It should match the trim size and the wall type. This keeps materials safe and your trim looks great.
Nailing trim is a careful job. The best tools and methods make it simple. With these, anyone can make trim work easy and neat!
Troubleshooting Common Issues in Trim Installation Using Finish Nails
Avoiding split wood and nail popping. Solutions for insecure trim and adjustments needed.
Imagine you’re building a trim, and the wood decides to play “Let’s Split” instead of “Be Still”. Oops! To avoid this splintery gig, choose the right size finish nails. Go for smaller diameter ones to avoid splitting. If the trim feels wobbly, think of it like a loose tooth; it needs a little nail love. A nail popped out? Tap it back gently and add another nearby. If you want to ace this trim game, practice like a wood-whisperer!
| Issue | Solution |
|---|---|
| Split Wood | Use smaller diameter nails. |
| Nail Popping | Gently reinsert the nail and add another. |
| Insecure Trim | Add additional nails for firmness. |
Expert Tips for Professional-Looking Trim Finishing
Tips for hiding nail holes and achieving a clean finish. Advice on using adhesive in conjunction with nails.
To achieve a trim finish that’s as smooth as a cat in silk pajamas, pay attention to the details. Begin by using adhesive along with nails. It helps keep everything in place. For nail holes, make them vanish like magic by filling them with putty and a little sanding. A clean surface is the secret! As for nail size, the experts whisper about 1.5 inch nails. They’re the perfect buddies for narrow trim. Here’s a handy cheat sheet:
| Nail Length | Best For |
|---|---|
| 1 inch | Thin trims |
| 1.5 inch | Narrow trims |
| 2 inch | Thicker trims |
Remember, each detail matters. It’s like a perfect recipe, where every ingredient counts. With these tips, your trim will be the envy of the block!
Frequently Asked Questions About Finish Nails and Trim Work
Addressing common queries about nail size selection and application. Expert answers to specific concerns on trim installation methods.
Frequently asked questions about finish nails and trim work
When choosing finish nails for trim, many wonder about the right size. The best size is often 1.5 to 2.5 inches. But why is size important? A correct size helps hold trim securely without splitting the wood.
Common Questions and Answers
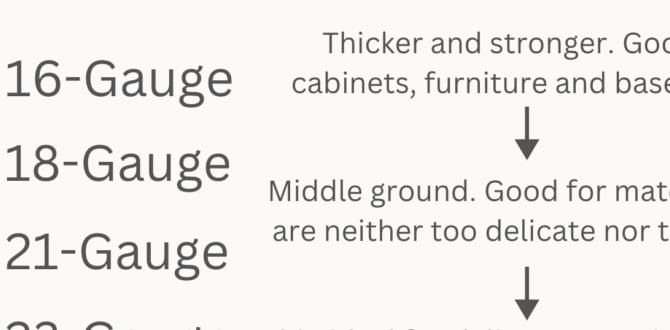
- What size nails are best for baseboards? Use 16 to 18-gauge nails. They’re strong and won’t damage the trim.
- Can I use 18-gauge nails for crown molding? Yes, they work well because they’re thin and less likely to split the wood.
Kevin, a trim expert, says, “Choosing the right nail keeps your trim from popping off!” Remember, using the correct nail size and method can make your project look professional.
Conclusion
Choosing the right finish nail length for trim is important. Use 1.5 to 2-inch nails to securely attach trim without splitting it. Consider the wood type and trim thickness to decide nail size. Test on scrap wood if you’re unsure. Ready to learn more? Explore resources on home improvement for additional tips and guidance.
FAQs
What Are The Best Finish Nail Sizes To Use For Different Types Of Trim Work?
When you’re doing trim work, choosing the right finish nail size is important. For baseboards, use 15- or 16-gauge nails, which are thicker and hold strong. For crown molding, try 16-gauge nails to keep them in place. If you’re working on small trims, like door frames, use 18-gauge nails, which are thinner and more delicate. Remember, the right nail helps hold everything together nicely!
How Does The Thickness Of The Trim Material Influence The Length Of Finish Nails Required?
The thickness of the trim material tells us how long the finish nails need to be. If the trim is thick, you need longer nails to reach into the wall and hold it securely. If the trim is thin, shorter nails are enough. Always make sure the nails go deep enough to keep the trim from falling off.
Are There Specific Nail Lengths Recommended For Various Types Of Wood Trim, Such As Baseboards Or Crown Molding?
Yes, different wood trims need different nail sizes. For baseboards, use 1.5-inch nails. For crown molding, use 2-inch nails. These help hold the trim tight against the wall.
What Are The Potential Risks Of Using Finish Nails That Are Too Long Or Too Short For Trim Installation?
Using nails that are too long can cause them to poke through the other side of the wood. This can damage walls or make them look messy. If the nails are too short, they won’t hold the trim well. The trim might fall off or wobble. So, the right nail size is important to keep everything in place!
How Can I Determine The Correct Length Of Finish Nails To Use If I’M Installing Trim Over Drywall?
To choose the right length of finish nails, think about the spaces you have. First, measure your trim piece. Then add the thickness of the drywall. Finally, make sure your nails are long enough to go through both and into the wood behind the drywall. This makes everything strong and safe.