Quick Summary: Using a nail gun for door casings is the fastest, most efficient way to achieve professional-looking results. Select the right nail gun (brad or finish nailer), ensure proper nail size, set the depth, and practice safe operation for clean, secure installations that enhance your home’s appearance with minimal effort.
Tired of wrestling with a hammer and nails for door casings? It can be slow work, and getting those nails perfectly flush can be a real challenge, especially for beginners. But what if I told you there’s a way to get clean, consistent results every time, and much faster? That’s where a nail gun comes in! Learning to use a nail gun for door casings might seem daunting, but it’s simpler than you think. I’m here to guide you through every step, from choosing the right tool to mastering the technique. Get ready to transform your doorways with ease and confidence!
Table of Contents
Your Door Casing Nailer Cheat Sheet: What You Need to Know
Installing door casings is a classic DIY project, and using a nail gun can make it feel less like a chore and more like a triumph. The right tool and a little know-how can save you time and give your home a polished look.
Which Nail Gun is Best for Door Casings?
For door casings, you’re typically looking for one of two types of nail guns: a brad nailer or a finish nailer. Both are excellent choices, but they have slight differences that might make one a better fit for your project or préférences.
Brad Nailer: These use very thin nails (typically 18-gauge). Because they’re so slender, they leave a tiny hole that’s easy to fill and conceal. They’re fantastic for delicate trim work where you want minimal visible fastening. However, they might not have the holding power for heavier trim if not also glued.
Finish Nailer: These use slightly thicker nails (typically 16-gauge). They offer a bit more holding power and create a hole that’s still relatively easy to fill. For standard interior door casings, a 16-gauge finish nailer is often the go-to choice for its balance of holding power and minimal marring.
My personal recommendation for most door casing projects leans towards a 16-gauge finish nailer. It provides a good balance, ensuring your casings stay put without creating overly noticeable holes that detract from the wood’s beauty.
Nail Gauge Explained:
| Nailer Type | Gauge | Nail Diameter (approx.) | Best For | Hole Size |
| :————– | :—- | :———————- | :——————————————– | :——— |
| Brad Nailer | 18 | 0.0475 inches | Delicate trim, paneling, smaller moldings | Very Small |
| Finish Nailer | 16 | 0.062 inches | Door casings, window trim, chair rails, baseboards | Small |
| Straight Nailer | 15 | 0.072 inches | Heavier trim, crown molding, framing accents | Medium |
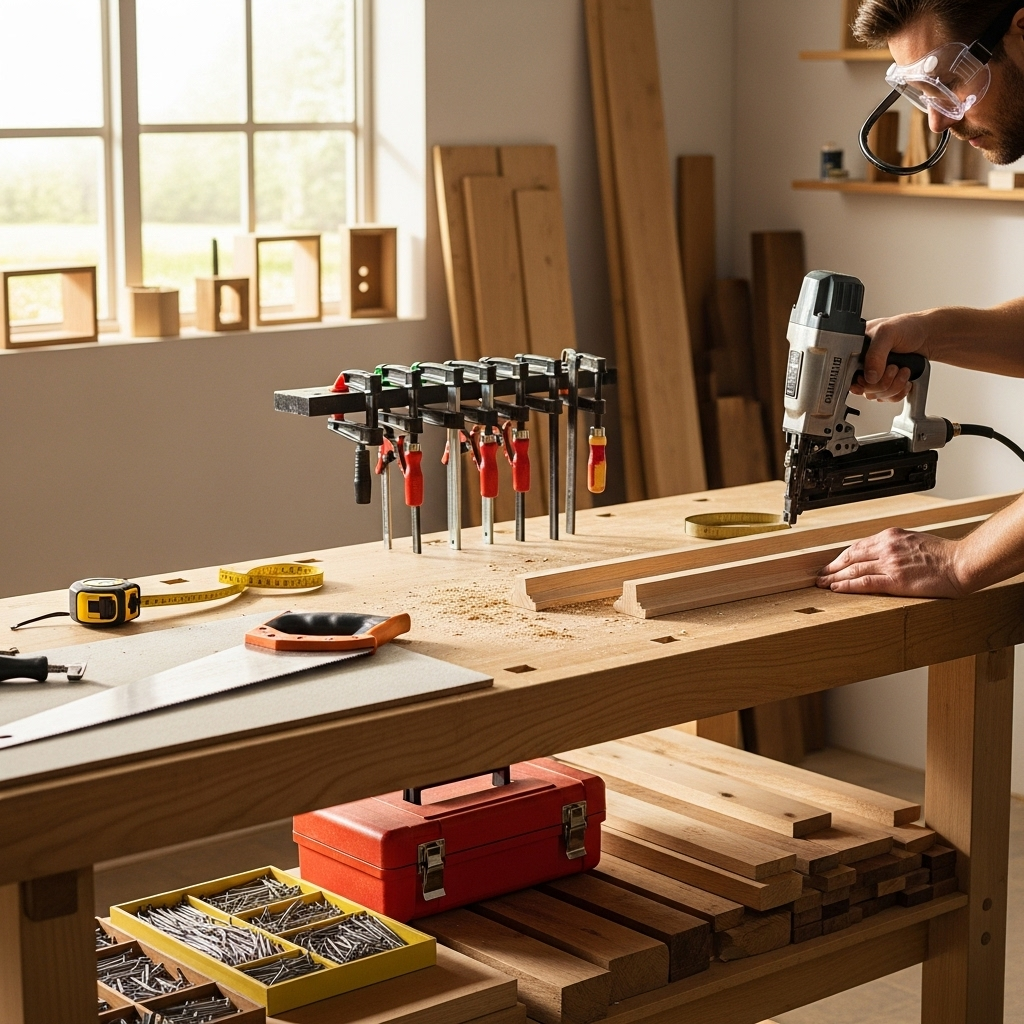
Essential Tools and Materials for Door Casing Installation
Beyond your nail gun, a few other items will make the job much smoother and safer. Think of them as your trusty sidekicks!
Nail Gun: As discussed, a 16-gauge finish nailer or 18-gauge brad nailer.
Air Compressor (if using pneumatic): Make sure it’s powerful enough for your nailer. Check your nailer’s PSI requirements.
Air Hose (if pneumatic): Long enough to reach your work area without being a trip hazard.
Nails: The correct gauge and length for your nailer and the thickness of your casings. For most interior door casings, 1-1/2″ to 2″ nails are common. Always ensure the nail is long enough to pierce through the casing and get a good hold in the wall stud or framing.
Safety Glasses: Non-negotiable! Protecting your eyes is the absolute priority.
Hearing Protection: Nail guns can be loud. Earplugs or earmuffs are a good idea.
Measuring Tape: For accurate casing lengths.
Pencil: For marking cuts and nail placements.
Miter Saw: Essential for making those precise 45-degree angle cuts for your corner joints. A sharp blade is key for clean cuts.
Stud Finder: To locate wall studs for secure nailing.
Caulk Gun and Paintable Caulk: For filling nail holes and gaps.
Wood Glue (optional but recommended): For extra strong joints.
Hammer and Nail Set (or specialized nail punch): For sinking nails just below the surface if your nail gun doesn’t do it perfectly.
Sandpaper: For smoothing any rough spots and preparing for finishing.
Step-by-Step Guide: How to Use Nail Gun for Door Casings

Alright, let’s get down to business! Following these steps will help you install your door casings like a pro. We’ll break it down so it’s easy to understand and execute.
Step 1: Prepare Your Materials and Work Area
Before you even pick up the nail gun, a little prep work goes a long way.
1. Gather Everything: Have all your tools and materials ready and within reach. This prevents you from having to search for something mid-project, which can break your flow.
2. Cut Your Casings: Measure your doorway carefully. You’ll need two side pieces (jambs) and two top pieces (headers). For a standard door, you’ll typically cut the two side pieces to the desired length, extending from the floor to the top of the door frame. For the header pieces, you’ll want them to overlap the side casings. The common method for corners is a miter joint, where each piece is cut at a 45-degree angle. The length of the header pieces will be measured from the outside edge of the side casing to the outside edge of the other side casing, with the miter cuts meeting in the middle. Precision here is key for a clean look!
3. Acclimate Your Trim: Wood can expand and contract with changes in humidity. It’s a good practice to let your trim sit in the room where it will be installed for at least 24-48 hours before cutting and installing. This helps prevent warping or gaps later on.
4. Set Up Your Nailer:
If pneumatic: Connect your air hose to the nail gun. Ensure your air compressor is turned on and set to the correct pressure recommended by your nailer’s manual. Most door casing jobs will fall into the 70-110 PSI range.
If cordless/electric: Ensure the battery is charged or it’s plugged in.
5. Load Your Nails: Open the magazine on your nail gun and load the appropriate nails. Make sure they are seated correctly.
Step 2: Mark Stud Locations
This is crucial for strong installation. Casings need to be secured to something solid.
1. Use Your Stud Finder: Run a stud finder along the wall around the door frame. Mark the center of each stud that your casing will attach to. You’ll typically find studs approximately every 16 inches.
2. Chalk Line or Pencil Marks: Lightly mark these stud locations on the wall. These will be your guides for where to drive nails.
Step 3: Position and Test Fire Your Nailer
Before you plunge into installing, a little test run is wise.
1. Find a Scrap Piece: Grab a piece of scrap wood that’s similar in thickness and type to your door casing.
2. Test the Depth: Place the nose of your nailer against the scrap wood. For pneumatic nailers, adjust the air pressure or use the depth adjustment dial on the gun itself (if it has one) until the nail drives in perfectly. You want the nail head to be slightly countersunk (just below the surface of the wood) so it can be easily filled, but not so deep that it blows through the wood or creates a huge divot. Many modern nailers have a depth adjustment knob on the tool itself, which is the easiest way to control this.
3. No Damage: The goal is a clean nail hole with minimal damage to the wood surface.
Step 4: Attach the First Side Casing (Jamb)
This is where the magic starts happening!
1. Dry Fit First: Before you nail, place your first side casing onto the door frame. Ensure it fits snugly against the door jamb and is flush with the edge.
2. Align with Studs: Position the casing so that your planned nail locations will hit the marked studs.
3. Hold Firmly: Press the nose of your nail gun firmly against the casing where you want to drive a nail. Ensure the contact trip is flat against the wood.
4. Pull the Trigger: Squeeze the trigger. The nail should drive into the wood.
5. Nail Placement Strategy:
Start with a nail near the top and another near the bottom to hold the casing in place.
Place nails approximately 1-1/2 to 2 inches from the end and edges of the casing.
Drive subsequent nails every 8 to 12 inches along the length of the casing, always aiming for a stud.
Avoid nailing too close to the mitered corner, as this can cause the wood to split.
6. Check Your Work: After nailing a section, quickly check that the casing is still flush and that no nails have popped out.
Step 5: Attach the Second Side Casing (Jamb)
Repeat the process you used for the first side casing on the other side of the door.
1. Dry Fit: Place the second casing and check its fit.
2. Align and Nail: Position it correctly, align with stud marks, and drive nails using the same pattern as the first side. Pay close attention to ensure the top of this casing aligns perfectly with the top of the first casing.
Step 6: Install the Header Casings
Now it’s time for the top pieces. This is where your mitered cuts will come together.
1. Dry Fit Carefully: Place one of the header pieces. The mitered end should meet the mitered end of the side casing. Ensure the piece is flush with the top of the side casings and the wall.
2. Nail Strategically: Start by nailing near the mitered corner to secure that critical joint. Then, nail down the length of the header, hitting studs as you go. Place nails approximately 8-12 inches apart.
3. Test the Second Header: Place the second header piece. It should fit snugly against the first header at the peak and meet the other side casing.
4. Secure the Second Header: Nail this piece into place, just as you did the first header. Also, ensure you place at least one nail where the two header pieces meet at the peak for extra security.
Step 7: Inspect and Reinforce
Take a moment to admire your work and make sure everything is solid.
1. Look for Gaps: Check all joints and edges. Are there any small gaps between the casing and the wall?
2. Check for Loose Pieces: Gently try to wiggle the casings. They should feel solid.
3. Add More Nails if Needed: If a section feels a bit loose, or if you missed a stud, add another nail or two.
Step 8: Finishing Touches: Filling and Sanding
This step makes all the difference between a DIY job and a professional finish.
1. Fill Nail Holes: Use a paintable wood filler or caulk to fill all the nail holes. For a seamless look, you can use a putty knife to apply the filler and then wipe away any excess. If using caulk, apply it directly into the hole.
2. Let it Dry: Allow the filler or caulk to dry completely according to the manufacturer’s instructions.
3. Sand Smooth: Once dry, gently sand down the filled nail holes until they are flush with the casing surface. You can also lightly sand any rough edges or imperfections on the casing itself. Wipe away dust with a tack cloth or slightly damp rag.
4. Caulk Gaps: For a truly professional finish, run a thin bead of paintable caulk along any gaps between the casing and the wall or ceiling. This hides any imperfections and creates a clean, painted-ready surface.
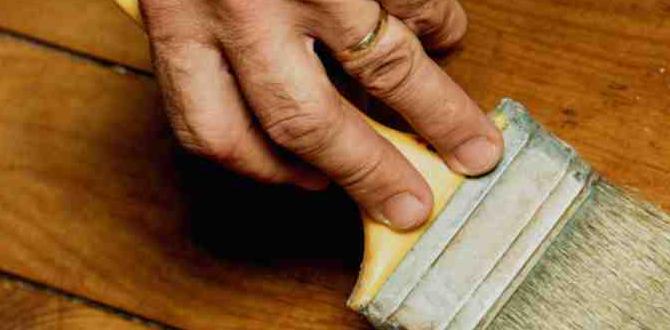
Step 9: Painting or Staining
Your door casings are now ready for their final treatment!
1. Clean: Ensure the area is clean and free of dust.
2. Prime (if painting): Apply a coat of primer if you plan to paint. This helps the paint adhere better and provides an even base coat.
3. Paint or Stain: Apply your paint or stain. You may need multiple coats depending on the product and desired finish. Always allow adequate drying time between coats.
Safety First! Nail Gun Best Practices
Using a nail gun is generally safe when you follow proper procedures. Here are some essential safety tips to keep in mind:
Always Wear Safety Glasses: This is the golden rule. Debris or misplaced nails can cause serious eye injury.
Never Point the Nail Gun at Anyone: Even when not powered, treat it with respect. It’s a tool that delivers force.
Keep Fingers Away From the Trigger and Nose: Only place your finger on the trigger when you are ready to fire. Ensure you are not ‘dry firing’ (firing without a nail or material).
Disconnect Power When Not In Use: For pneumatic nailers, detach the air hose when loading nails, clearing jams, or when the tool is unattended. For cordless/electric models, remove the battery or unplug it.
Understand Your Nailer’s Safety Features: Most nail guns have a safety contact trip. This means the gun will only fire when the nose is pressed against a surface and the trigger is pulled. Ensure this is functioning correctly. Some guns also offer “contact actuation,” meaning they fire when the nose touches, without pulling the trigger (use with extreme caution and only when fully ready).
Don’t Overload the Magazine: Load the correct number of nails as specified by the manufacturer.
Clear Jams Safely: If you get a jam, disconnect the power source before attempting to clear it. Refer to your tool’s manual for specific jam-clearing instructions.
Work in a Well-Ventilated Area: Especially important if you’re using air compressors that can release oil fumes or if you’re working with finishes.
Troubleshooting Common Issues When Using a Nail Gun for Door Casings
Even with the best intentions, sometimes little hiccups can occur. Don’t get discouraged; these are usually easy fixes!
Nail Not Firing:
Check Power: Is the air hose connected and is the compressor running with sufficient pressure? Is the battery charged?
Safety Contact: Is the nose of the nailer pressed firmly against the wood?
Jam: There might be a nail jam. Disconnect power and clear it.
Nail Not Driving Deep Enough:
Air Pressure: For pneumatic tools, increase the air pressure slightly.
Depth Adjustment: If your tool has a depth adjustment, try setting it to drive nails deeper.
Wood Density: Some very hard woods can be more challenging. Ensure your nailer is rated for the material.
Nail Driving Too Deep (Counter-sunk too much or breaking through):
Depth Adjustment: Decrease the depth setting on your nailer.
Air Pressure: Lower the air pressure if using a pneumatic tool.
Surface Material: If you are nailing near an edge or a very thin piece of material, it’s easier to drive the nail too deep.
Casing Splitting:
Predrilling: For very hard wood or when nailing close to the end of a piece, predrilling a pilot hole can help.
Nail Type: Ensure you’re using the correct nail type and gauge for your work. Sometimes a slightly thinner nail (like an 18-gauge brad nailer if you don’t need extreme holding power) is better for delicate trim.
Nailer Placement: Avoid nailing too close to the very edge or end of the trim. Spacing nails along the length and away from the tip helps distribute force.
Wood Quality: Poor quality wood can be more prone to splitting.
Nail Gun Jamming:
Disconnect Power: Immediately disconnect the air hose or battery.
* Clear Safely: Follow your tool’s manual for clearing jams. Usually, this involves opening a small access panel or door on the nailer and carefully removing the offending nail.
For more detailed troubleshooting specific to your tool, always refer to the manufacturer’s instruction manual. Reputable brands like DeWalt, Bostitch, and Ryobi often have excellent online resources and customer support.
Frequently Asked Questions (FAQ) about Using a Nail Gun for Door Casings
Q1: What is the difference between a brad nailer and a finish nailer, and which is better for door casings?
A1: A brad nailer uses thinner, 18-gauge nails that leave very small holes, ideal for delicate trim. A finish nailer uses slightly thicker, 16-gauge nails, offering more holding power and is generally the preferred choice for standard door casings due to its balance of strength and minimal hole size.
Q2: How long should the nails be for door casings?
A2: For most interior door casings, nails between 1-1/2 inches and 2 inches long are suitable. The key is that the nail must be long enough to pass through the casing material and securely embed into the wall stud or framing behind it.
Q3: Do I need to pre-drill holes for nails when installing door casings with a nail gun?
A3: Generally, no. The beauty