Storing nails in humid areas is simple with the right protection. Use airtight containers, silica gel packets, and corrosion-inhibiting wraps to prevent rust and keep your nails ready for any project, ensuring longevity and preventing frustrating damage to your work.
Hello there, fellow DIYers and woodworking enthusiasts! Jack Shaffer here from Nailerguy. Ever opened up your favorite nail container, only to find a rusty, clumpy mess instead of neat rows of fasteners? It’s a common frustration, especially if you’re working in a garage, basement, or workshop that tends to get a bit damp. That’s where having the right strategy for storing nails in humid areas comes in. It’s not just about keeping them tidy; it’s about preserving their integrity so they perform perfectly when you need them most.
Rust on nails can ruin your projects, leaving unsightly stains and compromising structural integrity. But don’t worry! With a few smart, simple steps, you can keep your nails in tip-top shape, no matter the environmental challenges. We’re going to break down exactly how to do it, so you can confidently tackle any project without worrying about corroded fasteners.
Let’s dive into keeping your nails frustration-free and project-ready!
Table of Contents
Why Humidity is the Enemy of Nails
Even the most robust metal fasteners are susceptible to rust when exposed to moisture. Humidity is essentially water vapor in the air. When this moisture comes into contact with metal, especially iron or steel (the primary components of most nails), a chemical reaction called oxidation occurs. This is what we know as rust or corrosion.
Think of it like leaving an iron skillet outside in the rain. It won’t take long before you see that familiar orange-brown coating. Nails, though often coated with zinc (galvanized) or other protective layers, can eventually succumb to sustained humidity. This is particularly true for uncoated or older nails.
The problem is amplified in humid areas because the air is constantly laden with moisture. This means your nails are under a continuous assault from water vapor.
The Consequences of Neglecting Nail Storage
Rust and Corrosion: The most obvious issue. Rusty nails are unsightly and can bleed onto your wood, leaving permanent stains.
Weakened Structure: Rust can weaken the metal of the nail, making it more prone to bending or breaking during use.
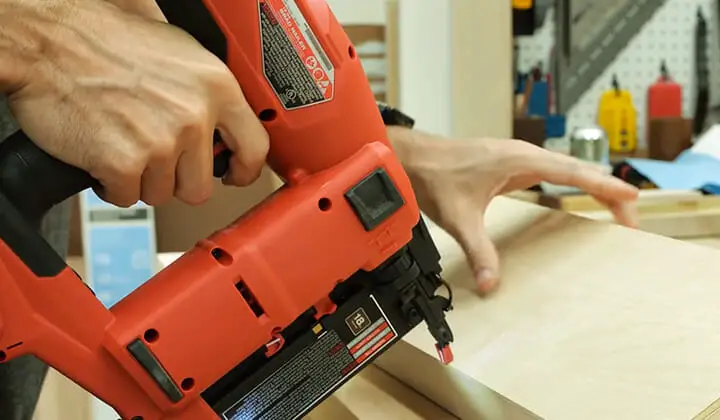
Jamming Nailers: Corroded nails can jam your nail gun, causing downtime and potential damage to the tool.
Difficulty Driving: Rusty nails don’t glide into wood as smoothly, increasing the effort needed and potentially splitting delicate wood.
Wasted Money: Replacing rusted-out nails is an unnecessary expense.
Understanding Your Nail Types and Their Rust Susceptibility
Before we get into storage solutions, it’s helpful to know what you’re dealing with. Different types of nails have varying levels of inherent rust resistance.
Common Nails, Box Nails, Finishing Nails: These are typically made of steel. Without a protective coating, they will rust very quickly. Look for galvanized, vinyl-coated, or stainless steel versions for better resistance.
Galvanized Nails: These have a protective zinc coating. While this offers good protection in many environments, prolonged exposure to high humidity can eventually wear down the coating, leading to rust.
Stainless Steel Nails: These are the champions of rust resistance. They are ideal for outdoor projects or extremely humid environments, but they come with a higher price tag.
Coated Nails (Vinyl, Epoxy): These have a polymer coating that provides a barrier against moisture. They are often used in pneumatic nail guns for their smooth driving and good holding power. The effectiveness of the coating against humidity depends on its integrity.
For most DIY projects where you’re using standard steel nails (even galvanized ones), proper storage in humid areas is crucial.
The Best Storage Methods for Humid Areas
The key to storing nails in a humid environment is to create a barrier between the nail and the moisture in the air. This means focusing on airtightness and moisture absorption.
1. Airtight Containers: Your First Line of Defense
This is the most fundamental and effective step. Storing nails in sealed containers prevents humid air from circulating around them.
What to Use:
Plastic Storage Bins with Gasket Seals: Look for bins specifically designed to be airtight and watertight. These often have a rubber or foam gasket around the lid.
Mason Jars or Glass Jars with Screw-On Lids: Ensure the lids have a good seal. These are great for smaller quantities of nails.
Specialty Toolboxes or Tackle Boxes with Secure Latches: Some higher-quality models offer decent sealing capabilities.
Original Nail Packaging (if sealed): Many nail boxes are designed to offer some protection, but for humid areas, transferring them to a more robust airtight container is usually best.
How to Do It:
1. Clean and Dry: Ensure your nails are completely dry before storing them. If you’re transferring them from a damp box, let them air dry thoroughly.
2. Sort and Separate: It’s a good idea to store different types and sizes of nails separately. This makes them easier to find and prevents rust from spreading from one type to another.
3. Fill the Container: Don’t overfill. Leave a little space for air to move around (though the goal is minimal air).
4. Seal Tightly: Close the lid securely. For screw-top jars, ensure the threads are clear of debris for a good seal. For plastic bins, make sure the latches engage properly.
2. Moisture Absorbers: The Extra Insurance
Even with airtight containers, a small amount of moisture can sometimes get in, or be present in the air trapped inside. This is where moisture absorbers come to the rescue.
Key Moisture Absorbers:
Silica Gel Packets: These are the little packets you find in shoe boxes and electronics packaging. They are designed to absorb moisture from the air. You can buy them in bulk online or from craft/hobby stores.
Desiccants (e.g., Calcium Chloride): Products like DampRid use calcium chloride to absorb moisture from the air and collect it as a liquid. While effective, ensure they are placed outside the nail container or in a separate, ventilated area if using small containers, as the liquid can be corrosive if it leaks onto nails.
Charcoal Briquettes (Unused!): Activated charcoal can absorb odors and some moisture. Use only plain, unused briquettes, not the instant-light kind with lighter fluid.
How to Use Them:
1. Place Inside Containers: Add one or two small silica gel packets or a small sachet of charcoal to each airtight container of nails.
2. Rechargeable Options: Many silica gel packets can be “recharged” by drying them out in an oven or microwave (follow product instructions carefully!). This makes them a cost-effective, long-term solution.
3. Monitor and Replace: Check your moisture absorbers periodically. If they seem saturated (silica gel might clump or turn a different color according to its type; charcoal will just become less effective over time), it’s time to recharge or replace them.
3. Corrosion-Inhibiting Products: Advanced Protection
For the ultimate protection, especially if you’re dealing with very high humidity or storing valuable, specialized fasteners, consider corrosion-inhibiting products.
VCI (Vapor Corrosion Inhibitor) Paper or Bags: These products release a protective vapor that forms a molecular layer on the metal surface, preventing the electrochemical reaction that causes rust. You can wrap individual nails or small batches in VCI paper, or use VCI bags for larger quantities.
Rust-Inhibiting Sprays/Oils: Some individuals opt to lightly spray or wipe nails with a rust-inhibiting oil. However, this can make them greasy and potentially affect how they drive or adhere to finishes. It’s generally better for long-term storage of infrequently used fasteners and should be used sparingly.
How to Use Them:
1. VCI Paper: Wrap nails in VCI paper and then place them in an airtight container. The VCI vapor will work within the sealed environment.
2. VCI Bags: Place nails directly into VCI bags and seal them. These are excellent for custom-sized batches.
3. Oils: If using oil, ensure it’s a light, non-gumming type. Apply a very thin coat with a lint-free cloth. Test a few nails first to see how they perform.
4. Strategic Location: Picking the Right Spot
Where you store your containers also makes a difference.
Avoid Direct Contact with Concrete: Concrete can wick moisture from the ground, making it a damp surface. Keep containers off the floor, perhaps on shelves or sturdy pallets.
Consider Climate Control: If possible, store your nails in a climate-controlled part of your home or workshop. A dry, stable temperature is ideal.
Ventilation (with Caution): While airtight containers are key for the nails themselves, the overall storage area benefits from some air circulation to prevent stagnant, moisture-laden air from building up. However, this should be balanced with keeping it dry. Dehumidifiers are excellent for larger workshop spaces.
Step-by-Step Guide: Storing Nails in a Humid Garage
Let’s put it all together for a common scenario: storing nails in a slightly humid garage.
Tools and Materials You’ll Need:
Airtight plastic storage bins with gasket seals
Silica gel packets (or other moisture absorbers)
Your nails!
Optional: VCI paper or bags, labels
The Process:
1. Assess Your Nail Collection:
Go through all your nails. Are they already rusty? If so, you might want to discard the severely rusted ones. Lightly rusted ones can sometimes be cleaned with steel wool, but it’s often more efficient to properly store new ones.
Sort them by type (e.g., framing nails, finishing nails, brads) and size.
2. Prepare Your Containers:
Take your airtight plastic bins and ensure they are clean and dry inside. Check that the rubber gasket seal is intact and not cracked or brittle.
3. Add Moisture Absorbers:
Place a few silica gel packets into the bottom of each bin. If you’re using a larger bin, distribute them around the bottom.
4. Portion Your Nails:
Decide how you want to organize. You can put all of one type and size in a single bin, or use smaller containers within a larger bin if you have many varieties.
For very long-term or critical storage, consider using VCI paper to wrap the nails before placing them in the bin.
5. Fill the Bins:
Carefully place your sorted nails into the bins. Avoid mixing different types where possible.
Ensure nails aren’t protruding and could puncture the container.
6. Seal Tightly:
Close the lid and engage all latches securely. Ensure the gasket makes full contact all around the lid’s perimeter.
7. Label Your Bins:
Clearly label each bin with the type and size of nails inside (e.g., “2-inch Finish Nails,” “3-inch Deck Screws” – though this guide is for nails, the principle applies!). This saves time and frustration later.
8. Choose the Storage Location:
Place the bins on a shelf, workbench, or sturdy rack. Keep them at least a few inches off the floor, away from any exterior walls or damp spots.
If your garage is chronically damp, consider using a small dehumidifier.
Maintaining Your Stored Nails
Proper storage isn’t a set-it-and-forget-it situation entirely. Regular checks ensure your system remains effective.
Periodic Inspection: Every few months, open a container (preferably on a dry day) to check on the nails and the moisture absorbers.
Recharge/Replace Absorbers: If your silica gel packets look saturated or your charcoal feels less effective, recharge or replace them. Refer to product instructions. For rechargeable silica gel, typical oven drying at low temps (around 200-250°F or 100-120°C) for an hour or two should do the trick, but always follow specific guidance for your type.
Check for Sealing: Ensure container lids are still sealing properly. Gaskets can degrade over time.
* Handle with Care: When taking nails out, try to do so quickly to minimize the time the container is exposed to humid air.
Frequently Asked Questions (FAQs)
Q1: What is the biggest risk of storing nails in a humid environment without proper care?
A1: The biggest risk is rust and corrosion. This can lead to stained wood, weakened nails, and difficulty using them with nail guns.
Q2: Can I just put all my nails in one big plastic tub?
A2: While a big tub is better than nothing, sorting nails by type and size is highly recommended. It makes them easier to find and keeps different metals or coatings separate, which can prevent galvanic corrosion if dissimilar metals touch. Combining this with airtightness and desiccants is key.
Q3: How often do I need to replace silica gel packets?
A3: It depends on the humidity level and the size of the packet. In very humid conditions, you might need to recharge or replace them every 3-6 months. Rechargeable ones can be used multiple times. Check them periodically for signs of saturation.
Q4: Is stainless steel a better option for humid areas?
A4: Yes, stainless steel nails are significantly more resistant to rust and corrosion than standard steel or even galvanized nails, making them an excellent choice for outdoor projects or consistently humid environments. However, they are typically more expensive.
Q5: What if my nails are already a little rusty?
A5: Lightly rusted nails can sometimes be cleaned with steel wool or a wire brush. For severely rusted nails, it’s often best to discard them and invest in new ones that you can store properly. Preventing rust in the first place is always easier than fixing it.
Q6: Are there any natural methods for keeping nails dry?
A6: Unused charcoal briquettes can absorb some moisture and odors. Rice can also absorb a small amount of moisture, but it’s less effective than silica gel and can break down over time. For serious humidity, manufactured desiccants are more reliable.
Q7: Can I store nails outdoors in a shed?
A7: A shed can be a humid environment, especially if it’s not insulated or climate-controlled. If storing nails in a shed, it’s essential to use robust airtight containers with moisture absorbers, just as you would in a moist garage or basement. Elevate them off the floor.
Protecting Your Investment and Your Projects
Keeping your nails in good condition is more than just a tidiness issue; it’s about ensuring the quality and longevity of your woodworking projects. A rusty nail can compromise structural integrity, leave ugly marks on your beautiful wood, and cause frustrating jams in your tools.
By implementing these strategies – focusing on airtight containers, utilizing moisture absorbers, and selecting smart storage locations – you’re actively protecting your fasteners from the damaging effects of humidity. It’s a small amount of effort that yields big rewards, ensuring that every nail you pull is as straight, strong, and clean as the day you bought it.
So, take a look at your current nail storage. Are they truly protected? A little proactive care now will save you time, money, and headaches down the road. Happy building, and may your nails always be rust-free!