Transform that awkward under-stair space into functional storage with a DIY shelving project. Learn simple, budget-friendly ideas to maximize every inch, turning clutter into organized bliss with clear, step-by-step guidance perfect for beginners.
We all have that one space in our homes that just…sits there. Often, it’s the area tucked away beneath the stairs. It’s a bit dark, maybe a little awkward, and it can quickly become a dumping ground for things we “might need someday.” But what if I told you that this often-ignored space could become one of the most useful areas in your home with a killer under stair storage shelving project?
Creating smart storage solutions doesn’t have to be complicated or expensive. Even if you’re new to DIY, a well-planned shelving unit can make a huge difference. We’ll walk through how to assess your space, choose the right materials, and build a functional and good-looking storage system that will banish clutter for good. Get ready to unlock the potential of your under-stair nook!
Table of Contents
Why Under-Stair Space is Prime Real Estate for Storage
That triangular void under your staircase might seem like a lost cause, but it’s actually a goldmine of potential storage. Most homes have this space, and it’s often underutilized. Think about it: it’s usually centrally located, and it’s a perfect spot for things you need to access, but maybe don’t want on display. From pantry items to cleaning supplies, or even a cozy reading nook, the possibilities are vast. Building custom under stair storage shelving is a fantastic way to add value and organization to your home.
Assessing Your Under-Stair Space: The First Step
Before we grab any tools, let’s get a good look at the space we’re working with. Every staircase is a little different, so understanding the dimensions and any quirks is key to a successful project. Grab a measuring tape and a notepad.
What to Measure:
- Height: Measure the height at the lowest point (where the ceiling meets the wall) and the highest point (where the stairs end).
- Width: Measure the width of the space from wall to wall.
- Depth: Measure how far the space extends from the wall under the stairs.
- Obstructions: Look for any pipes, wires, or structural elements that might get in your way. Note their location and size.
- Access: How will you get items in and out? Will it be a simple open shelf, or do you need doors or drawers?
Sketching out a rough diagram of your space, noting all these measurements and obstructions, will be invaluable when you start planning your shelving design. This step saves a lot of headaches later on!
Choosing Your Under Stair Storage Shelving Design
Now for the fun part – deciding what your under-stair storage will look like! There are many ways to go, from simple open shelves to more elaborate built-in units. Let’s explore some popular options.
Open Shelving
This is often the simplest and most budget-friendly option. Open shelves are great for displaying items (like books or decorative pieces) or for storing things that are frequently used, like pantry goods or cleaning supplies in attractive bins.
- Pros: Easy to build, cost-effective, great visibility for items.
- Cons: Items can look cluttered if not organized, dust can accumulate easily.
Closed Cabinets or Drawers
If you prefer a cleaner look or need to hide items, cabinets or drawers are the way to go. This can involve building simple box cabinets or incorporating sliding drawers for easy access.
- Pros: Hides clutter, protects items from dust, creates a streamlined appearance.
- Cons: More complex to build, can be more expensive, requires more precise measurements.
Combination Units
Why not have the best of both worlds? A common design is to have a few open shelves for frequently accessed items or display, combined with closed cabinets or drawers for things you want to keep out of sight.
Specialty Storage
Consider what you’ll store. For example, if it’s for shoes, you might want angled shelves. If it’s for wine bottles, you’ll need racks. For a home office nook, you might integrate a small desk or pull-out keyboard tray.
Material Choices for Your Project
The materials you choose will affect the look, durability, and cost of your under stair storage shelving project. For DIYers, there are some great, easy-to-work-with options.
| Material | Pros | Cons | Best For |
|---|---|---|---|
| Plywood (Birch, Oak Veneer) | Strong, versatile, good surface for painting or staining, relatively affordable. | Edges can be rough and require finishing, can be heavy. | Shelves, cabinet boxes, structural components. |
| MDF (Medium Density Fiberboard) | Smooth surface, easy to paint, very stable, affordable. | Heavy, not water-resistant, can sag over longer spans without support, difficult to screw into firmly. | Cabinet doors, drawer fronts, painted shelves (with adequate support). |
| Lumber (Pine, Fir) | Easy to cut and work with, readily available, can be stained or painted. | Can warp if not dried properly, can be more expensive than sheet goods for large areas. | Shelf supports, face frames, decorative trim. |
| Pre-finished Shelving | Ready to install, no finishing required, often very durable and attractive. | Can be more expensive, limited size and finish options. | Simple open shelving where finish is key. |
Hardware and Fasteners
Don’t forget the bits and pieces that hold it all together! You’ll need:
- Screws: Wood screws are essential. For cabinet construction and shelving, #8 or #10 screws in lengths of 1.5″ to 2.5″ are common.
- Shelf Pins/Brackets: If you plan on adjustable shelves, shelf pins inserted into pre-drilled holes are perfect. For fixed shelves, strong L-brackets or dadoes (grooves cut into the sides) provide support.
- Drawer Slides: If you’re building drawers, you’ll need hardware for them to slide smoothly.
- Hinges: For cabinet doors.
- Paint/Stain/Sealant: To finish your project and protect the wood.
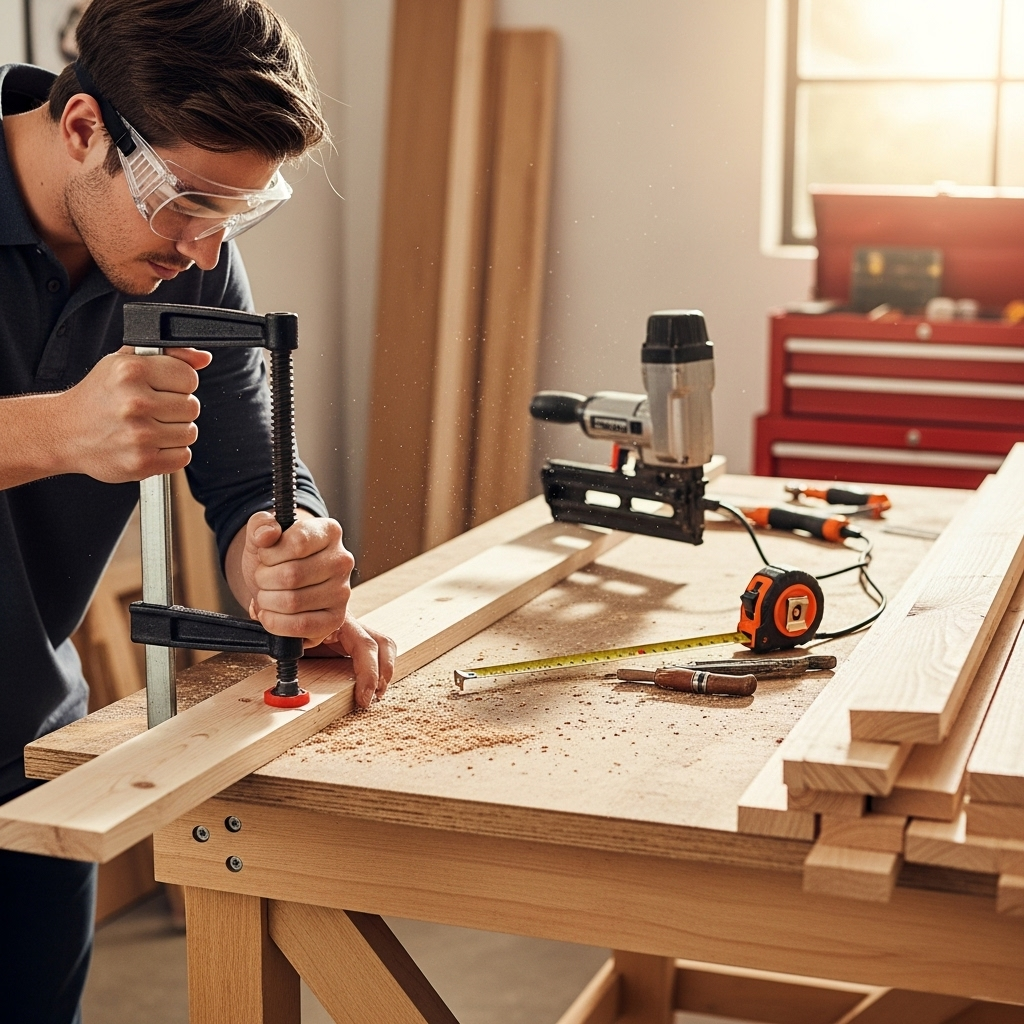
Tools You’ll Need for the Job
As Jack Shaffer of Nailerguy, I always say the right tool makes the job easier and safer! For this under stair storage shelving project, you won’t need every tool in the book, but a few key items will be very helpful.
Essentials:
- Tape Measure: For accurate measurements.
- Pencil: For marking cuts and placement.
- Safety Glasses: Non-negotiable for eye protection.
- Gloves: To protect your hands from splinters and cuts.
- Stud Finder: Crucial for anchoring shelves securely to wall studs.
- Level: To ensure your shelves are perfectly straight.
- Drill/Driver: Essential for pre-drilling holes and driving screws. A cordless one is incredibly convenient.
- Circular Saw or Miter Saw: For making straight, accurate cuts on your wood. A miter saw is great for repetitive cuts, especially if you’re building angled shelves. (If you’re unsure, a good circular saw can do the job with a guide).
- Sander (Orbital or Block): For smoothing edges and surfaces before finishing.
Helpful Additions:
- Jigsaw: Useful for cutting curves or notches if your design requires them.
- Pocket Hole Jig: A fantastic tool for creating strong, hidden joints, especially for cabinet construction and strong shelf supports.
- Chisels: For cleaning up dadoes or making small adjustments.
- Putty Knife: For filling screw holes or imperfections.
Remember, if you’re using a saw, always read the manual and understand its operation. Safety first!
Step-by-Step: Building Your Under Stair Storage Shelving
Let’s get building! This guide focuses on a common design: simple, sturdy shelving installed directly into the wall or on support cleats. We’ll cover the basics, and you can adapt it to your specific needs.
Step 1: Plan Your Layout
Based on your measurements (from Step 2), draw out exactly where each shelf will go. Consider the height you need between shelves for the items you’ll store. Mark these dimensions on your diagram and directly onto the wall where possible using a light pencil line. Use your level to ensure your marks are straight.
Step 2: Prepare the Wall (Install Support Cleats or Find Studs)
This is the most critical step for structural integrity. You have a few options:
- Option A: Mounting to Studs: Use your stud finder to locate the wall studs behind your desired shelf locations. Mark their centers clearly. When installing your shelves, you will drive screws directly through the shelves or support brackets into these studs. This is the strongest method.
- Option B: Installing Support Cleats: This is a great method, especially for longer shelves or when studs aren’t conveniently located.
- Cut strips of 1×2 or 1×3 lumber (cleats) to the length of your shelves.
- Hold a cleat against your wall at the desired shelf height. Use your level to ensure it’s perfectly horizontal.
- Locate studs behind the cleat. Drive screws through the cleat into the studs. If you can’t hit studs at both ends, use heavy-duty drywall anchors (like toggle bolts or molly bolts) on the ends of the cleat.
- Repeat for each shelf position.
For the sloped part of the wall under the stairs, you might need to measure and cut angled cleats to match the roofline.
Step 3: Cut Your Shelving Material
Measure your planned shelf locations carefully, taking the depth of the wall studs or cleats into account. Cut your plywood or lumber to size. If using plywood, remember to account for the thickness of the material when measuring the space between shelves. For a cleaner edge, consider getting the plywood cut at the store or finishing the edges later with iron-on veneer edging.
Step 4: Sand and Finish Your Shelves
Before installation, sand all edges and surfaces smooth. This is much easier to do now than when the shelves are in place. Apply your chosen finish – paint, stain, or a clear sealant. Allow adequate drying time between coats, following the product instructions. A good finish protects the wood and makes your shelving look professionally done.
Step 5: Install the Shelves
This is where the structure comes together!
- For shelves mounting directly to studs: Position the shelf, ensure it’s level, and then drive screws through the shelf directly into the marked stud locations. Use at least two screws per stud.
- For shelves mounting to cleats: Rest the shelf on top of the installed cleats. Ensure it’s flush with the front of the cleat where appropriate. Drive screws down through the shelf into the cleats below.
For the angled section under the stairs, the shelves will sit on the angled cleats you installed.
Step 6: Add Trim or Facing (Optional but Recommended)
To give your shelving a more finished, built-in look, you can add a thin piece of trim (like a 1×2) along the front edge of each shelf. This hides the raw edge of the plywood and provides a cleaner visual. You can paint or stain this trim to match your shelves or existing woodwork.
If you’re building cabinet doors or drawers, this is where you would install them, attaching hinges or drawer slides to your cabinet boxes and the doors/drawers themselves. This is a more advanced step, so if you’re a beginner, simple open shelves are a fantastic start!
Clever Under Stair Storage Ideas to Inspire You
Beyond basic shelving, there are so many inventive ways to use the under-stair space. Think outside the box!
1. Functional Pantry
With shelves at varying heights, you can store dry goods, canned items, and appliances. Use attractive bins and baskets to keep things tidy and easy to grab. This is perfect for kitchens with limited cabinet space.
2. Mudroom Nook
If your stairs are near an entrance, create a mini mudroom. Install hooks for coats, shelves for shoes, and cubbies for bags and accessories. A bench incorporating storage drawers can also be a great addition.
3. Kid’s Play Area or Reading Nook
For the angled ceiling, imagine low shelves stocked with books and toys. You could even build a small cushioned bench or a cozy nook with some fairy lights. It’s a magical space for little ones.
4. Home Office Corner
Need a small workspace? Build a custom shelf that doubles as a desk. Add some wall-mounted shelving above for supplies and file storage. Ensure good lighting!
5. Pet Space
Canine companions need a cozy spot too! Build a custom dog bed with built-in storage drawers for toys and leashes. Or, create a dedicated feeding station with easy-to-clean surfaces.
6. Display Area
Love to showcase your collectibles, art, or photos? Chic open shelving can turn your under-stair space into a gallery. Ensure good lighting to highlight your items.
7. Cleaning Supplies Station
Keep your mops, brooms, vacuum cleaner, and cleaning solutions neatly organized and out of sight. Adjustable shelves are great for fitting different-sized bottles and equipment.