Solid hardwood flooring offers unmatched beauty, durability, and value to your home. This guide breaks down everything beginners need to know to choose, install, and care for this timeless flooring option, ensuring a stunning and lasting result.
Thinking about new floors? Solid hardwood flooring is often the top choice for homeowners, and for good reason! It brings a natural warmth and timeless elegance to any room that’s hard to beat. But if you’re new to home renovation, the options and process might seem a little daunting. Don’t worry, I’m here to help you navigate it all. Together, we’ll uncover why solid hardwood is such a fantastic option and how you can achieve beautiful results, step by step. Let’s get started on making your home even more stunning!
Table of Contents
Why Choose Solid Hardwood Flooring? The Nailerguy’s Take
As someone who’s spent a lot of time with wood and tools, I can tell you that solid hardwood flooring is a champion. Every plank is milled from a single, solid piece of timber. That means you’re getting pure, natural beauty right under your feet. It’s not made of layers or composites; it’s the real deal.
Think about the look and feel. Hardwood floors add a sense of undeniable luxury and character. They have a unique grain pattern that can’t be replicated. Plus, they can last for generations if cared for properly. I’ve seen old homes with original hardwood floors that still look amazing!
The Big Benefits
Here’s why solid hardwood flooring is a smart move for your home:
- Timeless Beauty: It never goes out of style. Hardwood adds warmth and elegance that complements any décor.
- Increased Home Value: It’s a strong selling point. Buyers often see hardwood floors as a valuable upgrade.
- Durability: When properly maintained, these floors can last a lifetime, often outliving the owners!
- Natural Material: It’s a sustainable choice, especially when sourced from responsibly managed forests.
- Repairable: Scratches and dents? No problem. Solid hardwood can be sanded and refinished multiple times to look brand new.
- Hypoallergenic: Unlike carpet, hardwood doesn’t trap dust, pollen, or pet dander, making it great for allergy sufferers.
A Few Things to Keep in Mind
Now, no material is perfect, and it’s important to be a savvy shopper. Solid hardwood does come with a few considerations:
- Cost: It’s generally more expensive upfront than laminate or vinyl flooring.
- Moisture Sensitivity: Solid wood can expand and contract with changes in humidity and moisture. This makes it less ideal for bathrooms, basements, or laundry rooms.
- Scratching: While durable, it can be scratched or dented by furniture legs, pet claws, or high heels.
- Installation: It often requires professional installation, or at least a good understanding of flooring techniques, especially for nail-down methods.
Types of Solid Hardwood Flooring: Picking Your Perfect Plank
When you’re choosing solid hardwood, you’ll encounter a few key distinctions. These mainly come down to the type of wood, how it’s cut, and its finish.
Wood Species: The Heart of Your Floor
The type of wood you choose impacts the color, hardness, grain pattern, and price. Here are some popular options:
- Oak (Red & White): The most popular choice for a reason. It’s durable, relatively affordable, and takes stain beautifully. Red oak has reddish undertones, while white oak has more grayish-brown tones and is slightly harder.
- Maple: A very hard wood with a subtle, uniform grain. It has a lighter color and can give a very clean, modern look.
- Hickory: One of the hardest domestic woods available. It features a rich, varied grain and color, giving it a rustic charm.
- Walnut: Known for its deep, rich brown color and beautiful, often swirling grain patterns. It’s softer than oak but offers a luxurious look.
- Cherry: Offers a beautiful, warm reddish-brown color that darkens gracefully with age. It’s softer than oak.
- Pine: A softer wood, pine can dent and scratch more easily, but it offers a rustic, farmhouse look and is generally more affordable. It’s perfect for achieving that aged, distressed feel.
How the Wood is Cut (The Grain)
This refers to how the lumber is sliced from the log, affecting the look and stability of the plank.
- Plain Sawn: This is the most common and cost-effective cut. It shows the widest grain pattern, often a “cathedral” effect, and can be more prone to expansion and contraction.
- Rift & Quartersawn: These cuts are made perpendicular to the growth rings. This results in a straighter, more linear grain pattern. Quartersawn wood is generally more stable and less prone to shrinking or cupping, but it’s also more expensive.
Finish and Style: From Natural to Bold
The finish is what protects the wood and gives it its final appearance. You’ll have a couple of main choices:
- Pre-finished: Most solid hardwood sold today comes pre-finished. It’s coated with multiple layers of tough aluminum oxide or urethane at the factory. This finish is extremely durable and cures harder than most site-applied finishes. It also means faster installation and no VOCs (volatile organic compounds) released into your home during installation.
- Unfinished: This raw wood needs to be sanded, stained, and finished on-site after installation. It allows for complete customization of color and finish. This is a more labor-intensive option.
Surface styles vary too, from smooth, hand-scraped, to distressed, offering different aesthetic appeals.
Understanding Hardwood Flooring Dimensions
When you’re shopping, you’ll see planks with different widths and lengths. These dimensions can significantly affect the look of your room.
Plank Width
Plank widths can range from 1.5 inches to over 8 inches. For a more traditional look, narrower planks (2.25 to 3.25 inches) are often used. Wider planks (5 inches and up) can make a room feel more contemporary and spacious, and they require fewer seams, which can be a bonus.
Plank Length
Lengths can vary quite a bit, but generally, you’ll find them to be anywhere from 10 inches to 7 feet or more. Longer planks tend to create a more unified and expansive feel in a room. You’ll often get a mix of lengths in a single box to create a more natural, flowing appearance.
Installation: The Nailerguy’s Guide to Getting It Right
Installing solid hardwood flooring is a rewarding DIY project, but it requires careful preparation and the right tools. If you’re comfortable with basic carpentry and have the patience, you can tackle this!
Preparation is Key!
Before you even think about laying down a single plank, get your subfloor ready.
- Acclimate the Wood: This is crucial! Solid hardwood needs to adjust to your home’s climate. Keep the unopened boxes in the room where they’ll be installed for at least 72 hours. This helps prevent expansion or contraction issues later.
- Subfloor Check: Your subfloor must be clean, dry, flat, and structurally sound. Common subfloors are plywood or OSB. Ensure there are no squeaks or loose boards. For flatness, it should be within 3/16 inch over a 10-foot span.
- Moisture Testing: Especially important over concrete slabs or in basements. You can use a penetrating concrete moisture meter. If moisture levels are too high, you’ll need to address that first. The EPA provides excellent guidance on moisture control in buildings.
- Remove Old Flooring: Completely remove any existing carpet, vinyl, or old wood flooring.
- Underlayment/Vapor Barrier: Depending on your subfloor and the type of hardwood, you might need an underlayment. For wood subfloors, a layer of building paper or felt is often used. Over concrete, a 6-mil polyethylene vapor barrier is essential to stop moisture from migrating up.
Installation Methods
Solid hardwood is typically installed by one of these methods:
- Nail-Down: This is the most common method for solid hardwood, especially on wood subfloors.
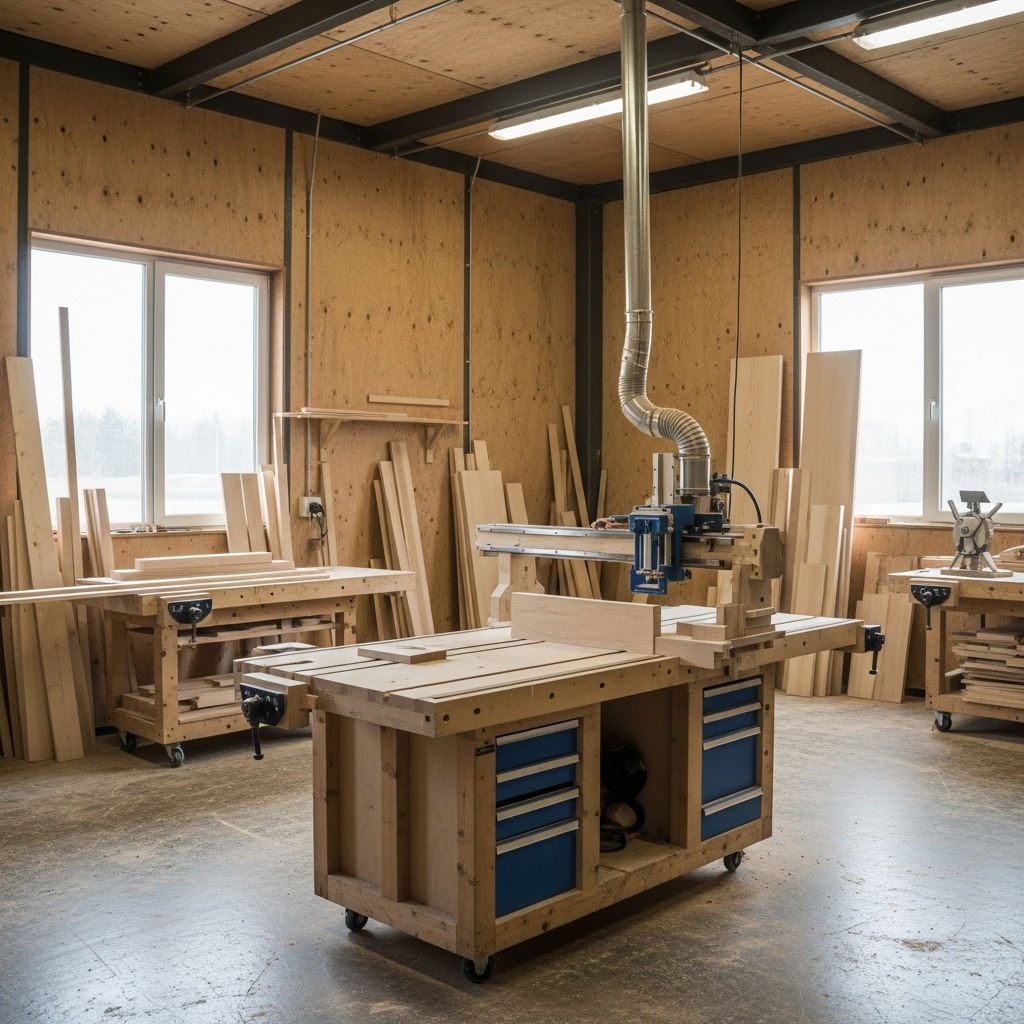
- Tools You’ll Need: A flooring nailer (also called a cleat nailer), an air compressor, and the appropriate fasteners (1.5″ to 2″ cleats). You might also need a manual floor stapler for the edges.
- The Process: You’ll start by laying a row of planks along the longest, straightest wall, leaving a small expansion gap (about 1/2 inch) around the perimeter. The floor nailer is used to drive fasteners through the tongue of the plank at an angle into the subfloor. You’ll alternate the placement of your tongue-and-groove joints to avoid long, unbroken lines. You’ll need to use a miter saw to cut planks to fit around obstacles and at the end of rows.
- Staple-Down: Similar to nail-down, but uses a manual or powered stapler. This method is often preferred for slightly thinner hardwood planks.
- Glue-Down: Sometimes used for solid hardwood, especially over concrete. Requires a special flooring adhesive and a trowel for application. This method can help dampen sound and reduce movement.
Pro Tip: Always follow the manufacturer’s specific installation instructions for your chosen flooring. They know their product best!
For DIYers, renting a flooring nailer is a common practice. Make sure you get the right size for your flooring thickness and nail type. Check out resources like Tool Reviews and Guides for advice on choosing the right nailer if you’re considering a purchase.
Expansion Gaps are Non-Negotiable!
This is one of the MOST important steps to prevent buckling. Wood expands and contracts with changes in humidity and temperature. You need to leave a small gap (typically 1/2 inch) between the hardwood planks and all vertical surfaces like walls, cabinets, doorways, and pipes. This gap will be hidden by your baseboards and trim later.
A Quick Look at Installing Solid Hardwood
Here’s a simplified step-by-step overview of the nail-down method:
- Plan Your Layout: Determine the starting wall and direction of the planks. Usually, they run parallel to the longest wall.
- Mark Your Lines: Snap chalk lines to ensure your first row is perfectly straight.
- Install the First Row: Position planks with the tongue side facing into the room. You may need to rip (trim) the tongue off the first row. Secure with finish nails or staples through the face of the board (will be covered by trim). Leave expansion gap at ends.
- Install Subsequent Rows: Use the flooring nailer to fasten planks through the tongue. Stagger end joints by at least 6 inches for strength and appearance.
- Cutting and Fitting: Use a miter saw for straight cuts and a jigsaw for curves or around obstacles.
- Last Rows: The last few rows might require face-nailing or using a pull bar and hammer to pull the planks tight before nailing.
- Install Trim: Reinstall or install new baseboards and quarter-round molding to cover the expansion gaps.
Caring for Your Solid Hardwood Floors: Keeping Them Stunning
Taking care of your new hardwood floors is pretty straightforward, but consistency is key. A little effort goes a long way in preserving their beauty and extending their life.
Daily/Weekly Care
- Sweep or Vacuum Regularly: Use a soft-bristle broom or the hard floor attachment on your vacuum cleaner. This removes grit and dust that can scratch the finish.
- Wipe up Spills Immediately: Don’t let liquids sit on the floor. Use a slightly damp cloth or mop.
- Use Mats and Rugs: Place doormats at every entrance to trap dirt and moisture. Use area rugs in high-traffic areas like living rooms and hallways to protect the finish from wear and tear.
- Protect Furniture Legs: Use felt pads on all furniture legs. Check them regularly and replace them when they get worn down.
Deep Cleaning and Maintenance
Avoid traditional “wet” mopping. Excess water can damage hardwood floors. Instead, opt for a cleaner specifically designed for hardwood floors. Most often, a lightly dampened microfiber mop is all you need.
- Manufacturer’s Recommended Cleaner: Always check what your flooring manufacturer recommends. Some finishes have specific cleaning requirements.
- Frequency: Deep cleaning might be needed every 2-3 months, or as necessary, depending on traffic.
Refinishing: Bringing Back the Shine
One of the greatest advantages of solid hardwood is its ability to be refinished. Over time, even the best finish can show wear. If your floors become deeply scratched or the finish dulls significantly, you can refinish them.
This process typically involves sanding down the old finish and a thin layer of wood, then applying a new stain (if desired) and protective topcoats. This can be a DIY job, but it’s labor-intensive and messy. Many homeowners opt to hire professionals for refinishing.
Solid Hardwood vs. Engineered Hardwood: What’s the Difference?
You’ll often see engineered hardwood flooring alongside solid hardwood. It’s important to understand the distinction:
| Feature | Solid Hardwood Flooring | Engineered Hardwood Flooring |
|---|---|---|
| Construction | Milled from a single piece of solid wood. | Multiple layers (plies) of wood, glued together, with a thin layer of real hardwood veneer on top. |
| Installation Flexibility | Best for nail-down or staple-down over wood subfloors. Can be glued. | More versatile. Can be nailed, stapled, glued, or even floated over many subfloors, including concrete. |
| Moisture & Temperature Stability | More susceptible to expansion/contraction from humidity and temperature changes. Not ideal for basements or bathrooms. | More stable. Less prone to warping or gapping caused by moisture and climate fluctuations, making it suitable for more areas of the home. |
| Refinishing | Can be sanded and refinished multiple times (depends on wear layer thickness). | Can be refinished 1-3 times, depending on the thickness of the top hardwood veneer. Thicker veneers can be refinished more. |
| Cost | Generally higher upfront cost per square foot for the material itself. | Can be comparable to solid, but often offers a slightly more budget-friendly option, especially for installation versatility. |
| Authenticity | 100% real wood throughout. | Top layer is 100% real wood; the core is usually plywood or HDF (High-Density Fiberboard). |
While engineered hardwood offers more installation versatility and stability, solid hardwood is the classic choice for its pure, unadulterated wood composition and ability to be restored virtually indefinitely. For a true, lasting, traditional hardwood floor experience, solid is often preferred where environmental conditions are stable.
Frequently Asked Questions
Q1: Can I install solid hardwood flooring in a kitchen?
It’s generally not recommended for kitchens due to high moisture and potential spills. Engineered hardwood or waterproof options like luxury vinyl plank are usually better choices for kitchens.
Q2: How long does installation of solid hardwood flooring take?
For a typical room (around 200-300 sq ft), professional installation usually takes 2-4 days. This includes preparation, acclimation, laying the floor, and installing trim.
Q3: What’s the best way to clean solid hardwood floors?
Regular sweeping or vacuuming with a soft brush attachment, and occasional cleaning with a hardwood floor cleaner and a slightly damp microfiber mop. Avoid excessive water and harsh chemicals.