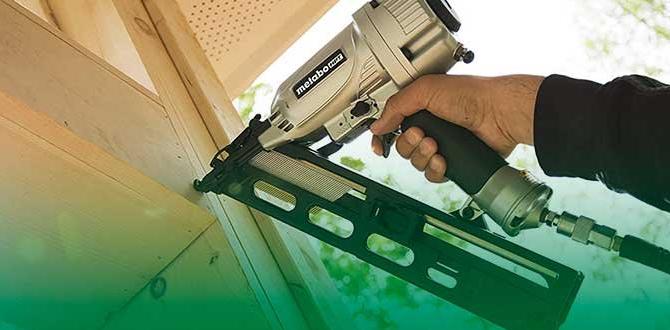
Have you ever struggled with getting the right depth on your nail projects? You’re not alone! Many DIY enthusiasts face this same challenge. The Ryobi brad nailer is a popular tool. But understanding its depth adjustment can make a big difference.
Picture this: You’re finishing a beautiful wood project, but the nails stick out. Frustrating, right? With the right depth setting, you can ensure the nails sit perfectly every time. This simple adjustment can turn an okay project into a fantastic one!
In this article, we will uncover easy tips on using the Ryobi brad nailer depth adjustment. You’ll learn how to make your projects look neat and professional. Let’s dive in and discover how this handy tool can work wonders for your next project!
Table of Contents
Ryobi Brad Nailer Depth Adjustment: Perfectly Set Nails

Ryobi Brad Nailer Depth Adjustment
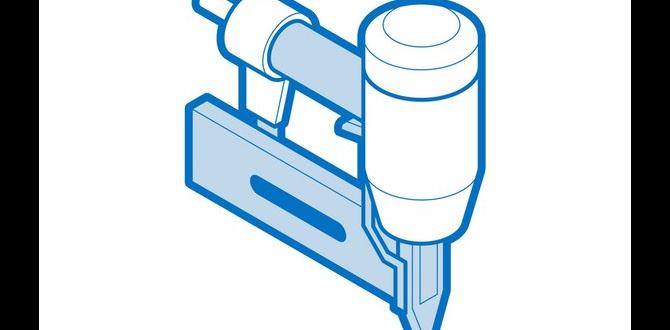
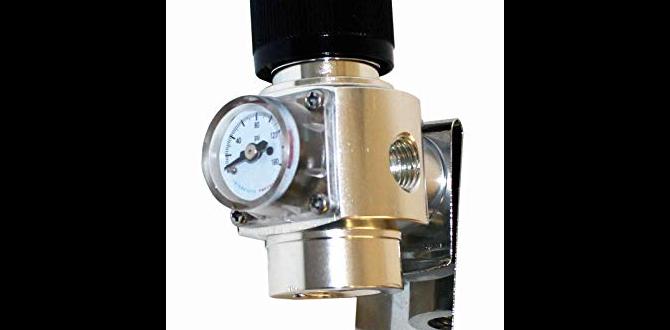
Adjusting the depth on your Ryobi brad nailer is essential for achieving clean and precise finishes. This feature helps control how deep the nail goes into the wood. Did you know that improper depth can damage materials or cause nails to stick out? With the simple adjustment knob, users can easily set the depth based on the thickness of the material. This makes your projects look professional every time, saving you time and frustration in the process.Importance of Depth Adjustment
Role of depth adjustment in achieving professional results. Common issues arising from improper depth settings.Adjusting depth is like tuning a musical instrument; it makes all the difference! A proper depth setting helps achieve professional results. If your nails go in too deep, they can split the wood, leaving it looking like Swiss cheese. Too shallow? They might stick out like an awkward thumb at a sock puppet party! Trust me, no one wants that. Get it right, and your projects will shine, leaving you proud and your friends asking for tips.
| Depth Setting | Consequence |
|---|---|
| Too Deep | Splits wood |
| Too Shallow | Nails stick out |
How to Adjust the Depth on Your Ryobi Brad Nailer
Stepbystep guide to adjusting depth settings. Tips for testing depth adjustment effectively.Adjusting the depth on your Ryobi brad nailer is easy! Follow these simple steps:
- Locate the depth adjustment dial on the tool.
- Turn the dial to set the depth you want.
- Test the setting on a scrap piece of wood.
- Make adjustments if needed, repeat testing.
To ensure it works well, use scrap wood similar to your project. This leads to perfect results! Remember, practice helps you improve your skills.
How do I know if the depth is correct?
Check the nails after nailing. If they sit flush with the surface, you’re all set. If not, adjust the depth dial and test again until it looks right.
Common Mistakes to Avoid with Depth Adjustment
Misunderstanding nail length and depth relationship. Ignoring material type when setting depth.Many people mix up nail length and depth adjustment. Using a short nail for a deep setting can ruin your project. It’s like trying to cook spaghetti with ice! Always check your material type too. Soft wood needs less depth, while hard wood requires more. If you ignore this, you might end up with a nail sticking out like a sore thumb. Here’s a quick guide:
| Material Type | Recommended Depth Setting |
|---|---|
| Softwood | Shallow |
| Hardwood | Deeper |
So remember, adjusting depth is not just about turning a knob; it’s about knowing your materials. Nail it right!
Maintenance Tips for Optimal Depth Adjustment
Regular cleaning and lubrication practices. Signs that your depth adjustment mechanism may need repair.Keeping your tool in tip-top shape helps with depth accuracy. Regular cleaning is a must. Dust and debris can mess with your brad nailer! Lubrication smooths everything out. A bit of oil can be your best friend here. Watch for problems like unusual sounds or difficulty adjusting the depth—these are clues your tool needs a check-up.
| Signs of Trouble | What to Do |
|---|---|
| Unusual noises | Check for blockages |
| Depth won’t adjust | Inspect the mechanism |
| Stiff adjustments | Apply more lubrication |
Comparing Ryobi Brad Nailer Depth Adjustment with Competitors
Key differences and advantages of Ryobi’s system. User experiences and satisfaction ratings.Choosing a good brad nailer? Ryobi stands out with its easy depth adjustment system. Many users love how simple it is to change settings. This feature allows for better nail placement. Other brands may not offer this ease. Here are some key differences:
- Quick changes: Adjust depth fast with Ryobi.
- Precise control: More accuracy than competitors.
- User ratings: High satisfaction rates among users.
Overall, users appreciate how Ryobi makes their projects smoother. Happy users often share their positive experiences.
What do users say about Ryobi brad nailers?
Most users find the Ryobi brad nailer easy to use and reliable. Many enjoy how lightweight it is. They feel confident while working with it.
FAQs About Ryobi Brad Nailer Depth Adjustment
Addressing common queries from users. Troubleshooting depthrelated issues.Many users have questions about adjusting the depth on their Ryobi brad nailer. It’s common to wonder how deep your nails should go. If you’re shooting nails that are too deep, it can mess up your project. On the flip side, if they barely go in, it can be frustrating! Troubleshooting depth issues is simple. Make sure to check your dial settings and keep the tool clean. After all, a nailer with a dirty nose isn’t winning any awards!
| Issue | Solution |
|---|---|
| Nails too deep | Adjust the depth dial. |
| Nails not deep enough | Increase the depth setting. |
| Jams | Clear the jam and clean the tool. |
User Recommendations and Best Practices
Realworld tips from experienced users. Dos and don’ts for effective use of depth adjustment.Experienced users have some golden rules for using the Ryobi brad nailer’s depth adjustment. First, always test on scrap wood before getting fancy with your projects. You don’t want to end up with nails too deep or not deep enough—yikes! Remember, adjust gently, like you’re turning a doorknob, not starting a race car. Avoid rushing the adjustments; a calm hand works wonders. Check out the handy table below for quick dos and don’ts:
| Dos | Don’ts |
|---|---|
| Test depth on scrap wood. | Don’t rush your adjustments! |
| Adjust slowly and steadily. | Don’t hold the nailer at weird angles. |
| Keep the nailer clean. | Don’t ignore the manual! |
With these tips, your depth adjustment skills will be on point, and your projects will shine like a star—without the nail mishaps!
Conclusion
In summary, adjusting the depth on a Ryobi brad nailer is easy and important. It helps you control how deep the nails go. You want nails to sit just right, not too deep or shallow. Try practicing on scrap wood first. For more tips, keep exploring and reading about brad nailers to become a pro!FAQs
How Do I Properly Adjust The Depth Setting On My Ryobi Brad Nailer For Different Materials?To adjust the depth setting on your Ryobi brad nailer, first look for the depth adjustment knob or dial. Turn it to make the nails go deeper or shallower, depending on the material. For soft wood, set it shallower. For hard wood, set it deeper. Always test with a scrap piece to make sure it’s just right!
What Are The Common Issues That Can Arise If The Depth Adjustment On A Ryobi Brad Nailer Is Incorrectly Set?If the depth adjustment on your Ryobi brad nailer is wrong, you might have some problems. If it’s too deep, nails can go all the way through the wood. If it’s too shallow, they might stick out or not hold well. This can make your project look messy and may not be strong enough. Always check and adjust the depth to avoid these issues!
Can I Use A Ryobi Brad Nailer Without Adjusting The Depth For Various Gauge Nails?You can’t use a Ryobi brad nailer without adjusting the depth for different gauge nails. Each gauge, or size, of nail needs a different depth to work well. If you don’t adjust it, the nails might stick out or go too deep. It’s best to set the depth for each type of nail you use. This way, your project will look better and be safer.
What Tools Or Methods Are Recommended For Making Precise Depth Adjustments On A Ryobi Brad Nailer?To make precise depth adjustments on a Ryobi brad nailer, you can use the depth adjustment dial. This dial is usually near the front of the tool. You turn it to change how deep the nails go into the wood. You can also test the depth by nailing into scrap wood first. This way, you can practice without messing up your project!
How Can I Troubleshoot Depth Adjustment Problems On My Ryobi Brad Nailer If The Nails Are Consistently Over- Or Under-Driven?If your Ryobi brad nailer is driving nails too deep or not deep enough, you can adjust the depth settings. Look for a knob or dial on the tool that controls the depth. Turn it in small amounts and test it on a scrap piece of wood. If the nails are still not right, check if the nails are loaded correctly or if they are the right size for your tool.