Run electrical wiring and use a nailer safely with this beginner’s guide. Learn essential safety tips, tool selection, and step-by-step instructions for a successful DIY project. Get it done right and with confidence!
Hey there DIYers! Jack Shaffer here from Nailerguy. Ever found yourself staring at a project, needing to tack up some trim or run a new wire, and feeling a little unsure about how to do it safely and effectively? You’re not alone! Many beginners find tackling electrical work and using powered nailers a bit daunting. But listen, with the right knowledge and a few simple steps, you can absolutely nail these tasks. We’re going to break down everything you need to know, from choosing the right tools to making sure everyone stays safe. Get ready to boost your DIY confidence!
Table of Contents
What You’ll Learn in This Guide
We’ll cover the absolute essentials to get you going. You’ll learn:
- Key safety precautions before you even pick up a tool.
- How to choose the right nailer for your project.
- Basic tips for running electrical wiring around your home.
- Step-by-step instructions for both tasks.
- Troubleshooting common issues you might encounter.
Let’s dive in and make your next project a breeze!
Safety First, Always!
Before we get into the nitty-gritty of running wires or firing up a nailer, let’s talk about the most important thing: safety. No project is worth an injury, so understanding and implementing safety measures is critical. Think of it as the foundation for all your DIY success.
Electrical Wiring Safety
Working with electricity can be dangerous if you don’t take the proper precautions. The golden rule is to always assume wires are live, even if you think you’ve turned off the power. It’s better to be safe than sorry!
- Turn off the power: Always, always, always switch off the power at the circuit breaker or fuse box before you touch any wires or electrical boxes. Double-check with a voltage tester to confirm the power is off.
- Use insulated tools: Make sure your screwdrivers, wire strippers, and pliers have good quality insulation on the handles.
- Understand your system: Familiarize yourself with basic electrical codes and practices. The National Electrical Code (NEC) is the standard in the US for safe electrical design and installation.
- Never work on wet surfaces: Water conducts electricity, so make sure your work area is dry.
- If in doubt, call a pro: For any complex wiring jobs or if you’re unsure about safety, it’s always best to consult a qualified electrician.
Nailer Safety
Nail guns are fantastic tools that speed up projects, but they pack a punch. Treating them with respect is key to avoiding injury.
- Read the manual: Every nailer is a little different. Take the time to read and understand your specific model’s operating manual.
- Wear safety glasses: This is non-negotiable. Always wear ANSI-approved safety glasses or a face shield to protect your eyes from flying debris or ricocheting nails.
- Keep hands and body clear: Never point the nailer at yourself or anyone else. Keep your hands and other body parts away from the nose of the nailer.
- Disconnect when not in use: For pneumatic nailers, disconnect the air hose when you’re done using it, changing nails, or leaving the tool unattended. For cordless and electric models, remove the battery or unplug it.
- Understand trigger mechanisms: Nailers often have different trigger modes (sequential, contact, full sequential). Know which one you’re using and ensure it’s appropriate for your task. Sequential triggers are generally safer for preventing accidental firing.
- Secure your workpiece: Make sure the material you’re nailing into is stable.
- Be aware of your surroundings: Make sure no one is behind the surface you’re nailing into, as a nail could potentially go all the way through.
Running Electrical Wiring: A Beginner’s Overview
Adding new electrical outlets, switches, or running wires for lighting might seem intimidating, but with basic knowledge and careful planning, it’s a manageable DIY task. Remember, for any work involving the main electrical panel or if you’re unsure, calling a professional electrician is always the safest bet.
Common DIY Wiring Tasks
Most beginner-friendly wiring projects involve:
- Replacing an old outlet or switch with a new one.
- Adding a light fixture.
- Running new wire within a room to add an outlet or switch (this often involves opening up walls).
Tools and Materials for Wiring
Here’s a basic rundown of what you’ll typically need:
- Circuit Breaker/Fuse Box: To shut off power.
- Voltage Tester: Non-contact or multimeter to verify power is off.
- Wire Strippers/Cutters: For removing insulation and cutting wires.
- Screwdrivers: Phillips and flathead, preferably insulated.
- Pliers: Needle-nose and lineman’s pliers can be very useful.
- Electrical Tape: For insulating splices.
- Wire Nuts: To connect wires securely.
- New Electrical Boxes: If you’re adding new boxes for outlets or switches.
- Electrical Cable (e.g., Romex): The appropriate gauge and type for your circuit. Check your local codes. Using the correct wire gauge is crucial for safety. For a 15-amp circuit, you’ll typically use 14-gauge wire; for a 20-amp circuit, use 12-gauge wire.
- Work Lights: Since you’ll be turning off the power.
You can find most of these at your local hardware store. For up-to-date information on electrical codes and safety practices, the Electrical Code Guide is an excellent resource for understanding residential wiring requirements.
Basic Steps for Running Wiring (Simple Scenario)
Let’s imagine you’re replacing an old outlet. This is a great starting point for understanding basic wiring.
- Turn off the Power: Go to your circuit breaker panel and flip the breaker that controls the outlet you’ll be working on. Flip it firmly to the ‘OFF’ position.
- Verify Power is Off: Use your voltage tester at the outlet to confirm there’s no power. Test all slots and the ground.
- Remove the Old Outlet: Unscrew the cover plate and then unscrew the outlet from the electrical box. Gently pull the outlet out of the box so you can see the wires connected to it. Note which wires go to which terminals.
- Disconnect Wires: Loosen the terminal screws and carefully remove the existing wires.
- Connect New Outlet:
- Ground Wire: Connect the bare copper or green wire to the green screw terminal on the new outlet.
- Neutral Wires: Connect the white wires to the silver (neutral) terminal screws. If you have more than one white wire, they should already be joined with a wire nut; you’ll reconnect them the same way to the new outlet’s terminals.
- Hot Wires: Connect the black or red wires to the brass (hot) terminal screws.
Use wire nuts to secure connections, ensuring they are twisted on tightly.
- Install New Outlet: Carefully fold the wires back into the electrical box and screw the new outlet into place.
- Attach Cover Plate: Screw on the new cover plate.
- Restore Power: Go back to the breaker panel and turn the power back on.
- Test: Use a small appliance or a tester to ensure the outlet is working correctly.
Running new wire in walls involves cutting into drywall, stapling the wire to studs (using nail plates where necessary to prevent accidental punctures), and connecting to existing boxes or installing new ones. This is a more involved process, and understanding how to safely navigate wall cavities and connect to existing junction boxes is crucial. For new runs, always ensure the wire gauge and breaker size are kept consistent throughout the circuit.
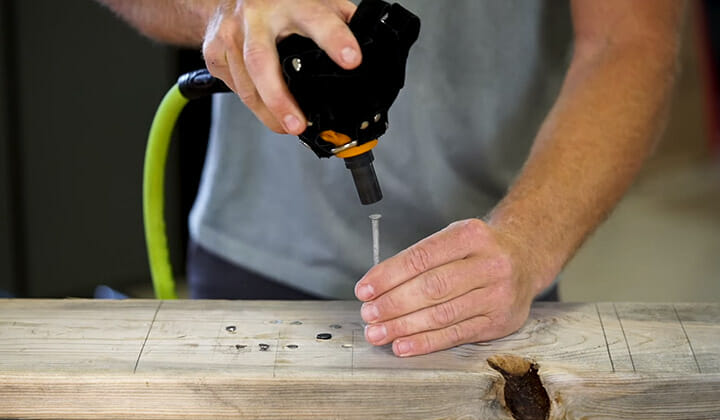
Using a Nailer Like a Pro: Beginner Tips
Nail guns are game-changers for woodworking and construction. They drive fasteners quickly and consistently, making projects move along much faster. But just like any power tool, they require proper handling.
Types of Nailers and When to Use Them
The type of nailer you need depends on the job. Here’s a quick look:
| Nailer Type | Common Uses | Fuel Type | Pros | Cons |
|---|---|---|---|---|
| Framing Nailer | Building frames, subfloors, decks, fences | Pneumatic, Cordless (Li-ion or Gas) | Powerful, drives large nails, fast | Heavy, requires air compressor (pneumatic) or fuel cells (gas cordless), can over-penetrate delicate materials |
| Finish Nailer | Trim work, baseboards, crown molding, window/door casings | Pneumatic, Cordless (Li-ion or Gas) | Drives thinner nails with smaller heads, less marring, good for fine details | Not for structural work, can be slower if high volume is needed |
| Brad Nailer | Light trim, delicate moldings, small crafts, tacking pieces before gluing | Pneumatic, Cordless (Li-ion) | Very thin nails, minimal damage to wood surface, great for precision | Only for very light-duty tasks, not structural |
| Annular Ring Shank Nailer (or Common Nailer) | General construction, attaching siding, framing | Pneumatic | Drives common nails, strong hold | Larger nail heads often visible, requires compressor |
| Pin Nailer | Almost invisible fastening, delicate trim, picture frames, model making | Pneumatic, Cordless (Li-ion) | Drives tiny headless pins for virtually invisible fastening | No holding power on its own, used with glue |
*Cordless framing nailers often use a combination of battery power and either a fuel cell or a small internal combustion system for driving nails.
Getting Started with Your Nailer
Once you’ve chosen the right nailer and understand its safety features, here’s how to get it ready for action:
- Read the Manual: Seriously, do this first! Know your tool.
- Check Safety Features: Ensure any safety guards or trigger locks are in place and functioning. For pneumatic tools, ensure the air fitting is secure.
- Load the Nails: Open the magazine according to the manufacturer’s instructions and load the correct type and size of nails. Make sure they are seated properly.
- Connect Power:
- Pneumatic: Connect the air hose from a properly regulated air compressor. Ensure the regulator is set to the pressure recommended in your nailer’s manual.
- Cordless: Insert a fully charged battery.
- Electric Corded: Plug it into a suitable power outlet.
- Select Trigger Mode (if applicable): Set your nailer to the appropriate trigger mode. For beginners, the ‘contact’ or ‘bump’ fire mode is often used for speed, but the ‘sequential’ fire mode offers more control and safety. With sequential fire, you must depress the nose onto the workpiece then pull the trigger to fire a nail.
- Test Fire (Safely): Find a scrap piece of wood. Hold the nailer firmly against it, ensuring the safety contact tip is depressed. Pull the trigger. Listen for the click and feel the recoil. If it doesn’t fire, re-check your power source/air supply and nail loading.
Technique for Proper Fastening
Simply jamming the nailer against wood and pulling the trigger isn’t always the best way. Here are some tips for cleaner, stronger joints:
- Positioning is Key: Place the nose of the nailer flush against the surface where you want the nail to go. Make sure the safety contact tip is also pressed firmly against the wood.
- Consistent Pressure: Apply steady, even pressure to the nailer. Jamming it too hard can damage the wood or the nailer itself.
- Angles Matter: For stronger holding power, don’t always shoot nails straight on. Consider driving nails at a slight angle (toe-nailing). This is especially useful for securing trim to studs or joists.
- Pilot Holes (Sometimes): For hardwoods or delicate trim, you might want to pre-drill a pilot hole slightly smaller than the nail diameter. This prevents splitting the wood.
- Don’t Over-Nail: Resist the temptation to put in a nail every inch. Generally, nails spaced 6-12 inches apart are sufficient, depending on the application.
- Avoid Driving into Air Gaps: Be mindful of where your nail is going. Don’t drive nails into empty spaces behind your material; aim for solid backing like studs, joists, or solid material.
Combining Wiring and Nailing for Project Success
Many DIY home improvement projects involve both running new electrical lines and using a nail gun. Think about installing new wall-mounted lights, adding ceiling lights, or even building custom built-in shelving that needs power.
Scenario: Installing New Wall Sconces
Let’s say you want to add some stylish wall sconces. This project will require both running a wire and mounting the fixture.
- Plan the Location: Decide exactly where you want the sconce. You’ll need to get power from an existing circuit.
- Safety First (Again!): Turn off the power to the circuit you’ll be tapping into. Use your voltage tester to confirm.
- Access Power: You might need to tap into an existing junction box or install a new one. This is where running wire comes in. You’ll need to carefully route new cable from your power source to the sconce location. Family Handyman offers great visual guides for safely running wire.
- Install a New Electrical Box: If an existing box isn’t conveniently located, you’ll need to cut a hole in the drywall and install a new electrical box for the sconce.
- Feed and Connect Wire: Run the electrical cable through the wall cavity to the new box. Connect the wires according to the sconce’s instructions (usually black to brass, white to silver, ground to green).
- Mount the Sconce Bracket: Now comes the nailer! Use your finish nailer or brad nailer to secure the sconce’s mounting bracket to the wall studs. For a secure hold, you’ll often be nailing into wood framing behind the drywall. Make sure the bracket is level and firmly attached.
- Install the Sconce: With the bracket secured, you can attach the actual sconce fixture.
- Restore Power and Test: Turn the power back on at the breaker and test your new sconce.
This is a simplified example, but it highlights how these two skills work together. Always ensure your wiring is done to code and that your nailer is used for securing mounting hardware or trim, not for any part of the electrical connections themselves!
<h2 id="common-problems-and