Quick Summary: To reduce wear on nailer parts, prioritize regular cleaning, proper lubrication, using the correct fasteners, gentle handling during operation, and secure storage. These simple habits significantly extend your nailer’s lifespan and ensure consistent performance for all your DIY projects.
Hey there, fellow DIYer! Jack Shaffer here, your go-to guy for all things nailers and woodworking. Ever feel like your trusty nail gun is giving up the ghost a little too soon? Maybe the firing isn’t as crisp, or you’re noticing tiny leaks of air after a project. It’s a common frustration for anyone who loves tackling projects around the house or in the workshop. But don’t worry, extending the life of your nailer isn’t some big secret. It’s all about a few key practices that, when followed, can make a world of difference. You put your faith in this tool to get the job done right, and with a little TLC, it can keep performing its best for years to come. Stick with me, and I’ll walk you through the simple, effective ways to keep your nailer running smoothly and reduce wear on those vital parts.
Table of Contents
Why Nailer Part Wear Happens (and Why You Should Care!)
Nailers are fantastic tools, designed to drive fasteners quickly and efficiently. But like any machine, they have parts that move, get stressed, and can wear down over time. Think of the piston, the driver blade, the O-rings, and the springs – these are the unsung heroes inside your nailer. Every time you pull the trigger, these components do their job, and that friction and impact can lead to gradual wear and tear.
Several factors contribute to this wear:
- Friction: Moving parts rubbing against each other without adequate lubrication can quickly degrade surfaces.
- Impact: The forceful driving of nails creates significant impact stress on critical components like the driver blade and piston.
- Debris and Dust: Airborne particles can get into the mechanism, acting like sandpaper and causing accelerated wear.
- Incorrect Usage: Driving the wrong type of nail, using an improper air pressure, or forcing the tool can put undue stress on parts.
- Lack of Maintenance: Skipping crucial cleaning and lubrication steps is a fast track to premature wear.
Why should you care so much about reducing this wear? It’s simple: a well-maintained nailer means:
- Longer Tool Life: You get more projects out of your investment.
- Consistent Performance: Your nailer fires accurately and powerfully every time.
- Fewer Repairs: Saves you time, money, and the frustration of a broken tool.
- Increased Safety: A well-functioning nailer is a safer nailer.
The good news is that most of these wear issues are preventable with a few straightforward maintenance habits. Let’s dive into the proven tips that will keep your nailer in top shape.
Essential Tips to Reduce Wear on Nailer Parts
Keeping your nailer happy is all about consistency. It’s not rocket science, just a few smart, simple steps to incorporate into your workflow. These aren’t just suggestions; they’re proven strategies that will save you headaches and money down the line.
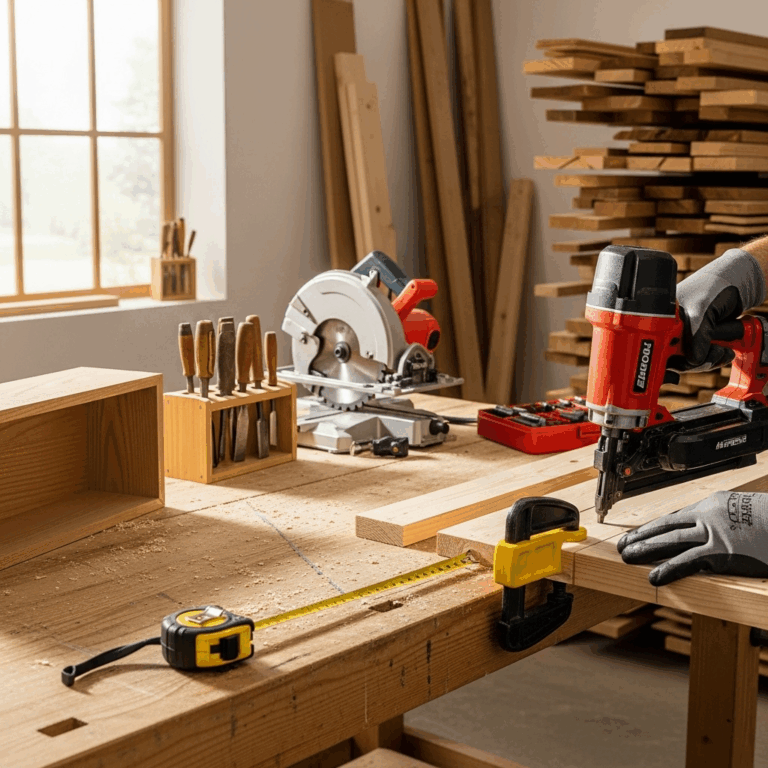
1. Keep It Clean, Folks!
This is hands-down the most important step. Dirt, sawdust, and debris are the enemies of moving parts. They get into seals, scratch surfaces, and grind away at metal components. Regular cleaning prevents this abrasive action and ensures that parts can move freely.
How to Clean Your Nailer:
- Disconnect Power: Always, always disconnect the air hose or battery before you start any cleaning or maintenance. Safety first!
- Wipe Down the Exterior: Use a clean, dry cloth to wipe off dust and debris from the outside of the tool.
- Clean the Magazine: The area where the nails are fed can get particularly gunked up. Use a brush (an old toothbrush works great!) or a clean rag to remove any sawdust or debris from the tracks and the feed mechanism.
- Clear the Tip/Nose: Sometimes, small wood shavings or dust can accumulate around the nose piece where the nail is driven. Gently clean this area with a brush or a soft cloth. For stubborn grime, a slightly damp cloth (water only) can be used, but ensure the tool is completely dry afterward.
- Check Air Ports: Ensure the air exhaust ports aren’t clogged. This helps the tool vent properly.
Frequency: Aim to give your nailer a quick wipe-down after every significant use. A more thorough clean, especially of the magazine, should happen every few weeks or whenever you notice performance issues.
2. The Magic of Lubrication
Just like a car needs oil, your pneumatic nailer needs a drop of air tool oil. This lubricant reduces friction between moving parts like the piston and cylinder, preventing them from grinding against each other. For cordless or electric nailers, the lubrication needs are different and often sealed internally, but for pneumatic tools, it’s crucial!
How to Lubricate Your Pneumatic Nailer:
- Disconnect the Air Hose: Again, safety is número uno.
- Add Oil to the Air Inlet: Locate the air inlet port on your nailer (where the air hose connects). For most pneumatic nailers, you’ll add a few drops (usually 2-5, check your manual) of specific air tool oil into this port.
- Connect Air and Fire: Reconnect the air hose. Then, fire the nailer several times into a scrap piece of wood. This helps distribute the oil throughout the internal mechanism where it’s needed most.
- Disconnect and Wipe: Disconnect the air hose again and wipe away any excess oil from the exterior.
Important Notes:
- Use the Right Oil: Never use WD-40 or general household oils. They can attract dust and gum up the works. Stick to specialized air tool oil, readily available at hardware stores.
- Don’t Overdo It: Too much oil can cause the tool to malfunction or spray excess oil onto your workpiece. A few drops are sufficient.
Frequency: Lubricate your pneumatic nailer at the beginning of each workday or after about 4-8 hours of continuous use. For less frequent users, a good oiling before a project and after a period of storage is a great rule of thumb.
3. Use the Right Fasteners (Nails!)
This might seem obvious, but using the correct type, size, and gauge of nails for your specific nailer is critical to preventing damage. Forcing a nail that’s too long or too wide, or using a nail with a flimsy shank, can cause jams, damage the driver blade, or even split the nailer’s magazine or firing mechanism.
Key Considerations for Fasteners:
- Nailer Type: Coil nailers use coil nails, stick nailers use stick nails. They are not interchangeable. Within stick nails, there are different angles (e.g., 15°, 21°, 30°, 34°) and collation types (paper, plastic, wire).
- Nail Gauge: This refers to the diameter of the nail shank. Using a gauge that’s too large for what your nailer is designed for can cause jams and damage.
- Nail Length: Ensure the nails you use are within the acceptable length range for your nailer.
- Nail Head Style: Brad nailers usually take brad nails with small heads, finish nailers take slightly larger headed nails, and framing nailers take full, round heads. Using the wrong head style can lead to improper driving and potential damage.
- Manufacturer Recommendations: Always consult your nailer’s manual for the exact specifications on compatible fasteners. Reputable manufacturers often have their own brand of fasteners designed to work perfectly with their tools.
Using the wrong fasteners is like trying to force a square peg into a round hole – it’s a recipe for trouble and accelerated wear.
4. Master the Art of Gentle Driving
Nailers are designed for efficiency, but that doesn’t mean you should abuse them. How you approach the workpiece can significantly impact the internal components.
Best Practices for Driving:
- Full Contact: Ensure the nose of the nailer is pressed firmly and squarely against the surface before you pull the trigger. This ensures a straight drive.
- Avoid Edges and Corners: Driving nails too close to the edge of a piece of wood increases the chance of blow-out and can put extra stress on the driver blade if the wood splits.
- Proper Air Pressure: Too high an air pressure can overdrive the nail, causing it to sink too deep and potentially damage the wood and the nailer’s internal components. Too low pressure can result in “nail pops” or fasteners not being driven fully, which can lead to jams. Always set your air pressure according to the manufacturer’s recommendations and test on scrap material. A good starting point for most nailers is between 70-100 PSI, but always check your manual.
- Don’t “Dry Fire”: Dry firing means pulling the trigger without a nail present (or when the magazine is empty). This causes the driver blade to slam against the anvil (the part that strikes the nail head) or the internal piston, leading to significant wear and potential damage. Be mindful of your fastener supply!
- Let the Tool Do the Work: Don’t lean heavily on the nailer or try to force it into tough materials. Allow the compressed air to do the driving. Excessive force can damage O-rings and other internal seals.
By being deliberate and gentle with your nailer’s operation, you’re actively reducing the shock and strain on its internal mechanisms.
5. Handle with Care and Store Smartly
How you handle your nailer when it’s not in action is just as important as how you use it.
Handling and Storage Tips:
- Avoid Dropping: This seems obvious, but tools get dropped. Treat your nailer with respect. A fall can misalign parts, crack casings, or damage the delicate mechanisms inside.
- Secure During Transport: When moving your nailer, use a sturdy tool bag or case to protect it from bumps and knocks.
- Store in a Dry Environment: Moisture is a nailer’s enemy. Rust can form on internal metal parts, especially the driver blade and piston, leading to increased friction and wear. Store your nailer in a dry, climate-controlled space.
- Release Air Pressure for Storage: For pneumatic nailers, it’s a good practice to disconnect the air hose and allow any residual pressure to vent from the tool if it will be stored for an extended period. This reduces stress on seals.
- Empty the Magazine: It’s also a good idea to remove any remaining nails from the magazine before storing it for a long time. This prevents nails from shifting or potentially causing a jam when you next use the tool.
Proper storage protects your tool from external damage and environmental factors that can degrade its components over time.
6. Regular Inspection: Become a Tool Detective
Becoming familiar with your nailer means you’ll start to notice when something is off. Regular visual inspections can catch small issues before they become big problems.
What to Look For:
- Air Leaks: Listen for hissing sounds when the tool is not firing. Small leaks can indicate worn O-rings or seals that need replacement.
- Loose Parts: Check for any screws or components that seem loose or are rattling.
- Signs of Damage: Look for dents, cracks, or unusually worn areas on the tool’s body, magazine, or nose piece.
- Performance Changes: Is it firing weaker? Is the cycling slower? Are nails getting jammed more often? These are all signs that something is wearing out.
If you notice any of these issues, it’s time to consult your manual or possibly seek professional service. Addressing problems early saves wear on other parts.
7. Use a Filter and Regulator (For Pneumatic Nailers)
If you’re using a pneumatic nailer, the quality of the air powering it is crucial. Dirt and moisture in your air lines can wreak havoc on your tool’s internal components.
Why They’re Essential:
- Air Filter: Removes dust, dirt, and other particulate matter from the compressed air before it enters your nailer. This directly prevents abrasive wear on internal parts. Many air compressors come with a built-in filter, but an in-line filter near the tool provides an extra layer of protection.
- Air Regulator: Allows you to precisely control the air pressure supplied to your nailer. As discussed earlier, using the correct, consistent air pressure is vital for both performance and preventing stress on components. An often-overlooked benefit of a regulator is that it also helps filter out moisture and oil that may be carried through the air lines from the compressor.
You can find suitable air filters and regulators at any hardware or tool supply store. They are a relatively small investment for the significant protection they offer your nailers.
According to the Occupational Safety and Health Administration (OSHA), proper maintenance and use of pneumatic-powered tools, including proper air pressure and cleanliness, are essential for safe and effective operation.
Understanding Different Nailer Types and Their Wear Patterns
While the core principles of reducing wear apply across the board, some specific nuances exist depending on the type of nailer you’re using. Understanding these can help you tailor your maintenance routine.
Pneumatic Nailers (Framing, Finish, Brad, etc.)
These are the most common type. Their primary wear points are the O-rings, seals, piston, driver blade, and springs. Lubrication is paramount, as is maintaining clean, dry air. Impact from driving is the main stressor.
Cordless/Battery-Powered Nailers
These nailers often use a spring-loaded or gas-powered mechanism (like Kobalt’s flywheel system or DeWalt’s flywheels). Wear points include the motor, battery contacts, driver blade assembly, and striker. While they don’t require air tool oil, keeping the battery contacts clean and ensuring the tool isn’t overstressed is key. Avoid dropping these, as the internal electronics can be sensitive.
Electric/Plug-In Nailers
Similar to cordless in their internal mechanisms but powered by an outlet. Wear can occur in the motor, gears, driver blade, and O-rings. Keeping the motor vents clean and ensuring no kinks in the power cord are important. Like cordless, they don’t need air oil.
Gas/Fuel Cell Nailers
These use a small fuel cell and an ignition system to drive the nail. Wear points include the ignition system, O-rings, seals, and the driver blade. Proper fuel cell insertion and keeping the ignition area clean are crucial. Moisture can also affect the fuel cell and electronics.
Regardless of the power source or type, a clean tool, correct fasteners, and gentle operation are universal secrets to a long tool life.
Table: Common Nailer Parts and How to Protect Them
Here’s a quick look at some key parts and how to minimize their wear:
| Nailer Part | Function | How to Reduce Wear |
|---|---|---|
| Driver Blade / Piston | The part that strikes and drives the nail. | Proper lubrication (pneumatic), avoid dry firing, gentle driving, correct air pressure, clean air supply. |
| O-Rings & Seals | Create airtight seals for pneumatic operation. | Proper lubrication (pneumatic), avoid over-pressure, store in dry conditions, avoid harsh cleaning chemicals. |
| Magazine | Holds the nails. | Keep clean of debris, use correct fasteners, avoid forcing nails. |
| Springs | Return parts to their ready position. | Avoid dry firing, avoid excessive force that compresses them unnaturally, clean tool regularly. |
| Anvil | The surface at the nose that supports the nail head. | Avoid dry firing (strikes the anvil directly), use correct fasteners, ensure nose is square to workpiece. |
| Trigger Mechanism | Activates the firing system. | Keep clean, avoid dust/debris ingress, avoid dry firing. |
FAQ: Your Nailer Wear Questions Answered
Here are some common questions beginner DIYers ask about keeping their nailers in good shape