Quick Summary: For most common tasks, a brad nailer typically needs between 70 and 120 PSI to drive nails effectively. This range ensures good holding power without damaging the wood. Always check your nailer’s manual for specific recommendations, as it can vary slightly by model and the type of nails you’re using.
Hey there, fellow DIYer! Jack Shaffer here from Nailerguy. Ever stood in front of a nail gun display, a bit overwhelmed by all the options and wondering about the nitty-gritty details like air pressure? You’re not alone! One of the most common questions I get is, “What PSI does my brad nailer need?” It’s a simple question with a big impact on your project’s success. Get the pressure too low, and your nails won’t sink in. Crank it up too high, and you might dent your beautiful wood or even damage the tool. But don’t sweat it! We’re going to break this down together, nice and easy. By the end of this guide, you’ll be a PSI pro, ready to tackle any brad nailer job with confidence.
Table of Contents
Understanding Brad Nailer PSI: The Basics
So, what exactly is PSI, and why does it matter so much for your brad nailer? PSI stands for Pounds per Square Inch. Think of it as the “push” or “force” that the air in your compressor delivers to the nailer. This force is what drives the nail into the material you’re working with.
For a brad nailer, which is designed for smaller, thinner nails used in trim, molding, and delicate woodworking, the PSI requirements are generally lower than for larger framing nailers. This is because brad nails themselves are not meant for heavy structural loads. They’re more about holding pieces together while glue dries or for decorative finishes.
The right PSI ensures your brad nailer performs optimally. It means nails will be driven flush, creating a clean, professional finish. Too little pressure, and you’ll have nails sticking out, requiring you to hammer them in manually – defeating the purpose of a nailer! Too much pressure, and you risk damaging the wood surface by driving the nail head too deep, or even bending the nail. Finding that sweet spot is key to efficient and effective use.
Why the Right PSI is Crucial for Your Projects
Using the correct PSI for your brad nailer isn’t just about making the tool work; it’s about ensuring the quality and longevity of your work. Let’s dive into why this detail is so important:
- Nail Driving Performance: At the right pressure, nails will be driven consistently and to the desired depth. This means no nails sticking out and no over-driven nails creating dimples in your workpiece.
- Wood Protection: Brad nails are often used on softer woods or finished surfaces where appearance matters. The correct PSI prevents the nail head from digging into and damaging the wood, keeping your project looking pristine.
- Tool Longevity: Running your brad nailer at excessively high pressures can put undue stress on its internal components, potentially leading to premature wear and tear or even damage. Conversely, running it too low might cause the mechanism to work harder than necessary to drive each nail.
- Safety: While brad nailers are generally considered safer than manual hammering, operating any power tool within its designed parameters is essential for safety. Consistent and predictable performance reduces the chance of unexpected tool behavior.
- Efficiency: When your nailer is set to the right PSI, it will drive nails quickly and effectively. This speeds up your project, allowing you to finish faster and with less frustration.
Think of it like tuning a musical instrument. You need to get the tension just right for the perfect sound. Your brad nailer is no different. The PSI is that critical adjustment that makes everything work harmoniously.
What PSI Range is Typically Recommended for a Brad Nailer?
This is the million-dollar question, and thankfully, the answer is quite straightforward for most brad nailers. The general consensus and manufacturer recommendations for brad nailers fall within a specific range. This range is designed to provide enough power to sink nails reliably while minimizing the risk of damaging your workpiece.
The most common PSI range for a brad nailer is between 70 and 120 PSI.
Within this range, you’ll find that many tasks can be accomplished effectively. However, it’s important to understand that this is a guideline, and the “perfect” PSI for your specific job might be somewhere within this spectrum. Factors like the type of wood, the thickness of the material, and even the length and gauge of the brad nails themselves can influence the ideal setting.
Always start at the lower end of the recommended range (e.g., 70-80 PSI) and gradually increase the pressure as needed. This is a safer approach that helps you avoid mistakes and ensures you’re using the least amount of force necessary for a perfect nail set.
Factors Affecting Your Brad Nailer’s PSI Needs
While we’ve established a general PSI range, it’s important to know that a few key factors can nudge the ideal setting up or down within that 70-120 PSI window. Understanding these will help you fine-tune your compressor settings for optimal results on any given project.
1. Type of Wood
This is perhaps the biggest influencer. Softer woods like pine, poplar, or cedar require less force to sink a brad nail. You’ll likely find success with the lower end of the PSI range, perhaps 70-90 PSI. Harder woods such as oak, maple, or hickory require more power. For these, you might need to increase your PSI, potentially moving towards 90-110 PSI, to ensure the nails are driven fully without bending.
2. Nail Size and Gauge
Brad nails come in various lengths and gauges (thickness).
- Length: Longer nails generally require a bit more force to drive them to their full depth. If you’re using the longest brad nails your tool can handle, you might need slightly higher PSI.
- Gauge: A thinner nail (higher gauge number, like 18-gauge) inherently requires less driving force than a slightly thicker one (like 16-gauge). For very fine trim with thin nails, lower PSI might be sufficient.
3. Depth Adjustment Setting on the Nailer
Most modern brad nailers have a depth adjustment feature. This allows you to fine-tune how deep the nail is driven without changing the compressor’s PSI. You can often achieve a perfect flush set by using the depth adjustment. If you’re consistently having to lean on the nailer, it might be set too low, or your depth adjustment needs tweaking. If you’re blowing through the wood, your depth adjustment is likely set too deep, or your PSI is too high.
4. Air Hose Length and Diameter
While this doesn’t change the required PSI, it can affect the delivered PSI. Longer or narrower air hoses can lead to a drop in air pressure between the compressor and the nailer. To compensate for this, you might need to set your compressor’s regulator slightly higher than you would for a shorter, wider hose. A good quality air hose is an investment that pays off in consistent performance.
5. Compressor Capability
Ensure your air compressor can reliably supply the PSI your brad nailer needs. Most brad nailers require continuous airflow, and if your compressor struggles to keep up, it can lead to inconsistent nail driving. Check your compressor’s CFM (Cubic Feet per Minute) rating to ensure it’s sufficient for your nailer and the duration of your work.
How to Set the Right PSI on Your Air Compressor
Setting the correct PSI on your air compressor is straightforward, but it’s important to do it correctly for both your nailer and your safety. Here’s a step-by-step guide to get you dialed in:
- Connect Your Brad Nailer: Ensure your brad nailer is properly connected to the air compressor via the air hose. Make sure the compressor is turned off before you make any connections for safety.
- Turn On the Compressor: Power up your air compressor. Let it build up pressure in the tank. You’ll hear it stop automatically when it reaches its maximum tank pressure.
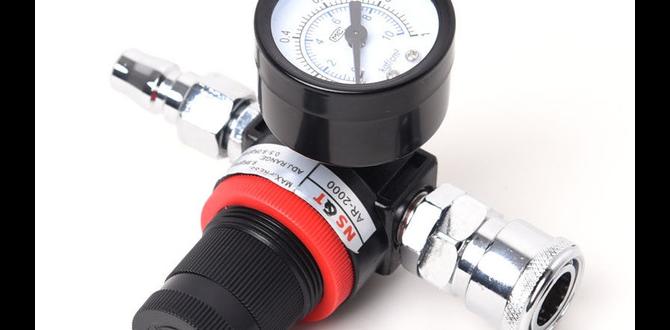
- Locate the Regulator: On most air compressors, you’ll find a regulator knob and a pressure gauge. The regulator is usually a round dial with markings, often near where the air hose connects. The gauge will show you the current air pressure.
- Adjust the Regulator: Slowly turn the regulator knob. You’ll typically turn it clockwise to increase pressure and counter-clockwise to decrease it. Watch the pressure gauge as you adjust.
- Set to Desired PSI: For your brad nailer, start aiming for the lower end of the recommended range, around 70-80 PSI. If your compressor has two gauges (one for tank pressure and one for regulated output), make sure you’re adjusting the output regulator.
- Test Fire: With the compressor running and regulated to your initial target PSI, pick up your brad nailer and fire a few test nails into a scrap piece of the same material you’ll be using for your project.
- Observe and Adjust:
- Nails sinking too deep or causing damage? Lower the PSI slightly (e.g., by 5 PSI) and test again. You might also want to check your nailer’s depth adjustment setting.
- Nails not sinking fully? Increase the PSI slightly (e.g., by 5 PSI) and test again.
- Fine-Tune: Continue making small adjustments to the PSI and depth setting until your nails are consistently setting flush with the surface without damaging the wood. This iterative process is the most effective way to find the perfect setting for your specific task.
Remember, it’s always better to start low and increase gradually. This approach is not only more effective but also safer.
Recommended PSI Settings for Common Brad Nailer Applications
To give you a clearer picture, here’s a table outlining typical PSI settings for various common brad nailer applications. Remember, these are starting points, and you should always fine-tune based on the factors we discussed earlier and test on scrap material!
| Application | Typical Wood Type | Recommended PSI Range | Notes |
|---|---|---|---|
| Attaching thin trim (e.g., quarter round, baseboards on drywall) | Pine, MDF, Poplar | 70 – 90 PSI | Focus on flush set without denting delicate profiles. |
| Installing cabinet trim or decorative molding | Hardwood (Oak, Maple), MDF, Pine | 80 – 100 PSI | Precision is key; slight adjustments may be needed for different wood densities. |
| Hobbyist woodworking (e.g., small boxes, picture frames) | Baltic Birch Plywood, Pine, Basswood | 60 – 85 PSI | Often using very thin stock, lower PSI prevents blow-through. |
| Attaching thinner paneling (e.g., beadboard) | Softwoods, Engineered Wood | 80 – 100 PSI | Ensure nails penetrate adequately into underlying studs or furring strips. |
| Working with hardwood flooring trim | Oak, Maple, Hickory | 90 – 115 PSI | Hardwoods require more force. Monitor closely to avoid damaging the floor surface itself. |
| General repairs and lighter tasks | Mixed (Pine, Poplar, Plywood) | 75 – 95 PSI | A good all-around setting for versatility. |
My Personal Best Practice: Always Test!
No matter what guide you read or what manufacturer says, my best advice is always to grab a piece of scrap wood that closely matches your project material and do a test. Fire a few nails at your chosen PSI. Check the depth. Are they flush? Are they buried? Is the wood dented? Make a small adjustment, fire another few nails, and check again. This simple step saves so much frustration and ensures a professional finish. Most pneumatic tool manufacturers, like DEWALT, emphasize this testing phase in their user guides.
Troubleshooting Common PSI-Related Brad Nailer Issues
Even with careful setup, you might run into a few snags. Here’s how to address common issues related to PSI:
- Problem: Nails aren’t sinking fully.
- Solution: Increase PSI gradually (5 PSI at a time) until nails set properly.
- Solution: Check if your brad nailer has a “nail depth adjustment” and ensure it’s not set too shallow.
- Solution: Make sure your air compressor is keeping up with demand (check CFM).
- Solution: Ensure your air hose isn’t too long or too narrow, causing significant pressure drop.
- Problem: Nails are sinking too deep or damaging the wood.
- Solution: Decrease PSI gradually (5 PSI at a time).
- Solution: Adjust your brad nailer’s depth setting to a shallower position.
- Solution: Double-check that you are not using a nail size or type that is too large for the material.
- Problem: Brad nailer is “weak” or firing erratically.
- Solution: Ensure your compressor tank has sufficient air pressure.
- Solution: Check for air leaks in your hose, fittings, or the nailer itself. A leak will reduce the effective PSI reaching the tool.
- Solution: Make sure the brad nailer’s magazine is properly loaded and the driver blade isn’t obstructed.
- Problem: Compressor is running constantly but not achieving desired pressure.
- Solution: This often indicates an air leak somewhere in the system (compressor, hose, fittings, or nailer).
- Solution: Your compressor might be undersized for the continuous draw of the nailer.
- Solution: The compressor’s internal pressure switch or relief valve could be malfunctioning.
Dealing with tools can sometimes feel like a puzzle, but by systematically checking these common issues, you can usually get back to work quickly. Resources from organizations like the Occupational Safety and Health Administration (OSHA) also provide guidelines on the safe use of powered tools, which is always a good principle to follow.
Do I Need a Brad Nailer With Adjustable PSI Port?
When you’re shopping for a brad nailer, you might see terms like “adjustable depth” or “integrated regulator,” but a direct “adjustable PSI port” on the nailer itself is less common for brad nailers. Instead, the primary way to control PSI is through the regulator on your air compressor.
However, most good quality brad nailers do have an integrated depth adjustment. This is crucial because it allows you to fine-tune the final nail set without constantly fiddling with the compressor. Some higher-end pneumatic tools might have more sophisticated air regulation built-in, but for the vast majority of brad nailers used by DIYers, the compressor’s regulator is your main tool for setting PSI.
The key features to look for are:
- Depth Adjustment Knob/Lever: This is almost essential. It usually allows you to set how deep the nail head sits relative to the wood surface.
- Clear Airflow: Ensure the tool is designed to receive adequate airflow from your compressor without restriction.
So, while you control the supply PSI with your compressor, the nailer’s internal mechanism and its depth adjustment let you apply that pressure effectively for the desired result.
FAQ Section
Q1: What is the minimum PSI I can use with a brad nailer?
For most brad nailers, the absolute minimum functional PSI is around 70 PSI. Below this, you’ll likely struggle to get nails to sink reliably, leading to frustration and incomplete drives. Always check your tool’s manual, as some heavy-duty brad nailers might have slightly different


