Pneumatic nailer not firing? Don’t worry! This guide offers simple, step-by-step fixes for common problems, getting you back to your projects in no time. We cover everything from air supply issues to jammed nails.
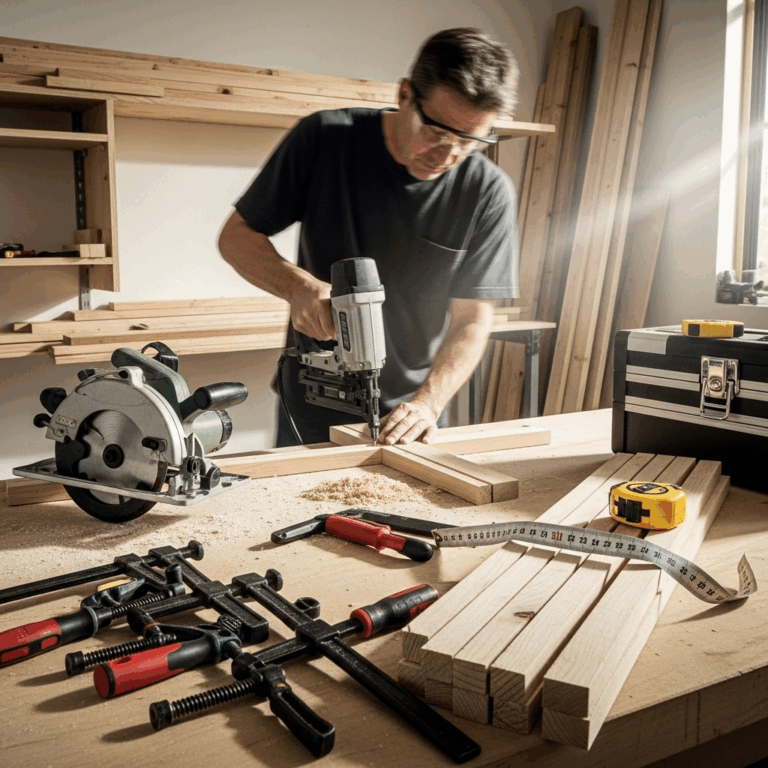
Hey there, fellow woodworkers and DIY enthusiasts! Jack Shaffer here, your go-to guy for all things nail guns. There’s nothing quite like the satisfaction of a project coming together, and a pneumatic nailer is a fantastic tool to help you get there faster and with less effort. But what happens when your trusty nail gun decides to take an unscheduled break? A sudden jam or a nail that just won’t fire can be frustrating, especially when you’re in the middle of a great build. The good news is, most pneumatic nailer problems are surprisingly easy to fix. You don’t need to be a master mechanic to get your tool working again. In this guide, we’ll walk through the most common hiccups and provide straightforward, jargon-free solutions. Get ready to troubleshoot like a pro and get back to building!
Table of Contents
Common Pneumatic Nailer Problems & Their Solutions
It’s a familiar scene for many DIYers: you’re tackling a woodworking project, the nails are flying, and then… silence. Your pneumatic nailer just stops working. Before you panic or consider replacing it, let’s break down the most frequent issues and how to solve them. Knowing these fixes can save you time, money, and a whole lot of frustration.
1. The Nailer Won’t Fire (No Nail Ejected)
This is probably the most common and disheartening problem. You pull the trigger, you hear the air hiss (or sometimes not even that!), but nothing happens. Let’s explore the usual suspects:
Possible Causes & Fixes:
- Lack of Air Pressure: This is the #1 reason for a nailer not firing. Pneumatic tools need a consistent flow of compressed air to operate.
- Disconnected Air Hose: Simple, but it happens! The hose might have popped off the compressor or the nailer.
- Safety Tip Not Engaged: Most nail guns have a safety or contact trip mechanism. This little lever against the wood needs to be pressed down firmly for the nailer to fire.
- Dry Firing Prevention: Some nailers have a mechanism to prevent firing when the magazine is empty.
- Internal Jam/Damage: While less common initially, a jammed nail or internal issue can prevent firing.
- Low Battery (for cordless models): If you’re using a cordless pneumatic nailer, a depleted battery will obviously stop it from working.
Step-by-Step Troubleshooting:
- Check Air Pressure: Is your air compressor turned on and pressurized to the recommended PSI for your nailer? Most nail guns require between 70-120 PSI. Consult your nailer’s manual for the exact range. Your compressor’s gauge should show sufficient pressure.
- Inspect the Air Hose: Ensure the air hose is securely connected to both the compressor’s regulator and the nailer’s air inlet (coupler). Also, check the hose for any kinks or damage that might restrict airflow.
- Verify Safety Tip Engagement: Place the nose of the nailer firmly against a piece of scrap wood. You should feel the safety contact piece depress. If it feels stuck or doesn’t depress easily, investigate that specifically.
- Check the Magazine: Ensure there are nails loaded correctly in the magazine. Some nailers will prevent firing if the magazine is empty or if there’s an issue with the nail collation.
- Listen for Air Leaks: When you pull the trigger, do you hear air escaping strongly from somewhere other than the exhaust port? This could indicate a leak in the hose, coupler, or within the nailer itself.
- Disconnect and Reconnect Hose: Sometimes, a quick disconnect and reconnect can reseat the coupler and ensure proper airflow.
- Reload Nails: Remove the nails from the magazine, then reload them carefully. Make sure they are seated properly and aligned.
If you’ve gone through these steps and it’s still not firing, it’s time to look at more specific issues like jams.
2. Nails Are Not Fully Driving (Countersinking Issues)
This happens when the nail goes into the wood but doesn’t sink deep enough, leaving the head protruding. It can be a minor annoyance or a critical problem if you need a flush finish.
Possible Causes & Fixes:
- Insufficient Air Pressure: The most common culprit. If the pressure is too low, the nail won’t have enough force to drive fully.
- Incorrect Nail Size or Type: Using nails that are too long or too thick for the material can cause them to buckle or not seat properly. Also, ensure you’re using the correct gauge and collation type (e.g., clipped head vs. full round head) as specified by the nailer manufacturer.
- Wood Density: Driving nails into very dense hardwoods can sometimes require higher air pressure than standard softwoods.
- Depth Adjustment Setting: Many nail guns have a depth adjustment wheel or knob. It might be set too shallow.
- Worn O-rings or Seals: Internal parts can wear down over time, leading to loss of power.
Step-by-Step Troubleshooting:
- Increase Air Pressure: Slowly increase the PSI from your compressor’s regulator. Test fire a nail. Find the sweet spot that drives nails consistently without overdriving them. Remember to stay within the nailer’s recommended operating range.
- Check Nail Specification: Double-check that the nails you are using match the specifications in your nailer’s manual. Ensure they are the correct length, diameter, and collation angle/type.
- Adjust Depth Setting: Locate the depth adjustment mechanism on your nailer. Usually, it’s a dial or a small lever near the nose. Turn it to a deeper setting and test.
- Test on Different Wood: If you’re working with exceptionally hard wood, try it on a softer piece of lumber to see if the nailer performs differently. You might need to bump up the pressure for hardwoods.
- Inspect for Leaks While Firing: With safety precautions in place, fire a nail and listen carefully for any air leaks when the tool fires. Persistent leaks might point to internal wear.
If increasing air pressure and adjusting depth doesn’t solve it, and you’re using the correct nails, it might be time to consider internal wear.
3. Nail Gun Jams
A jammed nail gun is an immediate project stopper. Nails can jam in the magazine, the driver blade channel, or even get bent upon firing. Here’s how to tackle it:
Possible Causes & Fixes:
- Incorrect Nail Loading: Nails not seated properly in the magazine can easily lead to jams.
- Bent or Damaged Nails: Using bent nails or nails that were damaged in transit can cause feeding issues.
- Improper Nail Collation: Using nails with the wrong angle or collation type for your specific nailer is a sure way to cause jams.
- Low Air Pressure Firing: Firing at too low a pressure can cause nails to bend and jam rather than driving straight.
- Debris in the Magazine/Channel: Dust, wood chips, or broken nail pieces can obstruct the feeding mechanism.
- Worn Driver Blade: A bent or dull driver blade won’t be able to push the nail cleanly, potentially leading to jams.
Important Safety Note: Always disconnect the air hose from the nailer before attempting to clear a jam or perform any maintenance. Ensure the safety tip is not engaged.
Step-by-Step Jam Clearing:
- Disconnect Air Supply: This is crucial for safety. Pull the air hose completely off the nailer.
- Open the Magazine: Most nail guns allow you to slide open the magazine. Do this to get clear access to the nail track.
- Identify the Jammed Nail: Look into the magazine and the driver blade channel to see where the nail is stuck.
- Remove Obstructions:
- Magazine Jams: If it’s a nail misfeed in the magazine, try to gently push or wiggle it free. If a nail is bent badly, you might need needle-nose pliers to extract it.
- Driver Blade Channel Jams: This is where a nail gets stuck before being driven. You may need to operate the safety contact tip a few times (gently!) while looking into the channel. Sometimes, a light tap on the nose of the gun with the palm of your hand can dislodge a simple jam, but be careful not to damage the tool.
- Using Pliers: For stubborn jams, especially if a nail has broken, needle-nose pliers are invaluable for gripping and pulling out the offending nail or pieces.
- Check Driver Blade Condition: While you have the magazine open, try to peek at the driver blade. Is it bent or damaged? A bent blade needs to be replaced.
- Clear Debris: Use a soft brush or a puff of compressed air (from a separate source, not the nailer!) to clear any dust or debris from the magazine mechanism.
- Reload Properly: Once clear, reload the appropriate nails, ensuring they sit correctly in the track.
- Reconnect Air and Test: Reconnect the air hose, aim at scrap wood, and test fire a few nails to ensure the jam is cleared and the nailer is functioning correctly.
Refer to your nailer’s manual for specific instructions on opening the magazine and accessing the driver blade channel. Some models have tool-free jam release mechanisms making this easier.
4. Air Leaks From the Nailer
A hissing sound when the nailer isn’t firing, or a weak hiss even after a shot, indicates an air leak. This wastes air, reduces power, and can be annoying.
Possible Causes & Fixes:
- Loose Air Hose Connection: The coupler on the nailer might not be fully seated or the O-ring on the plug is damaged.
- Damaged O-rings and Seals: Over time, rubber seals and O-rings wear out or get damaged, especially around the piston, cylinder, or trigger valve.
- Cracked Housing or Components: Less common, but a crack in the tool’s body or internal parts can cause leaks.
- Trigger Valve Issues: The trigger mechanism itself can develop leaks.
Step-by-Step Leak Detection & Repair:
- Immerse in Water (Carefully!): With the air disconnected, submerge the nailer (excluding electrical components if it’s a cordless model) in a tub of water. Look for bubbles escaping. The location of the bubbles will pinpoint the leak. This is a great method for finding small leaks.
- Check Coupler and Hose: Start by disconnecting and reconnecting the air hose. Inspect the O-ring on the air plug for cracks or damage. If damaged, replace it. Ensure the nailer’s coupler isn’t blocked with debris.
- Inspect External Seals: Look for any obvious cracks or damage to the external housing or around the trigger area.
- Listen for Specific Hissing: With regulated air pressure connected (but not firing), carefully listen to where the hiss is coming from. Common leak points are around the trigger assembly, the exhaust port (if not sealing properly), or where the main cylinder meets the body.
- Replace O-rings and Seals: If you identified a leak from an internal component (like the piston seal or trigger valve), you’ll likely need to disassemble the nailer to replace the faulty O-ring or seal. This often requires a repair kit specific to your nailer model. Check your manual or the manufacturer’s website for parts diagrams and kits. Resources like ToolPartsDirect.com can be helpful for finding specific part numbers.
- Professional Repair: If you’re uncomfortable with disassembly or can’t locate the leak, it might be time to seek professional repair or contact the manufacturer for warranty service.
Replacing O-rings is a common maintenance task that can significantly extend your nailer’s life.
5. Nailer Firing Continuously or “Doubling”
This is a dangerous situation where the nailer fires multiple nails in rapid succession, or fires a nail without the trigger being pulled (sometimes called “rampaging” or “double firing”). This usually means there’s an issue with the trigger mechanism or safety contact.
Possible Causes & Fixes:
- Stuck Safety Contact Tip: If the safety tip is stuck in the depressed position, the nailer can fire repeatedly.
- Stuck Trigger Mechanism: Debris or a faulty internal part can cause the trigger to remain engaged.
- Problem with Sequential vs. Contact Trip Options: If your nailer has multiple firing modes, a malfunction in switching between them could cause issues.
- Internal Valve Damage: A damaged internal valve can cause continuous firing.
Extreme Caution: If your nailer is firing continuously, immediately disconnect the air supply. Do not attempt to fire it again until the issue is resolved.
Step-by-Step Troubleshooting for Continuous Firing:
- Immediately Disconnect Air: This is the first and most important step. Remove the air hose.
- Inspect Safety Contact Tip: Press the safety contact tip repeatedly. Does it move freely? Is it sticky or jammed? Try to clear any visible debris around it. A light application of a lubricant designed for pneumatic tools might help if it’s sticking, but be sparing.
- Inspect Trigger Mechanism: Look into the trigger area. Is there any visible debris jamming the trigger?
- Check Firing Mode Selector (if applicable): If your nailer has a mode selector (single sequential, full sequential, contact trip), ensure it’s clearly set to one mode and isn’t stuck between settings. Try cycling through the modes.
- Disassemble Trigger/Safety Area: If the above doesn’t help, you may need to partially disassemble the nailer to access the trigger mechanism and safety contact components. This is an area where a repair manual is highly recommended. Look for worn or broken parts.
- Professional Help: Continuous firing is a significant safety hazard. If you cannot easily identify and fix the problem, it’s best to take it to a qualified tool repair shop rather than risk injury.
A nailer that fires without you wanting it to is dangerous. Always prioritize safety and get it repaired properly.
Essential Pneumatic Nailer Maintenance Tips
Troubleshooting is great, but an ounce of prevention is worth a pound of cure! Regular maintenance can prevent many of these issues from happening in the first place and keep your nailer running smoothly for years.
Daily/Before Use Checks:
- Check Air Pressure: Ensure it’s within the recommended range for your nailer.
- Inspect Air Hose: Look for kinks, cuts, or damage.
- Test Safety Tip: Make sure it depresses and springs back freely.
- Check Nail Loading: Ensure nails are properly seated.
Weekly/Regular Maintenance:
- Lubricate: For most pneumatic tools (check your manual!), add 1-2 drops of specialized pneumatic tool oil to the air inlet daily or every few hours of use. This lubricates internal moving parts like the piston and O-rings. Too much oil can cause issues, so follow the manufacturer’s recommendation.
- Clean Magazine: Wipe down the magazine track to remove dust and debris.
- Blow Out Exhaust Port: Use compressed air to clear the exhaust port, preventing buildup that can affect performance.
- Wipe Down Tool: Keep the exterior clean to prevent grit from getting into mechanisms.
Periodic Maintenance:
- Inspect for Wear: Check the driver blade for damage and the nose piece for excessive wear.
- Replace O-rings/Seals: As you notice minor leaks or power loss, proactive replacement of O-rings and seals (especially for older tools) can prevent bigger problems. Refer to your manual for a parts diagram. The U.S. Department of Labor provides general safety guidelines for construction tools which can be relevant for maintenance practices: Tool Safety and Handling.
Pneumatic Nailer Troubleshooting Summary Table
Here’s a quick reference guide to some common issues and their likely causes. Remember to always disconnect your air supply before performing any hands-on troubleshooting or maintenance.
| Problem | Likely Cause(s) | Primary Fix(es) |
|---|---|---|
| Nailer Won’t Fire | Low air pressure, hose |