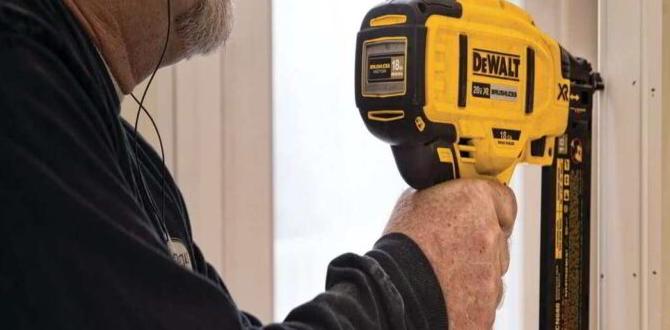
Have you ever struggled with a tool that just won’t work? It can be so frustrating! Imagine trying to finish a project with a nail gun that keeps jamming. That’s where o-ring replacement comes in. It’s an easy fix that can make a big difference.
Many people don’t realize how important these small parts are. O-rings help your finish nail gun run smoothly. When they wear out, your tool won’t work right. Knowing when and how to replace them can save you time and effort.
Did you know that a simple o-ring change can extend the life of your nail gun? It’s true! With the right tips, you can keep your tools in top shape. Let’s dive into what you need to know about o-ring replacement for your finish nail gun!
Table of Contents
O-Ring Replacement For Finish Nail Gun: A Complete Guide

Understanding O-Ring Replacement for Finish Nail Guns
Replacing the o-ring in a finish nail gun is crucial for proper functionality. A worn o-ring can cause air leaks, leading to poor nail performance. Knowing when to replace this small but vital part can save you time and frustration. Think of it as giving your tool a little health check! Did you know that regular maintenance can extend the life of your finish nail gun? Proper care ensures you always nail it right!Understanding the Function of O-Rings in Finish Nail Guns
Explanation of Orings and their role in nail gun mechanics. Why maintaining Orings is crucial for performance and safety.O-rings are small rubber circles that play a big role in finish nail guns. They help seal air inside the tool, making sure it works properly. Without good O-rings, the nail gun can lose power and fail to fire nails accurately. This could even be unsafe for users. Maintaining O-rings keeps the gun’s performance strong and safe. A little care can go a long way.
Why is O-ring maintenance important?
The O-rings keep air pressure where it needs to be, so the tool works right. Regular checking can prevent leaks. Replacing worn O-rings can save time and money by avoiding bigger tool problems later on.
- Ensures safety while using the nail gun
- Improves the tool’s performance
- Prevents costly repairs
Signs That Your O-Ring Needs Replacement
Common indicators of Oring wear and failure. The consequences of ignoring Oring issues.Look for signs that show your o-ring might be worn out. Common indicators include:
- Visible cracks or tears
- Loss of pressure during use
- Fluid leaks around the o-ring
Ignoring these issues can lead to bigger problems. You may face:
- Reduced tool efficiency
- Increased wear on the nail gun
- Costly repairs or replacements
Acting quickly can save time and money!
What are the symptoms of a failing o-ring?
Symptoms include leaks, loss of pressure, and visible damage. Noticing these symptoms helps address problems early.
Tools and Materials Required for O-Ring Replacement
Essential tools needed for the replacement process. Types of Orings suitable for different finish nail gun models.Replacing an o-ring in a finish nail gun is simple with the right tools. Here’s what you’ll need:
- Small screwdriver to pry out the old o-ring.
- Replacement o-rings that fit your nail gun model.
- Lubricant to make installation easier.
- Clean cloth for quick clean-up.
Different models need different o-rings. Check your manual to find the right type. This ensures a tight seal and smooth operation. With these tools and materials, you’re ready for an easy replacement!
What type of o-ring do I need for my finish nail gun?
Check your nail gun’s manual for the correct o-ring size and type. Each model uses different specifications.
Step-by-Step Guide to Replacing O-Rings
Detailed procedures for disassembling the nail gun. Instructions for removing old Orings and installing new ones.Replacing O-rings in a nail gun is like changing a tire; it sounds tough, but you can do it! Start by unplugging your nail gun. Then, take it apart carefully. Look for screws and make sure to keep them safe, or they might go on a little vacation! Once open, find the old O-rings. Pop them out gently; they can be as stubborn as a kid refusing to eat broccoli. Now, grab the new O-rings and slide them into place. It’s like putting on a new pair of shoes; they should fit snugly!
| Step | Action |
|---|---|
| 1 | Unplug the nail gun. |
| 2 | Remove screws carefully. |
| 3 | Take out old O-rings. |
| 4 | Install new O-rings. |
Tips for Proper O-Ring Maintenance
Best practices for extending the lifespan of Orings. Recommendations for regular inspections and upkeep.Keeping O-rings in shape is as important as keeping your favorite snack fresh. Check them often for wear and tear. Little cracks are like tiny reminders that your O-ring needs TLC. To help them last, use a bit of lubricant during installation. Think of it as a spa day for your O-ring! Regularly inspect them every few months—don’t be afraid to give them the side-eye!
| Best Practices | Frequency |
|---|---|
| Visual Inspection | Every month |
| Lubrication | Before each use |
| Replace Worn O-rings | As needed |
Follow these tips to keep your O-rings happy and your finish nail gun in tip-top shape. Because let’s be honest, nobody wants a nail gun that’s tired and cranky!
Common Mistakes to Avoid During O-Ring Replacement
Missteps that can lead to further damage or malfunction. How to troubleshoot issues that arise postreplacement.Replacing o-rings in your finish nail gun can be tricky. Avoid these mistakes to keep your tool in good shape:
- Don’t skip cleaning the area before replacing the o-ring. Dirt can cause leaks.
- Use the right size o-ring. A wrong fit leads to damage.
- Securely tighten all parts after replacement. Loose parts can cause malfunction.
- Test the gun after replacement. This helps catch issues right away.
When problems arise, check for worn out parts or leaks. If the gun doesn’t work properly, try rechecking your o-ring fit. Remember, a little care goes a long way!
What should I do if my finish nail gun leaks after o-ring replacement?
Check the o-ring size and fit. It may be too loose or damaged. If the leak continues, ensure all parts are tightly secured. A quick inspection can save you time and frustration!
When to Seek Professional Help for O-Ring Replacement
Scenarios where DIY may not be advisable. How to choose a qualified technician for your nail gun maintenance.Sometimes, fixing your own tools can be tricky. If your finish nail gun leaks air or doesn’t work right, it might be time to call for help. Here are a few situations where DIY isn’t the best choice:
- You can’t find where the problem is.
- The gun is damaged or old.
- You don’t feel safe making the repair.
Choosing a good technician is key. Look for someone with experience and good reviews. Ask questions about their training. This can help ensure they know how to handle o-ring replacement correctly. Remember, a skilled technician can save you time and keep your tool working well.
What should I look for in a technician for nail gun repair?
When choosing a technician, look for certified professionals with strong customer reviews. Experience is important, too. A well-informed tech will understand common issues that can arise.
Cost Analysis: DIY vs. Professional O-Ring Replacement
Comparison of costs for DIY replacement and hiring a professional. Longterm savings from proper maintenance versus costly repairs.Replacing an o-ring in your finish nail gun can be done yourself or by a professional. Let’s compare costs. DIY replacements are usually cheaper, often under $20 for materials. Hiring a pro can cost $50-$100 or more. Proper maintenance can save money in the long run, helping you avoid bigger repairs later. Think about this: consistent care keeps tools running smoothly.
How much does it cost to replace an o-ring?
The cost varies by method:
- DIY: Under $20 for materials
- Professional help: $50-$100+
Keeping your finish nail gun in top shape means fewer costly fixes later.
Frequently Asked Questions About O-Ring Replacement
Answers to common queries regarding Oring issues and replacements. Clarification on myths and misconceptions surrounding Oring maintenance.Many people have questions about O-ring replacement. Here are some common queries and facts to help you understand. Did you know that most problems happen because of wear and tear? O-rings can wear out and need replacement to keep your tools working well. It’s also a myth that replacing them is hard. In reality, it’s quite simple! Below are clarifications on some frequent questions:
What are signs that an O-ring needs replacement?
Look for leaks, swelling, or cracks. These can mean it’s time to replace your O-ring.
Are all O-rings the same?
No, they come in different sizes and materials. Each serves a specific purpose.
How often should O-rings be checked?
It is good to check them regularly, especially if you use your nail gun often.
Conclusion
In conclusion, replacing the O-ring in your finish nail gun can improve its performance. A snug O-ring prevents air leaks, making the tool work better. You can find O-rings at hardware stores or online. If you want to learn more, consider looking up repair guides or videos. Staying informed helps you keep your tools in great shape!FAQs
What Are The Common Signs That Indicate An O-Ring Replacement Is Needed In A Finish Nail Gun?If your finish nail gun isn’t working right, it might need a new O-ring. Look for signs like air leaks or a weaker nail strike. You might also notice the gun makes a hissing sound when you use it. If it jams often or doesn’t fire nails, that’s another clue. It’s time to check and change the O-ring!
How Do You Properly Disassemble A Finish Nail Gun To Replace The O-Ring?To take apart a finish nail gun, first unplug it or remove the battery. Next, use a screwdriver to take off the outer cover. Look for the O-ring and gently pull it out. Then, put in the new O-ring and put the cover back on. Finally, tighten the screws and plug it in or add the battery.
What Types Of O-Rings Are Compatible With Different Models Of Finish Nail Guns?Finish nail guns use different types of O-rings. The most common ones are rubber O-rings and polyurethane O-rings. Rubber O-rings are often soft and flexible. Polyurethane O-rings are strong and last longer. You should always check your nail gun’s manual to find the right O-ring type.
What Tools Are Needed For Replacing The O-Ring In A Finish Nail Gun?To replace the O-ring in a finish nail gun, you need a few tools. First, grab a screwdriver to open the gun. You might also need pliers to pull out the old O-ring. A new O-ring should be ready for replacing. Lastly, use lubricant to help the new O-ring fit better.
Can A Finish Nail Gun Be Used Without O-Rings, And What Risks Are Involved?No, you shouldn’t use a finish nail gun without O-rings. O-rings help keep air inside the tool. Without them, it can leak air and not work properly. This can make the nail gun dangerous, causing it to shoot nails unexpectedly. Always make sure the O-rings are in good shape before using the tool.
{“@context”:”https://schema.org”,”@type”: “FAQPage”,”mainEntity”:[{“@type”: “Question”,”name”: “What Are The Common Signs That Indicate An O-Ring Replacement Is Needed In A Finish Nail Gun? “,”acceptedAnswer”: {“@type”: “Answer”,”text”: “If your finish nail gun isn’t working right, it might need a new O-ring. Look for signs like air leaks or a weaker nail strike. You might also notice the gun makes a hissing sound when you use it. If it jams often or doesn’t fire nails, that’s another clue. It’s time to check and change the O-ring!”}},{“@type”: “Question”,”name”: “How Do You Properly Disassemble A Finish Nail Gun To Replace The O-Ring? “,”acceptedAnswer”: {“@type”: “Answer”,”text”: “To take apart a finish nail gun, first unplug it or remove the battery. Next, use a screwdriver to take off the outer cover. Look for the O-ring and gently pull it out. Then, put in the new O-ring and put the cover back on. Finally, tighten the screws and plug it in or add the battery. “}},{“@type”: “Question”,”name”: “What Types Of O-Rings Are Compatible With Different Models Of Finish Nail Guns? “,”acceptedAnswer”: {“@type”: “Answer”,”text”: “Finish nail guns use different types of O-rings. The most common ones are rubber O-rings and polyurethane O-rings. Rubber O-rings are often soft and flexible. Polyurethane O-rings are strong and last longer. You should always check your nail gun’s manual to find the right O-ring type.”}},{“@type”: “Question”,”name”: “What Tools Are Needed For Replacing The O-Ring In A Finish Nail Gun? “,”acceptedAnswer”: {“@type”: “Answer”,”text”: “To replace the O-ring in a finish nail gun, you need a few tools. First, grab a screwdriver to open the gun. You might also need pliers to pull out the old O-ring. A new O-ring should be ready for replacing. Lastly, use lubricant to help the new O-ring fit better.”}},{“@type”: “Question”,”name”: “Can A Finish Nail Gun Be Used Without O-Rings, And What Risks Are Involved? “,”acceptedAnswer”: {“@type”: “Answer”,”text”: “No, you shouldn’t use a finish nail gun without O-rings. O-rings help keep air inside the tool. Without them, it can leak air and not work properly. This can make the nail gun dangerous, causing it to shoot nails unexpectedly. Always make sure the O-rings are in good shape before using the tool.”}}]}