Quick Summary: A nailer that shoots 16-gauge nails, often called a 16-gauge finish nailer, is incredibly versatile for woodworking and home projects. It’s perfect for trim, molding, cabinetry, and assembling furniture without leaving huge holes. Easy to use and efficient, it’s a must-have tool for DIYers and hobbyists.
Hey there, DIY enthusiasts and aspiring woodworkers! Jack Shaffer here from Nailerguy. Ever stared at a pile of trim, molding, or some delicate furniture pieces and wished you had a tool that could join them together cleanly and securely, without the fuss of hammers and tiny finishing nails?
You’re not alone! That’s where a real lifesaver comes in: the 16-gauge nailer. It’s like the Goldilocks of nail guns – not too big, not too small, but just right for a huge range of tasks around your home and workshop. Forget about struggling with hammers and bent nails; this tool makes professional-looking results achievable for everyone.
Choosing the right nailer can seem a bit daunting at first, with all the different gauges and types out there. But don’t worry, I’m here to demystify the 16-gauge nailer. We’ll cover what it is, what makes it so special, and how to pick the perfect one for your next project, making sure you feel confident and ready to tackle any task.
Table of Contents
What is a 16 Gauge Nailer? The Workhorse You Need
Think of nail guns as powered hammers, and the “gauge” refers to the thickness of the nail. A lower gauge number means a thicker nail, and a higher gauge number means a thinner nail. So, a 16-gauge nail is thinner than, say, a 15-gauge or 14-gauge nail, but thicker than an 18-gauge nail.
This sweet spot in nail thickness is what makes a 16-gauge nailer so incredibly useful. A 16-gauge nail is substantial enough to hold pieces of wood securely, providing a strong bond, but it’s slim enough to be relatively subtle. When fired, it leaves a small, clean hole that’s easy to fill with putty or wood filler, making for a seamless finish.
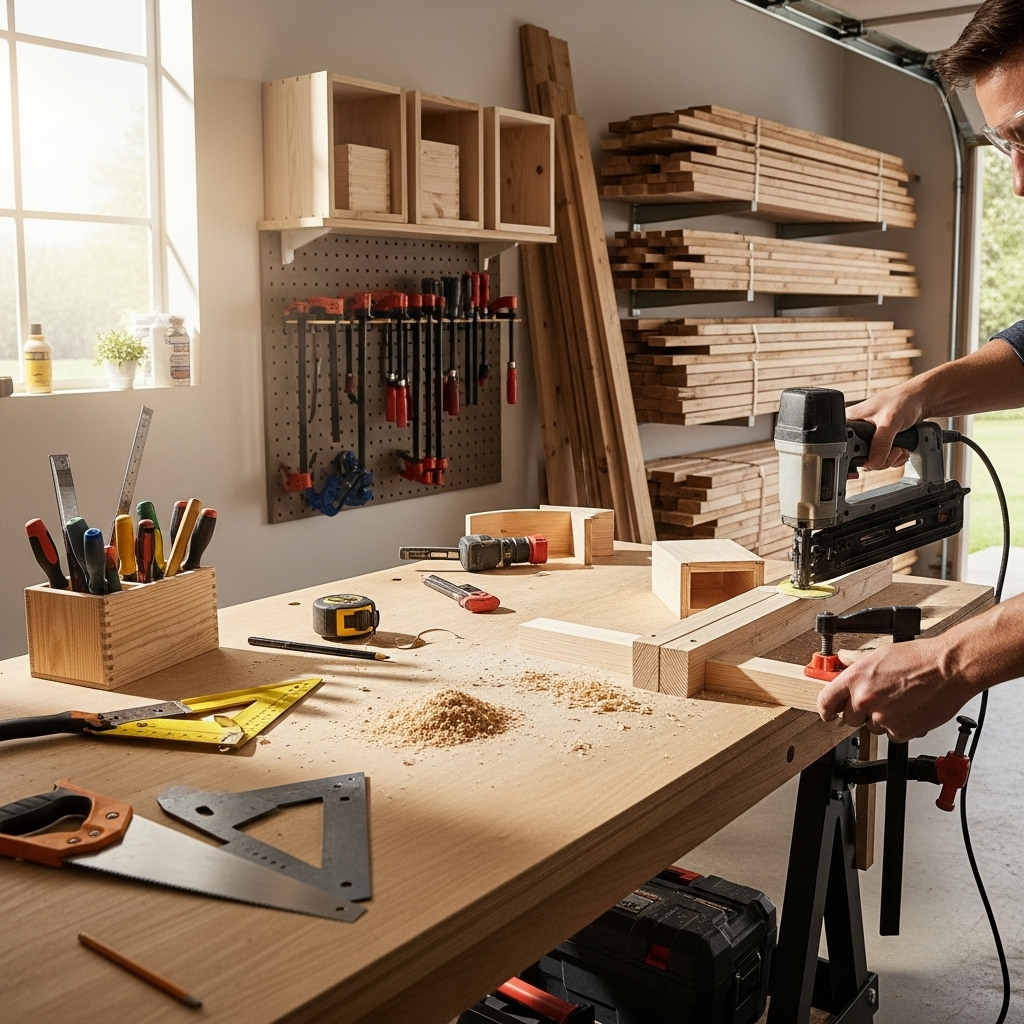
It’s often called a “finish nailer” because it’s perfectly suited for those finishing touches on projects – the stuff that makes your work look polished and professional. Whether you’re installing baseboards, attaching crown molding, building intricate cabinet doors, or assembling light-duty furniture, a 16-gauge nailer is your go-to tool.
Why Choose a 16 Gauge Nailer? The Pros Stack Up
You might be wondering, “Why specifically a 16-gauge?” Great question! Here’s why this nailer is a favorite among DIYers and pros alike:
- Versatility: It handles a wide array of tasks, from delicate interior trim to assembling cabinet boxes.
- Finish Quality: The slim nail leaves a minimal hole, making it easy to achieve a clean, professional look after filling.
- Holding Power: It’s strong enough to hold firmly in place without splitting thinner woods like poplar or pine, which can happen with thicker nails.
- Balance: It strikes a perfect balance between the bulkier framing nails (which are too large for fine work) and the very thin brad nails (which might not offer enough holding power for some applications).
- Efficiency: Projects that would take hours with a hammer can be completed in a fraction of the time.
It’s the kind of tool that empowers you to take on more ambitious projects and achieve results you’ll be proud of. Think of it as upgrading your toolkit to make everything easier and look better.
When is a 16 Gauge Nailer the Right Choice? Project Examples
So, what kind of jobs are perfect for a 16-gauge nailer? Let’s paint a picture:
- Installing Trim and Molding: This is where the 16-gauge truly shines. Baseboards, crown molding, chair rails, window and door casings – all these benefit from the clean fastening a 16-gauge provides. The thin nail means you won’t split the wood, and the hole is small enough to disappear once filled.
- Cabinetry: Building or repairing cabinets? A 16-gauge nailer is fantastic for assembling cabinet face frames, attaching doors, and securing drawer boxes. It provides a strong hold while keeping the project pieces aligned perfectly.
- Furniture Assembly: For lighter furniture projects, like building shelves, attaching decorative trim to furniture, or even putting together small tables, a 16-gauge nailer can be a huge help. It provides a sturdy connection without dominating the piece.
- Wainscoting and Paneling: Installing decorative wall panels or wainscoting is made significantly easier and faster with a 16-gauge nailer. You get a consistent hold across many pieces without much effort.
- Picture Frames and Small Boxes: If you’re into crafting or building decorative boxes, the precise fastening of a 16-gauge nailer ensures strong joints and clean aesthetics.
For these types of tasks, anything that requires a good combination of holding strength and a subtle finish, the 16-gauge nailer is your best friend.
Types of 16 Gauge Nailers: Air-Powered vs. Battery-Powered
When you start looking for a 16-gauge nailer, you’ll notice they primarily come in two main power sources: pneumatic (air-powered) and battery-powered (cordless). Each has its own set of advantages, making one a better fit than the other depending on your needs and workspace.
Pneumatic (Air-Powered) 16 Gauge Nailers
These are the traditional workhorses of the nail gun world. They run off compressed air supplied by an air compressor and connected via a hose.
- How They Work: An air compressor stores pressurized air. When you pull the trigger, a burst of this air is released through the hose to drive a piston inside the nailer, which then fires the nail.
- Pros:
- Power and Speed: Generally offer the most power and firing speed. They can often handle denser woods with ease.
- Lighter Tool Weight: The nailer itself is usually lighter because the compressor and motor are external.
- Cost-Effective (Initially): The nailer tool itself can be less expensive than its cordless counterparts.
- No Battery Issues: No need to worry about charging batteries or their lifespan.
- Cons:
- Requires an Air Compressor: You need to invest in a compressor, which can be bulky and add to the overall cost and noise.
- Hose Management: The air hose can get in the way, snag on things, and limit your range.
- Noise: Air compressors can be quite loud.
- Setup Time: It takes a bit longer to set up – connect the hose, turn on the compressor, let it build pressure.
Battery-Powered (Cordless) 16 Gauge Nailers
These are becoming increasingly popular due to their convenience and portability. They run on rechargeable lithium-ion batteries.
- How They Work: Battery-powered nailers use a combination of a battery to power a small motor, which then drives a pneumatic system (like a mini air tank), or some use a spring-loaded mechanism powered by the motor. This means they don’t need an external compressor.
- Pros:
- Ultimate Portability: No cords, no hoses! You can work anywhere, from the top of a ladder to a remote outdoor location.
- Quick Setup: Grab and go! Just make sure your battery is charged.
- Convenience: Perfect for quick jobs or working in tight spaces where a compressor and hose would be cumbersome.
- Cons:
- Tool Weight: Can be heavier due to the battery pack.
- Battery Management: You need to keep batteries charged. Running out of power mid-project can be frustrating. Battery performance can also degrade over time.
- Firing Speed: May be slightly slower to fire successive nails compared to top-tier pneumatic models.
- Cost: Often a higher upfront cost for the tool and batteries.
- Power Limitations: While much improved, some high-end battery models might still struggle with the absolute hardest woods compared to powerful pneumatic tools.
Choosing Your 16 Gauge Nailer: Key Features to Consider
With the types sorted, let’s dive into the specifics. When you’re shopping for a 16-gauge nailer, keep these important features in mind:
1. Power Source (Revisited)
As we discussed, the biggest decision is pneumatic or cordless. Think about your typical projects. If you’re doing a lot of trim work in your house and value freedom of movement, cordless might win. If you have a dedicated workshop, do lots of heavy-duty trim, or already own an air compressor, pneumatic is a strong contender.
2. Nail Capacity and Loading Mechanism
Look at how many nails the magazine can hold. Longer magazines mean fewer reloads, which saves time and keeps your workflow smooth. Also, check how easy it is to load nails. Some offer side-loading, which is generally more convenient than bottom-loading.
3. Depth Adjustment
This is crucial for controlling how deep the nail sinks into your material. You want to be able to adjust it easily so you can sink nails flush with the surface or slightly below it (for easier filling) depending on your needs. Most good nailers have an external dial or lever for this.
According to This Old House, “Depth adjustment is key to a clean finish. You don’t want nails sticking out, nor do you want them buried so deep they create a huge divot.”
4. Firing Mode (Sequential vs. Contact Actuation)
This determines how you fire nails:
- Sequential/Single Fire: You must press the safety tip firmly against the wood AND pull the trigger for each nail. This is the safest mode and best for precision work, like around delicate trim edges, where you want full control over every nail placement.
- Contact Actuation/Bump Fire: You can fire nails by simply pressing the safety tip against the wood and continuing to pull the trigger. The nail fires as you bump the tool along. This is much faster for installing long trim pieces or framing, but less precise. Many nailers offer a switch to toggle between these modes.
For a 16-gauge finish nailer, having both modes available adds a lot of versatility.
5. Ergonomics and Weight
You’ll be holding this tool, sometimes for extended periods. Is it comfortable in your hand? Does it feel balanced? A tool that’s too heavy or has an awkward grip can lead to fatigue and less accurate work. Try to hold it in a store if possible, or read reviews that specifically mention comfort and handling.
6. Jam Clearance Mechanism
Nails jam. It’s a fact of life with nail guns. A good nailer will have an “easy access” or “tool-free” jam release. This means you can quickly open up the nose of the gun and clear a jammed nail without needing special tools, which saves a lot of frustration and downtime.
7. Air Pressure/Battery Compatibility (if applicable)
- Pneumatic: Check the recommended operating pressure range (PSI) for the nailer. This will help you ensure your air compressor is suitable.
- Cordless: If you’re buying a cordless tool, check which battery platform it uses. If you already own other tools from a specific brand (like DeWalt, Ryobi, Milwaukee, etc.), sticking to that brand for your nailer might allow you to share batteries, saving you money.
Comparing 16 Gauge Nailer Options: A Snapshot
To help you see how these factors play out, let’s look at a hypothetical comparison of a common pneumatic and a popular cordless 16-gauge finish nailer. Keep in mind that specific models and features change rapidly, so this is a general guide.
| Feature | Example Pneumatic 16 Gauge Nailer | Example Cordless 16 Gauge Nailer |
|---|---|---|
| Power Source | Air Compressor & Hose | Rechargeable Lithium-Ion Battery |
| Typical Weight (Tool Only) | 3-4.5 lbs | 5-7 lbs (including battery) |
| Nail Capacity | 100-150 nails | 80-120 nails per charge (approx.) |
| Operating Cost | Very low per nail (electricity for compressor) | Moderate (battery charging, eventual battery replacement) |
| Portability | Limited by hose length | Excellent |
| Setup Time | Moderate (compressor, hose, pressure check) | Fast (grab and go) |
| Typical Applications | Trim installation, cabinetry, furniture, paneling | Trim installation, cabinetry, furniture, paneling, any mobile application |
| Initial Cost | Lower for nailer, higher for compressor package | Higher for nailer, batteries, and charger |
Remember to always research the specific model you are interested in, as features and performance can vary significantly between brands and even different models within the same brand.
How to Use Your 16 Gauge Nailer Safely and Effectively
Now that you’ve chosen your nailer, let’s talk about using it. Safety and proper technique are paramount. A nail gun can be a dangerous tool if not handled with respect.
Essential Safety Gear
Before you even pick up the nailer, make sure you have these basics:
- Safety Glasses: ALWAYS wear safety glasses or goggles. Flying debris or ricocheting nails can cause serious eye injury.
- Hearing Protection: While not as loud as some power tools, nail guns do make a significant noise. Earplugs or earmuffs are a good idea, especially for prolonged use.
- Gloves: Work gloves can protect your hands from splinters and provide a better grip on the tool.
- Sturdy Footwear: Protect your feet, especially if working on a job site.
Step-by-Step: Loading and Firing
Let’s break down the process:
- Read the Manual: Seriously, the manufacturer’s manual is your best friend. It will have specific instructions for your model.
- Connect Power:
- Pneumatic: Ensure your air compressor is set to the recommended PSI for your nailer (usually found on the tool or in the manual). Connect the air hose securely.
- Cordless: Ensure your battery is fully charged and properly inserted into the tool.
- Load the Nails:
- Most 16-gauge nailers pivot open from the magazine.
- Insert a strip of 16-gauge finish nails into the magazine, ensuring they are seated correctly against the feeder.
- Close and secure the magazine. It should click or lock into place.
- Select Firing Mode (if applicable): If your nailer has a switch for sequential vs. contact actuation, choose the mode appropriate for your task. For beginners, sequential is often recommended for better control.
- Test the Depth Adjustment: Before firing into your project, test the depth on a scrap piece of the same material. Adjust the depth setting until the nail sinks to your desired level (flush or slightly countersunk).
- Position the Nailer: Place the nose of the nailer firmly against the surface where you want to drive the nail. Ensure the safety contact element is also pressed against the wood.
- Fire the Nail:
- Sequential Mode: Press the nailer tip firmly against the wood, then pull the trigger.
- Contact Actuation Mode: With the trigger held down, press the nailer tip firmly against the wood. The nail will fire. Continue to press the tip and pull the trigger for subsequent nails.
- Maintain