For a successful hardwood floor installation, a specialized flooring nailer—either manual or pneumatic—is your best friend. They efficiently drive flooring nails at the correct angle, securing planks without damaging their beautiful finish. Choosing the right one ensures a professional, lasting result for your DIY project.
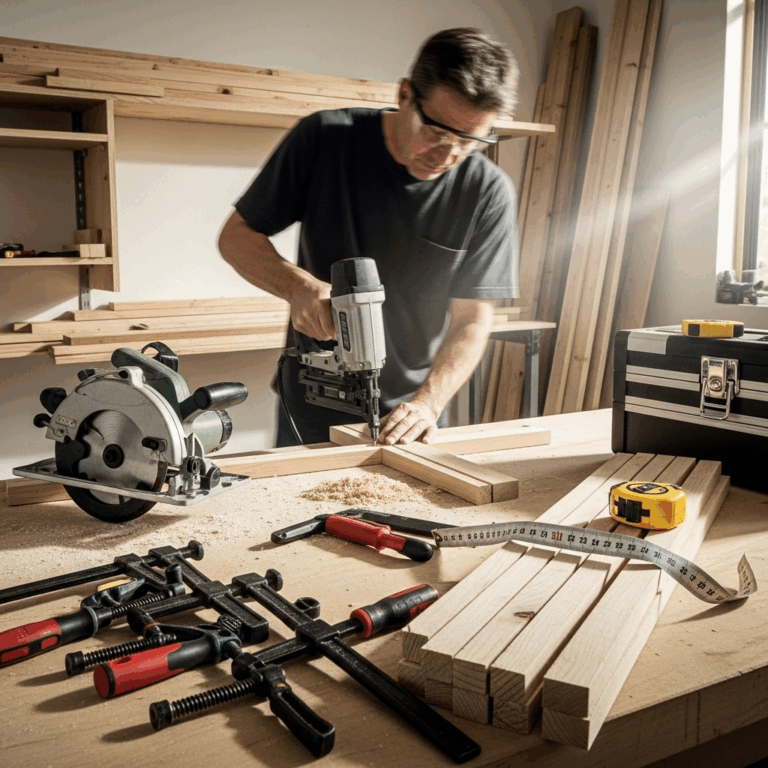
Hey there, fellow DIYers! Jack Shaffer here from Nailerguy. Ever look at a beautifully installed hardwood floor and think, “Wow, how did they do that?” It’s a common question, and believe me, it can seem a bit daunting. The secret isn’t magic; it’s often thanks to the right tool for the job. Specifically, the right nailer. Installing hardwood floors without the proper equipment can lead to headaches, damaged planks, and a finish that just doesn’t look quite right. But don’t worry! With a little guidance, you can absolutely nail this project. Today, we’re going to walk through the “genius method” for hardwood flooring installation using the right nailer, making you feel like a pro in no time.
Table of Contents
Why the Right Nailer Matters for Hardwood Floors
Hardwood flooring requires a specific type of fastener and a tool engineered to deliver it precisely. Unlike framing or finishing nailers, flooring nailers are designed to drive thin, L-shaped or T-shaped nails (cleats) through the tongue of the hardwood plank and into the subfloor at an optimal angle.
- Plank Strength: This angled fastening is crucial for holding the planks securely, preventing gaps and squeaks over time.
- Damage Prevention: A good flooring nailer has a specialized nose piece that protects the surface of the hardwood from dents or scratches.
- Efficiency: Driving nails by hand for an entire floor is practically impossible and incredibly time-consuming. A nailer speeds up the process dramatically.
Understanding Your Flooring Nailer Options
When it comes to installing hardwood floors, you have two main types of nailers to consider: manual (or hand-powered) and pneumatic (air-powered). Each has its pros and cons, and the best choice often depends on your project size, budget, and personal preference. Let’s break them down.
Manual Flooring Nailers
These are the workhorses of older installations, and they’re still a solid option for many DIYers. A manual nailer is essentially a long-barreled hammer with a built-in magazine for flooring cleats. You place the nailer on the tongue of a plank, swing the hammer, and it drives the cleat.
How a Manual Flooring Nailer Works:
- Load L-shaped flooring cleats into the magazine.
- Position the nailer’s shoe against the tongue of the flooring plank.
- Swing the hammer head down with a firm, controlled motion. You’ll hear and feel the cleat being driven.
- Advance the nailer to the next position along the plank, typically every 6–10 inches.
Pros of Manual Nailers:
- Cost-Effective: Generally less expensive to purchase than pneumatic or electric models.
- No Air Compressor Needed: This means fewer accessories and less setup.
- Simplicity: Fewer moving parts, making them generally reliable and easy to maintain.
Cons of Manual Nailers:
- Physical Exertion: They require significant upper body strength and can be tiring, especially for large areas.
- Slower Pace: You’ll work at a more deliberate pace compared to pneumatic options.
- Potential for Damage: If you miss the cleat or swing too hard, you could potentially damage the flooring or the nailer itself.
Pneumatic Flooring Nailers
These are the modern standard for most professional installers and are increasingly popular with DIYers tackling larger projects. Pneumatic nailers connect to an air compressor, which provides the power to drive the nails with a quick burst of air.
How Pneumatic Flooring Nailers Work:
- Connect the nailer to an air compressor using a suitable hose.
- Load the specialized flooring cleats into the nailer’s magazine.
- Place the rubber-soled foot of the nailer onto the tongue of the flooring plank.
- For most models, you’ll tap the body of the nailer with a rubber mallet. This action actuates a piston that drives the cleat into the wood. Some models may have a trigger mechanism.
- Reposition the nailer and repeat.
Pros of Pneumatic Nailers:
- Speed and Efficiency: Significantly faster installation times.
- Less Physical Strain: The compressor does the heavy lifting, requiring less effort from you.
- Consistent Power: Delivers a consistent driving force for reliable results.
- Less Chance of Damage: The controlled air pressure and specialized foot help protect the flooring.
Cons of Pneumatic Nailers:
- Higher Initial Cost: The nailer itself can be pricier, and you’ll also need to factor in the cost of an air compressor and hoses.
- Requires Power Source: You need access to electricity for the compressor and space to house it.
- Noise: Compressors can be loud, so ear protection is a must.
- More Maintenance: Air tools require occasional oiling and maintenance.
Choosing the Right Nailer for Your Project
The “genius method” starts with selecting the tool that best fits your needs. Here’s a quick guide to help you decide:
| Factor | Manual Flooring Nailer | Pneumatic Flooring Nailer |
|---|---|---|
| Project Size | Small to medium rooms, repairs | Medium to large rooms, whole-house installations |
| Budget | Lower initial investment | Higher initial investment (nailer + compressor) |
| Physical Condition | Good upper body strength needed | Less physical strain required |
| Speed of Installation | Slower | Much faster |
| Portability | Highly portable, no hoses or compressor | Less portable (requires compressor and hoses around) |
For most DIYers tackling a single room or even a couple of rooms, a good quality manual flooring nailer can be a fantastic, budget-friendly choice. If you plan on doing many flooring projects or have a large area, investing in a pneumatic system will likely save you time and a lot of physical effort in the long run.
Nailer Accessories You’ll Need
Beyond the nailer itself, a few accessories are essential for a smooth and successful hardwood flooring installation. The right cleats are paramount.
Flooring Cleats
These are the fasteners. They’re L-shaped or T-shaped and specifically designed for hardwood flooring, allowing them to slide into the groove of the tongue-and-groove planks and secure them to the subfloor. Always match the cleat size and type to your flooring manufacturer’s recommendations.
Rubber Mallet
Crucial for pneumatic nailers, and useful for manual ones too. A rubber mallet allows you to gently tap the nailer into position or actuate it without marring the surface of the wood. Some models are specifically designed and weighted for flooring nailers.
Air Compressor and Hose (for Pneumatic Nailers)
If you opt for a pneumatic nailer, you’ll need a suitable air compressor. For flooring nailers, a compressor that can deliver at least 90 PSI (pounds per square inch) and has a tank of 10 gallons or more is usually recommended. A durable air hose of sufficient length to reach your work area without being a tripping hazard is also necessary.
Safety Gear
Never skip safety! Always wear safety glasses to protect your eyes from flying debris. When using pneumatic tools, ear protection is highly recommended due to the compressor noise.
The Genius Method: Step-by-Step Installation
Now, let’s get to the good part – how to use your chosen nailer for a flawless hardwood floor installation. This method focuses on efficiency, precision, and protecting your new floor.
Step 1: Prepare Your Subfloor
A solid, flat, and clean subfloor is the foundation for any successful flooring project. Remove any old flooring, staples, nails, or debris. Check for squeaks in the subfloor and address them by screwing down any loose sections.
Step 2: Acclimate Your Flooring
This step is critical and often overlooked. Hardwood expands and contracts with changes in humidity. Allow your flooring to acclimate to the room’s conditions for at least 72 hours (or as recommended by the manufacturer) before installation. Store the planks flat in the room where they will be installed.
Step 3: Plan Your Layout
Decide on the direction your planks will run. Typically, they run parallel to the longest wall in the room or perpendicular to the floor joists for maximum stability. You’ll usually start within 1/2 inch to 1 inch of the wall, leaving room for expansion. You’ll also need to account for doorways and transitions.
Step 4: Prepare Your Starting Row
For the very first row, you’ll likely need to cut off the tongue of the planks facing the wall. This provides a flat edge to nail into the subfloor. Use a table saw or miter saw for this. When you get to the last plank in the first row, you might need to rip it to fit, again leaving a small expansion gap.
Step 5: Begin Nailing with Your Flooring Nailer
This is where your nailer shines. For the first few rows, you might need to face-nail (drive nails straight down through the plank) because there’s no tongue for the nailer to grab. Use screws or specialized face nails for this, as cleats won’t work. Once you are at least 1/2 inch away from the wall, you can start using your flooring nailer.
- Position the Plank: Lay your first full plank against the wall (groove side facing out). Ensure it’s straight and has the proper expansion gap.
- Place the Nailer: Position your flooring nailer so its foot rests firmly on the tongue of the plank, nestled against the subfloor. Ensure the nailer head is directly over the tongue.
- Drive the Nail:
- For Pneumatic Nailers: Gently tap the body of the nailer with your rubber mallet. The air pressure will drive the cleat through the tongue and into the subfloor.
- For Manual Nailers: Bring the hammer head down with a firm, controlled strike.
- Space Your Nails: Drive fasteners approximately every 6–10 inches along the length of the plank. Be sure to nail into the joists if possible for maximum strength. Ensure your nails are fully driven but not breaking through the surface of the hardwood.
- Work Across the Plank: Move the nailer along the plank, driving fasteners at regular intervals.
Pro Tip: For pneumatic nailers, set your air pressure correctly. Too low, and the nail won’t seat properly. Too high, and you risk damaging the tongue or driving the nail too deep. Test on a scrap piece first!
Step 6: Nailing Subsequent Rows
For every subsequent row, you’ll simply slide the tongue of the new plank into the groove of the previous one. Ensure a snug fit, then position your nailer on the tongue and drive your fasteners as described in Step 5.
Continue this process, working your way across the room. You’ll use your nailer to secure each plank. As you approach walls, you might need to cut planks to fit. Remember to maintain that crucial expansion gap of 1/2 to 1 inch around the perimeter of the room.
Step 7: The Final Rows
The last few rows can be the trickiest. You’ll need to cut planks to fit the diminishing space. You may also need to use a pry bar to gently pull the last planks tight before fastening. Again, carefully position your nailer on the tongue and drive the fasteners.
For very tight spaces where the nailer won’t fit, you might have to resort to face-nailing again with finish nails, set below the surface and then filled with matching putty. Plan ahead to minimize this.
Maintaining Your Flooring Nailer
A well-maintained nailer will last for years and perform reliably. Here’s how to keep yours in top shape:
- Clean Regularly: Wipe down your nailer after each use to remove sawdust and debris. Pay special attention to the nose piece and magazine.
- Lubricate (Pneumatic): If you have a pneumatic nailer, follow the manufacturer’s instructions for oiling. Usually, just requires a few drops of pneumatic tool oil in the air inlet before use.
- Inspect Closures: Check for any damaged or worn parts, especially the footpad on the nailer, to ensure it’s not scratching your floors.
- Proper Storage: Store your nailer in a clean, dry place. If it’s a pneumatic model, drain any residual air from the system.
Troubleshooting Common Issues
Even with the best tools, you might encounter a hiccup. Here are a few common problems and how to fix them:
| Problem | Cause | Solution |
|---|---|---|
| Nail not driving fully | Low air pressure (pneumatic) or insufficient force (manual). Debris in the magazine or nailer. Worn driver blade. | Increase air pressure/swing harder. Clean the nailer and magazine. Inspect the driver blade. |
| Nail bending or breaking | Incorrect cleat type or size. Subfloor too hard or uneven. Nailer positioned incorrectly. | Ensure you’re using the correct cleats. Check subfloor for flatness. Re-position nailer on the tongue. |
| Flooring surface dented or scratched | Nailer footpad is damaged or worn. Too much air pressure (pneumatic). Hammer impact too hard (manual). | Replace worn footpad. Reduce air pressure or adjust mallet strike. |
| Nailer jamming | Incorrect loading of cleats. Debris in the mechanism. Worn parts. | Reload cleats carefully according to instructions. Clean all components thoroughly. Inspect for worn parts. |
Best Practices for a Professional Finish
The “genius method” isn’t just about using the nailer; it’s about doing it well. Here are some extra tips:
- Work with the Light: Install flooring so the planks run parallel to the main light source in the room. This helps hide minor imperfections and makes the floor look more uniform.
- Stagger Your Joints: Always stagger the end joints of your planks from row to row. Aim for a minimum staggering of 6–8 inches for a natural, attractive look and to avoid weak points.
- Use a Flooring Puller and Bar: For those last tough rows, a flooring puller and pry bar can be invaluable for getting planks tight.
- Read Up: Always consult the installation guide provided by your hardwood flooring manufacturer. They often have specific recommendations regarding fasteners and techniques. The National Association of Home Builders (NAHB) offers great resources on building practices.
- Take Breaks: Installing hardwood floors is a marathon, not a sprint. Step back, rest, and assess your progress regularly.
Frequently Asked Questions About Flooring Nailers
Q1: Can I use a regular finish nailer for hardwood floors?
No, it’s not recommended. A regular finish nailer drives nails straight down and doesn’t secure the tongue of the plank effectively. Flooring nailers are specifically designed to drive L-shaped cleats at the correct angle into the tongue for a strong hold.
Q2: What kind of nails (cleats) do I need for hardwood flooring?
You need specialized L-shaped or T-shaped flooring cleats. These are typically 1-1/2 to 2 inches long and are designed to be driven at an angle into the tongue of the wood. Always check your flooring manufacturer’s recommendations.
Q3: How often should I lubricate my pneumatic flooring nailer?
It’s generally recommended to add a few drops of pneumatic tool oil to the air