Can A Nailer Drive Masonry Nails? Yes, with the right tool and specific masonry nails. Standard nail guns aren’t designed for concrete or brick, but specialized powder-actuated tools or specific pneumatic nailers can effectively drive masonry nails.
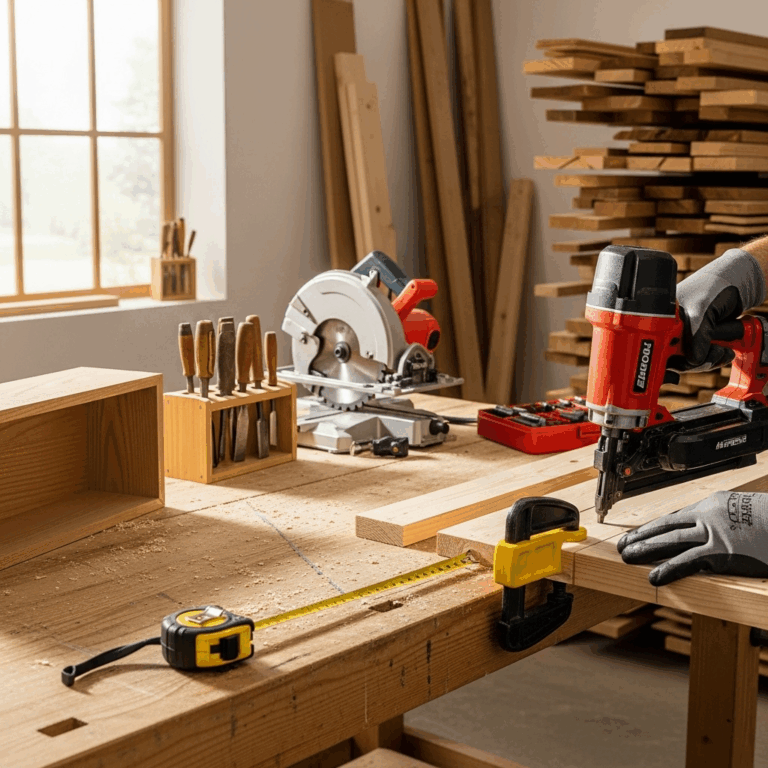
Hey there, DIY friends! Jack Shaffer here from Nailerguy. Ever stared at a solid brick wall or a concrete slab and wondered, “Can I just nail this into place?” It’s a common thought, especially when you’ve got a project that needs to go where wood usually doesn’t. Trying to hammer in regular nails into masonry materials is tough, frustrating, and often just doesn’t work. You end up with bent nails and a sore thumb. But what about using a nailer? Can power actually do the heavy lifting here? The good news is, yes, you can use a nailer for masonry, but it’s not your average framing nailer. We’ll dive into the exciting world of masonry fastening and show you the proven solutions that will make your next project a breeze.
Table of Contents
Understanding Masonry and Fastening Challenges
Masonry, like brick, concrete, and stone, is incredibly strong and dense. This is what makes it so durable, but it also makes it a challenge for standard fasteners. When you try to drive a regular steel nail into these hard materials, a few things can happen:
Bent Nails: The nail simply can’t penetrate the dense material and bends over.
No Penetration: The nail might bounce back or barely leave a mark.
Damaged Material: You could chip or crack the masonry.
Tool Damage: Trying to force a standard nailer might damage the tool itself.
Traditional methods involve drilling pilot holes and using masonry screws or anchors, which are reliable but can be time-consuming. This is where specialized nailers come into the picture, offering a faster and more efficient way to secure items to masonry surfaces.
The “Can a Nailer Drive Masonry Nails?” Answer: Yes, but…
The straightforward answer is yes, a nailer can drive masonry nails, but only specific types of nailers and specific types of nails are designed for this task. Your typical pneumatic or cordless framing nailer or finish nailer uses a relatively soft steel nail designed to penetrate wood. These nails simply aren’t hard or strong enough to go into concrete or brick, and the nailers themselves aren’t built to deliver the kind of force needed.
Trying to use a standard nail gun on masonry is not only ineffective but can also be dangerous, potentially damaging your tool or causing a nail to ricochet.
Types of Nailers That Can Drive Masonry Nails
When we talk about nailers for masonry, we’re generally referring to two main categories:
1. Powder-Actuated Tools (PATs): These are the powerhouses designed specifically for fastening into concrete, steel, and brick. They use a small explosive charge (like you’d find in a blank cartridge) to drive a hardened steel fastener.
2. Specialized Pneumatic/Cordless Nailers for Masonry: Some manufacturers offer heavy-duty pneumatic or cordless nailers that can drive specialized masonry nails. These are less common than PATs but are an option for certain applications.
Let’s break down each of these.
1. Powder-Actuated Tools (PATs): The Heavy Duty Solution
Powder-actuated tools are the gold standard for reliably fastening into hard materials like concrete, steel, and sometimes dense block. They are incredibly effective but require careful handling and training due to their power source.
How PATs Work:
PATs use a .22 caliber blank cartridge (or similar power load) as their energy source. When the trigger is pulled, a firing pin strikes the cartridge, igniting the powder. This creates a rapid expansion of gases that drives a hardened steel piston. The piston then strikes a specialized masonry nail (often called a “concrete nail” or “drive pin”), driving it into the substrate.
The force of the impact is controlled by the power level of the cartridge used, which is selected based on the material density and the fastener being driven.
Here’s a simplified look at the process:
- A specific masonry nail or threaded rod is placed into the muzzle of the tool.
- A power load (blank cartridge) is inserted into the tool’s chamber.
- The tool is placed firmly against the masonry surface.
- The trigger is pulled, firing the load.
- Gas pressure drives the fastener into the concrete or brick.
Common Applications for PATs:
Attaching wood framing to concrete floors or walls.
Securing electrical boxes, conduit straps, or furring strips.
Fastening metal studs to concrete slabs.
Installing insulation clips or framing anchors.
Pros of Using PATs:
Speed: Dramatically faster than drilling and inserting anchors.
Strength: Creates very secure, structural fastenings.
Versatility: Can fasten wood, metal, and other materials to concrete, brick, and steel.
Cost-Effective (for high volume): While the tool itself is an investment, the speed and labor savings can make it very economical for larger jobs.
Cons of Using PATs:
Cost: PATs and their consumables (fasteners and loads) can be expensive for occasional use.
Safety & Training: They are powerful tools that require proper training and strict adherence to safety guidelines. You can’t just pick one up and start using it.
Noise: They are significantly louder than standard pneumatic nailers.
Regulations: Many rental companies and manufacturers require brief training or certification before you can rent or purchase one.
Essential Safety for PATs:
Because PATs use explosive power, safety is paramount. Always:
Read and understand the manufacturer’s manual thoroughly.
Wear appropriate Personal Protective Equipment (PPE), including safety glasses, hearing protection, and gloves.
Never point the tool at anyone, and ensure no one is in the line of fire.
Use the correct power load for the fastener and material.
Ensure the tool is placed flat and firmly against the work surface before firing.
Keep the tool clean and well-maintained.
You can find more detailed safety information and guidelines from organizations like the Occupational Safety and Health Administration (OSHA) regarding powder-actuated tools. Check OSHA’s guidelines on Powder-Actuated Tools.
Types of Fasteners for PATs:
PATs use specific fasteners, which are hardened steel pins or threaded studs designed to be driven into masonry. They come in various lengths and diameters, often with different head types to suit the application.
Drive Pins: Straight pins used for attaching items directly.
Threaded Studs: For attaching items with nuts or hangers.
Wood Fasteners: Pins with a small wood-thread section to help them grip wood when fastening directly into masonry without a pilot hole in the wood.
Concrete Form Straps: For holding rebar or anchors in place.
2. Specialized Pneumatic/Cordless Nailers for Masonry
While less common and generally not as robust as PATs for typical concrete, some manufacturers have developed heavy-duty pneumatic and cordless nailers capable of driving specialized masonry nails into softer masonry materials like cinder blocks or even some types of brick.
These tools typically operate by delivering a very high-impact burst of air or a powerful spring/battery-driven mechanism. They are often used for lighter-duty applications where the extreme power of a PAT isn’t necessary.
How They Work:
These nailers often use a high-pressure air system or a powerful battery and motor to generate a strong impact. They drive hardened steel nails that are specifically designed for masonry. The key difference here is that they rely on mechanical force rather than explosive powder.
Common Applications:
Attaching furring strips to concrete block walls.
Securing light-gauge metal or wooden furring for drywall installation.
Fastening certain types of wiring or conduit clips directly to softer masonry.
Pros of Specialized Masonry Nailers:
Safer than PATs: No explosive charges involved, reducing some of the inherent risks.
Quieter: Generally less noisy than powder-actuated tools.
Easier to Use: Often more intuitive to operate than PATs, especially for those not trained on explosive-powered tools.
More Accessible: May be easier to find for rent or purchase without extensive training requirements.
Cons of Specialized Masonry Nailers:
Limited Material Penetration: Typically only effective in softer masonry like cinder blocks or some types of brick. They will struggle or fail on dense concrete or hard stone.
Specialized Nails Required: You must use the specific masonry nails designed for the tool.
Less Power: Not suitable for heavy-duty structural fastening.
Tool Durability: May not withstand the constant high-impact required for tough jobs as well as a PAT.
Choosing the Right Specialized Masonry Nailer:
If you’re considering one of these, look for:
High PSI Rating (for pneumatic): This indicates more power.
Heavy-Duty Construction: The tool should feel robust.
Compatibility with Masonry Nails: Confirm it’s designed for brick or block.
Brand Reputation: Stick with trusted tool manufacturers known for quality.
Masonry Nails vs. Standard Nails: The Key Differences
It’s crucial to understand why you can’t just use any nail. Masonry nails are specifically engineered to handle the challenges of hard materials.
| Feature | Standard Nail | Masonry Nail (for PATs/Specialized Nailers) |
| :—————— | :———————————————– | :—————————————— |
| Material Hardness | Softer steel, prone to bending | Hardened steel, very brittle, high tensile strength |
| Shank Design | Smooth, sometimes ribbed for wood grip | Smooth, sometimes with fluting or slight ribbing to reduce spalling (chipping) |
| Head Shape | Varies (flat, finish, brad), designed for driving | Usually flat, slightly larger to prevent pull-through |
| Tip Design | Sharp point to penetrate wood | Blunt or chisel tip, designed to displace or fracture material |
| Purpose | Joining wood members | Fastening to concrete, brick, stone, or steel |
| Corrosion Resist.| Varies, often uncoated or zinc plated | Often coated for corrosion resistance, particularly in concrete |
Using a standard nail on masonry is like trying to use a butter knife to cut through concrete – it’s just not built for the job.
When to Use a Nailer vs. Other Masonry Fastening Methods
While nailers (specifically PATs) are excellent for many jobs, they aren’t always the best or only solution. It’s good to know your options.
When a Nailer (PAT) is the Best Choice:
High Volume of Fastenings: If you’re attaching dozens or hundreds of items (like furring strips for a whole house), a PAT will save you immense time and labor.
Structural Attachments: For reliable, strong fastening where a secure connection is critical.
When Speed is Essential: Urgent project deadlines often make PATs the only feasible option.
Attaching Wood to Concrete/Steel: A classic use case where a PAT excels.
When to Consider Other Methods:
Occasional, Light-Duty Fastening: If you just need to hang a picture frame or a lightweight shelf bracket, drilling a pilot hole and using a concrete screw or anchor is often simpler, safer, and more economical.
Very Hard or Brittle Masonry: Some very dense concrete or delicate historic brick might be better suited to screws and anchors to avoid damage.
Homeowners with No Experience with PATs: If you’re hesitant about the safety and training involved with PATs, opt for screw anchors.
Tight Spaces with Poor Ventilation: PATs can produce some exhaust fumes, so good ventilation is important.
Alternative Masonry Fastening Methods:
1. Drilling and Anchors: This is the most common DIY method.
How it works: Drill a pilot hole with a hammer drill and masonry bit, then insert a plastic or metal anchor. A screw is then driven into the anchor.
Pros: Safe, widely available, good for light to medium loads, precise placement.
Cons: Slower than nailers, can be labor-intensive for many fastenings.
Types: Sleeve anchors, wedge anchors, tapcons (concrete screws), toggle bolts. Tapcons are particularly popular for DIYers as they create their own threads in a pre-drilled hole.
2. Chemical Anchors (Adhesive Anchors):
How it works: A two-part epoxy or resin is injected into a drilled hole, and a threaded rod or anchor bolt is inserted. The chemical cures, creating an incredibly strong bond.
Pros: Extremely strong, good for overhead applications, can be used in cracked concrete.
Cons: Requires specific tools (caulking gun, resin injection bottle), longer curing times, more expensive per fastener.
Consider resources from manufacturers like Simpson Strong-Tie for a deep dive into various anchoring solutions and their applications.
Getting Started: A Step-by-Step Guide (Using PATs as the Prime Example)
Since powder-actuated tools are the primary way a “nailer” drives masonry nails effectively, let’s walk through a typical scenario. Remember, always prioritize safety and refer to your tool’s manual.
Project Example: Attaching 2×4 wood framing to a concrete block wall.
Step 1: Gather Your Tools and Materials
Powder-Actuated Tool (PAT): Ensure it’s appropriate for your task.
Masonry Nails/Fasteners: Correct size and type for your PAT and the materials. For attaching wood, you might use specialized wood fasteners.
Power Loads: The correct caliber and power level cartridge. This is CRITICAL. Loads come in different power levels (e.g., 1-5). Consult your PAT’s manual or a professional for recommendations based on your fastener and the density of the masonry.
Safety Gear: Safety glasses or face shield, hearing protection, work gloves.
Workpiece: The item you are fastening (e.g., 2×4 lumber).
Measuring Tape & Pencil: For layout.
Step 2: Prepare the Work Area & Material
Clear Obstructions: Ensure the work area is free of any electrical wires, plumbing, or other obstructions that could be hit by the fastener. Use a stud finder or X-ray scanner if unsure.
Position Workpiece: Mark the precise location where you want to attach the wood. Hold the 2×4 firmly in place against the concrete block wall.
Step 3: Load the PAT
Safety First: Ensure the tool is not loaded and not cocked.
Insert Fastener: Place the appropriate masonry nail or fastener into the barrel of the PAT.
Insert Power Load: Open the tool’s chamber as per the manufacturer’s instructions, insert the correct power load, and close and lock the chamber securely. Never load a power load until you are ready to fire immediately.
Step 4: Position and Fire the PAT
Firm Contact: Place the muzzle of the PAT firmly and squarely against the workpiece where you want the fastener to go. Ensure there’s no gap.
Check Clearance: Make sure no part of your body or any other person is in the path of the fastener if it were to miss or pass through.
Trigger Pull: Squeeze the trigger smoothly and firmly. The tool will fire, driving the fastener.
Step 5: Inspect the Fastening
Check for Security: Gently try to wiggle the attached 2×4. It should feel very secure.
Check for Damage: Inspect the masonry for any excessive chipping or cracking around the fastener. Minor surface spalling is sometimes normal.
Verify Depth: The fastener should be driven to the correct depth according to the fastener manufacturer’s specifications.
Step 6: Reload and Repeat
Unload Safely: If moving to a new location or taking a break, unload the PAT as per the instructions – remove the spent cartridge and any unused loads from the chamber.
Repeat Steps 3-5: Continue attaching the wood at your marked locations.
Important Note on Specialized Pneumatic/Cordless Nailers:
If you are using one of the less common specialized pneumatic or battery-powered masonry nailers, the process is more akin to using a regular nail gun.
1. Load the correct type of masonry nails into the magazine.
2. Ensure the tool is connected to a powerful enough air compressor (for pneumatic) or has a fully charged battery.
3. Place the nose of the nailer flat against the masonry surface where you want the nail.
4. Pull the trigger.
These tools typically have depth adjustment settings to control how far the nail is driven. Remember they are generally for softer masonry.
Troubleshooting Common Issues When Fastening to Masonry
Even with the right tools, you might encounter problems. Here are a few common ones and how to solve them:
Nail Won’t Drive Deep Enough:
PATs: You might be using a power load that is too weak. Try a higher power level. Consult your PAT manual or a professional. Ensure the tool is clean and functioning correctly. The masonry might be exceptionally hard.
Pneumatic/Cordless: The tool might not be powerful enough for the material.