Have you ever struggled with getting your nailer to drive just the right depth? It can be frustrating! Many people want their projects to look perfect, but getting the depth right can feel like a puzzle. Luckily, there’s a simple solution you can find at Home Depot—a great place for all your DIY needs.
Imagine you’re building a birdhouse or framing a wall. The last thing you want is to see nails sticking out or sinking too deep. Did you know that adjusting the depth on your nailer can make all the difference? It’s a small change that brings big results!
This guide will help you understand nailer depth adjustment. With the right tips, you can master this skill in no time. Dive in, and let’s explore how to make your work shine!
Table of Contents
Nailer Depth Adjustment Guide: Home Depot Tips And Tricks

Nailer Depth Adjustment Guide at Home Depot
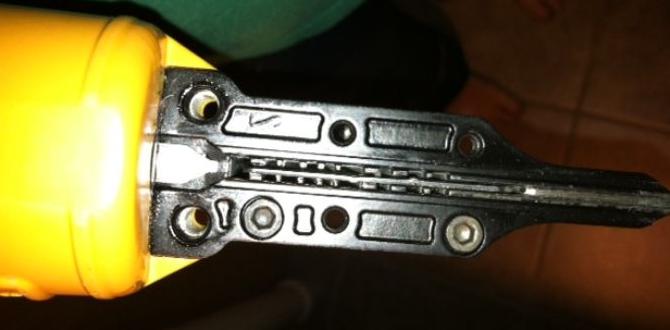
Understanding nailer depth adjustment is crucial for achieving professional-looking results in your projects. Did you know that adjusting the depth can help prevent surface damage? At Home Depot, you can find easy-to-follow guides to set your nailer properly. A correctly adjusted nailer puts nails in just the right spot. This avoids flaws and enhances the durability of your work. Whether you’re a beginner or seasoned DIYer, learning this skill can save you time and materials. Get ready to improve your craft today!Understanding Nailer Depth Adjustment
Explanation of what nail depth adjustment means. Importance of proper nail depth in various projects.Nailer depth adjustment is about controlling how deep a nail goes into a material. It’s important for several reasons. First, if nails are too deep, they may damage the material. If they are too shallow, they won’t hold properly. This can lead to weak projects. Proper depth ensures a strong bond and a neat finish.
- Prevents damage to surfaces
- Enhances the strength of joints
- Affects the overall appearance of the project
- Improves safety during use
Why is proper nail depth important?
Proper nail depth helps create strong and safe projects. It also makes the work look better.How to Adjust Nailer Depth: Step-by-Step Guide
Detailed instructions for adjusting depth on various nailers. Common tools needed for adjustment.Adjusting the depth on your nailer is easy. Follow these steps for a good fix. First, check your nailer model. Each one may look different. Usually, there is a dial or lever on the body. Turn it to set the depth. You may need a few tools:
- Screwdriver
- Tape measure
- Pliers
Make sure you have these ready. Always test nailers on scrap wood before starting your project. This way, you can see if the depth is just right.
What tools do I need to adjust the nailer depth?
You typically need a screwdriver, a tape measure, and pliers for adjustments.
Common Issues Related to Depth Adjustment
Troubleshooting misfires and nail jams. Effects of incorrect depth on projects.Nailing can be a real headache if things don’t go as planned. Misfires and nail jams are common issues that often arise from depth adjustment problems. If nails shoot out too deep or not deep enough, it can ruin your project faster than you can say, “oops!”. Too shallow and the nail wobbles, too deep and you’re left with a mess.
| Problem | Effect |
|---|---|
| Misfires | Leaves nails hanging out. How embarrassing! |
| Nail Jams | Delays your work. A real nail-biter of a situation! |
Always double-check your depth setting to keep things on track. Remember, the right depth makes everything neat and tidy—like wearing matching socks, it feels just right!
Best Practices for Using Nailers Effectively
Tips for optimal nailer performance. Safety precautions to take during use.Using a nailer effectively can make your projects easier and faster. First, ensure your nailer is set to the correct depth. This will help nails sit flush without making deep holes that look like Swiss cheese! Remember to keep your fingers safe—wear protective glasses and earplugs. A funny thing to note: keeping your hands away from the nailing area is like avoiding that one friend who always borrows your stuff without returning it.
| Best Practices | Safety Precautions |
|---|---|
| Adjust depth correctly | Wear safety goggles |
| Use the right nails | Keep hands clear of the nozzle |
| Practice on scrap wood | Check for jams before use |
Following these tips can lead to optimal nailer performance. Safety first—because no one wants a surprise trip to the ER for a nail-related incident!
Maintenance Tips for Nailers
Regular maintenance practices to ensure longevity. Cleaning and storing your nailer properly.Keeping your nailer in top shape helps it last longer. Here are some easy steps:
- Clean the nailer after each use. Dust and debris can cause problems.
- Oil the moving parts regularly. This keeps them working smoothly.
- Store your nailer in a dry place. A case will protect it from damage.
Follow these tips to enjoy a reliable nailer for many projects.
How often should I maintain my nailer?
You should do simple maintenance every time you use your nailer. Check the user manual for detailed advice. Regular care prevents big problems and saves money in the long run.
Frequently Asked Questions About Nailer Depth Adjustment
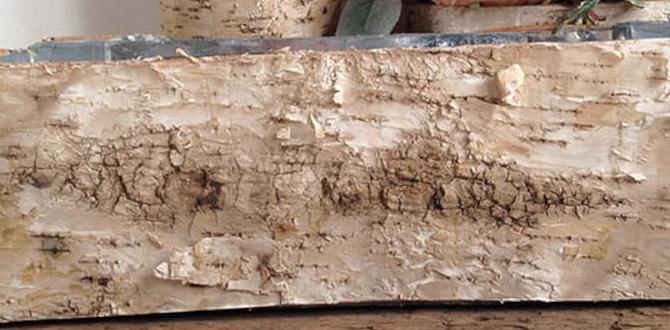
Common questions users have about depth settings. Expert answers to enhance understanding and troubleshoot issues.Many users often wonder about the best depth settings for their nailers. One common question is, “What if my nails are not flush?” This usually means you need to adjust the depth setting. Try turning the knob slightly! Another query is, “Does the type of wood matter?” Absolutely! Softer woods need less depth, while harder woods might need more. Think of it as trying to put a nail into a marshmallow versus a brick!
| Question | Answer |
|---|---|
| Why are my nails sinking? | Adjust the depth to a shallower setting! |
| How do I know the right depth? | Test on scrap wood first! |
These tips can help you nail it every time. Don’t hesitate to experiment a bit to find what works best for your project!
Conclusion
In summary, using a nailer depth adjustment guide from Home Depot can help you set the right depth for your nails. This ensures clean and professional-looking work. Remember to check your device before starting a project. For more tips on using nailers, visit Home Depot’s website or ask an associate for advice. Happy building!FAQs
Sure! Here Are Five Related Questions On The Topic Of Nailer Depth Adjustment:Sure! Here are five questions about nailers and how to adjust their depth. 1. What is a nailer? A nailer is a tool that shoots nails into wood. 2. Why do we adjust nail depth? We adjust nail depth so the nails go in just right. 3. How do we change the depth? You can change the depth with a dial or lever on the nailer. 4. What happens if the depth is too deep? If the nail is too deep, it can split the wood. 5. What if the nail is not deep enough? If the nail isn’t deep enough, it won’t hold the wood together.
Sure! Just let me know what question you want me to answer.
How Do I Adjust The Depth Setting On My Pneumatic Nailer For Different Materials?To adjust the depth on your pneumatic nailer, find the depth adjustment knob or lever. You can turn it to change how deep the nails go. For soft materials like softwood, set it to a shallower depth. For hard materials, like plywood, set it deeper. Always test on a scrap piece first to make sure it’s just right!
What Are The Important Factors To Consider When Adjusting The Nail Depth On A Brad Nailer?When you adjust the nail depth on a brad nailer, think about the material you are using. Soft wood needs a shallower depth, while hard wood needs a deeper setting. You also want to make sure the nail doesn’t stick out or go too deep. Finally, always check your tool’s guide for the best settings.
Are There Specific Guidelines For Adjusting The Depth On A Framing Nailer Versus A Finish Nailer?Yes, there are different guidelines for setting the depth on a framing nailer and a finish nailer. A framing nailer uses bigger nails, so you should set it deeper to hold heavy pieces together. A finish nailer uses smaller nails for detailed work, so you want it to set the nails just below the surface. Always check your depth setting before nailing to get it right!
What Tools Or Accessories Can Help With Accurately Setting Nail Depth In My Nailer?You can use a depth adjustment tool. This helps you choose how deep you want the nails. Some nailers also have a built-in depth gauge. A guide or a measuring tape can help too. These tools make sure your nails go in the right amount!
How Can I Troubleshoot Inconsistent Nail Depth Issues With My Nailer During A Project?To fix nail depth problems with your nailer, start by checking the air pressure. Make sure the pressure is at the right level for your nailer. Next, look at the nails you’re using. They should fit your nailer correctly. If you still have issues, clean the nailer carefully. Dirt can cause problems. Finally, practice on scrap wood to see if the nails go in right.
{“@context”:”https://schema.org”,”@type”: “FAQPage”,”mainEntity”:[{“@type”: “Question”,”name”: “Sure! Here Are Five Related Questions On The Topic Of Nailer Depth Adjustment:”,”acceptedAnswer”: {“@type”: “Answer”,”text”: “Sure! Here are five questions about nailers and how to adjust their depth. 1. What is a nailer? A nailer is a tool that shoots nails into wood. 2. Why do we adjust nail depth? We adjust nail depth so the nails go in just right. 3. How do we change the depth? You can change the depth with a dial or lever on the nailer. 4. What happens if the depth is too deep? If the nail is too deep, it can split the wood. 5. What if the nail is not deep enough? If the nail isn’t deep enough, it won’t hold the wood together.”}},{“@type”: “Question”,”name”: “”,”acceptedAnswer”: {“@type”: “Answer”,”text”: “Sure! Just let me know what question you want me to answer.”}},{“@type”: “Question”,”name”: “How Do I Adjust The Depth Setting On My Pneumatic Nailer For Different Materials?”,”acceptedAnswer”: {“@type”: “Answer”,”text”: “To adjust the depth on your pneumatic nailer, find the depth adjustment knob or lever. You can turn it to change how deep the nails go. For soft materials like softwood, set it to a shallower depth. For hard materials, like plywood, set it deeper. Always test on a scrap piece first to make sure it’s just right!”}},{“@type”: “Question”,”name”: “What Are The Important Factors To Consider When Adjusting The Nail Depth On A Brad Nailer?”,”acceptedAnswer”: {“@type”: “Answer”,”text”: “When you adjust the nail depth on a brad nailer, think about the material you are using. Soft wood needs a shallower depth, while hard wood needs a deeper setting. You also want to make sure the nail doesn’t stick out or go too deep. Finally, always check your tool’s guide for the best settings.”}},{“@type”: “Question”,”name”: “Are There Specific Guidelines For Adjusting The Depth On A Framing Nailer Versus A Finish Nailer?”,”acceptedAnswer”: {“@type”: “Answer”,”text”: “Yes, there are different guidelines for setting the depth on a framing nailer and a finish nailer. A framing nailer uses bigger nails, so you should set it deeper to hold heavy pieces together. A finish nailer uses smaller nails for detailed work, so you want it to set the nails just below the surface. Always check your depth setting before nailing to get it right!”}},{“@type”: “Question”,”name”: “What Tools Or Accessories Can Help With Accurately Setting Nail Depth In My Nailer?”,”acceptedAnswer”: {“@type”: “Answer”,”text”: “You can use a depth adjustment tool. This helps you choose how deep you want the nails. Some nailers also have a built-in depth gauge. A guide or a measuring tape can help too. These tools make sure your nails go in the right amount!”}},{“@type”: “Question”,”name”: “How Can I Troubleshoot Inconsistent Nail Depth Issues With My Nailer During A Project?”,”acceptedAnswer”: {“@type”: “Answer”,”text”: “To fix nail depth problems with your nailer, start by checking the air pressure. Make sure the pressure is at the right level for your nailer. Next, look at the nails you’re using. They should fit your nailer correctly. If you still have issues, clean the nailer carefully. Dirt can cause problems. Finally, practice on scrap wood to see if the nails go in right.”}}]}