Choosing the right nailer for your decking project makes all the difference. For the best results, a framing nailer or a dedicated deck nailer is your go-to. They drive nails powerfully and consistently, ensuring a sturdy and beautiful deck without the hassle. Let’s walk through how to pick and use yours.
Building a deck is a fantastic way to enhance your home. But the thought of hammering thousands of nails can be daunting, right? Don’t worry, that’s where a nailer comes in! It transforms a tough job into a much more manageable and enjoyable project. Choosing the right nailer might seem tricky at first, but by understanding a few key things, you’ll be picking the perfect tool for your deck build in no time.
We’ll cover everything you need to know to get your deck looking great and feeling super secure. From understanding different types of nailers and what features matter most, to practical tips for using them safely and effectively, this guide has you covered. Get ready to build with confidence!
Table of Contents
Why Use a Nailer for Decking Projects?
When you’re building a deck, consistency and speed are super important. Manually hammering nails can lead to uneven depth, bent nails, and a whole lot of fatigue. A nailer automates this process, driving each nail to the perfect depth with minimal effort from you. This means your deck will not only look more professional but will also be structurally sound and safer for years to come.
Think about it: a deck needs to withstand plenty of use, weather, and time. Using a nailer ensures that each board is fastened securely, reducing the chances of loose boards or structural issues down the line. It’s an investment in both the quality of your project and your own well-being.
Types of Nailers for Decking
Not all nailers are created equal, and for decking, some are definitely better suited than others. The main players you’ll encounter are framing nailers and some specialized deck nailers. Let’s break them down.
1. Framing Nailers
Framing nailers are workhorses. They’re designed to drive large nails quickly and powerfully, making them ideal for the structural parts of your deck, like framing the joists and beams. They can handle the tough job of pushing nails through dense lumber.
Sub-types of Framing Nailers:
- Coil Nailers: These use nails held together by wire in a coil. They typically hold a lot of nails, meaning fewer reloads during long stretches of work. They are great for repetitive nailing tasks.
- Stick Nailers: These use nails that are collated (stuck together) in a straight stick, usually at an angle. The angle allows them to get into tighter spaces and are often preferred for framing where you might need to get into corners or reach awkward spots.
For decking, you’ll want a framing nailer that can handle at least a 2-inch nail, and preferably up to 3 or 3-1/2 inches, depending on the thickness of your lumber and the specific fasteners required by your deck plans.
2. Dedicated Deck Nailers
Some manufacturers offer nailers specifically marketed for decking. These often combine features found in framing nailers with specific advantages for deck board installation. They might have a slightly different nose piece designed to drive nails flush with the surface of deck boards without damaging them.
While a framing nailer is very versatile and can do the job, a dedicated deck nailer can sometimes offer a bit more finesse for the visible decking boards themselves. However, for the underlying framing, a standard framing nailer is usually the primary tool.
3. Pneumatic vs. Cordless Nailers
This is a big decision! Your nailer will either be powered by compressed air (pneumatic) or have its own battery and gas system (cordless).
- Pneumatic Nailers: These are incredibly powerful and generally more affordable upfront. They require an air compressor and a hose. The compressor adds to the bulk and noise on your job site, and you need to be mindful of air pressure settings.
- Cordless Nailers: These offer the ultimate freedom of movement. No hoses, no compressor. They use either batteries for power or a combination of batteries and fuel cells. They are more expensive initially and can be heavier due to the built-in power source. For large decking projects, battery life and fuel cell availability become important considerations.
Key Features to Look For in a Decking Nailer
When you’re scanning the tool aisle or browsing online, keep these important features in mind to make sure you get a nailer that will serve your decking project well.
- Nail Size Capacity: As mentioned, ensure it can handle the length and gauge of nails required for your deck framing and boards. Most deck framing will require nails between 2.5 and 3 inches long.
- Power: For driving into tough wood like treated pine or hardwoods, you need a nailer with enough power (often measured in PSI for pneumatic or by amperage for cordless motors).
- Depth Adjustment: This is crucial! A depth adjustment feature allows you to control how far the nail is driven. You want nails to be sunk flush with the wood surface, not sticking out nor buried too deep.
- Magazine Capacity: A larger magazine means you can fire more nails between refills, saving you time and keeping your workflow smooth, especially when fastening dozens of deck boards.
- Rafter Hook: A small but mighty feature! This allows you to hang your nailer on a joist or rafter when you’re not using it, keeping it off the ground and easily accessible.
- Comfort and Ergonomics: You’ll likely be holding this tool for hours. Look for a comfortable grip, good weight balance, and minimal vibration.
- Safety Features: Most modern nailers have safety contact tips that prevent accidental firing. Always ensure this feature is present and functioning.
Essential Tools and Materials for Your Decking Project
Besides your trusty nailer, having the right tools and materials will make your deck building experience much smoother and safer. Here’s a quick rundown:
Tools:
- Safety Glasses: Non-negotiable. Protect your eyes from flying debris.
- Work Gloves: To protect your hands and improve grip.
- Measuring Tape and Pencil: For accurate marking and layout.
- Speed Square and Chalk Line: For precise straight lines and angles.
- Circular Saw or Miter Saw: For cutting lumber to size.
- Level: To ensure your deck is built perfectly flat.
- Hammer: For any minor adjustments or pulling errant nails.
- Clamps: To hold boards in place while fastening.
- Air Compressor and Hose (if using pneumatic): Make sure the compressor has enough CFM (Cubic Feet per Minute) output to keep up with your nailer.
Materials:
- Lumber: Pressure-treated pine is common for its durability and resistance to rot and insects. Hardwoods like Ipe are beautiful but harder to work with. Check local building codes for approved materials.
- Decking Screws or Nails: Use exterior-grade fasteners specifically designed for decking. Stainless steel or coated screws offer excellent corrosion resistance. For nailers, you’ll be using compatible nails.
- Joist Hangers and Connectors: Essential for strong structural connections.
- Concrete for Footings: If your deck requires ground-level support.
Step-by-Step: Using Your Nailer for Decking Projects
Let’s get down to business! Here’s how to use your nailer effectively and safely for your decking project.
Step 1: Preparation and Safety First!
Before you even pick up your nailer, take these steps:
- Read Your Nailer Manual: Every nailer is a bit different. Familiarize yourself with its specific operating instructions, maintenance, and safety features.
- Wear PPE: Put on your safety glasses and work gloves. You might also consider hearing protection, especially with pneumatic nailers.
- Set Up Your Workspace: Ensure you have clear access to the area where you’ll be working. Keep cords or hoses from becoming tripping hazards.
- Connect and Calibrate (if pneumatic): Connect your nailer to the air compressor. Set the air pressure according to your nailer’s specifications. Too low, and nails won’t drive properly; too high, and you risk damaging the wood or driving nails too deep.
- Load the Nailer: Follow your manual’s instructions to load the correct type and size of nails into the magazine. Ensure they are seated properly.
Step 2: Setting the Depth
This is critical for a clean, professional finish and a strong hold.
- Test Drive: Find a scrap piece of lumber similar to what you’ll be fastening.
- Adjust Depth Wheel: Fire a test nail. If it’s too high, increase the depth setting (or adjust air pressure slightly if applicable). If it’s too low (buried too deep), decrease the depth setting.
- Achieve Flushness: Your goal is to have the nail head sit perfectly flush with the surface of the wood.
Many modern nailers have an easy-to-use depth adjustment wheel near the nose of the tool. Experimenting with scrap pieces will help you dial this in precisely.
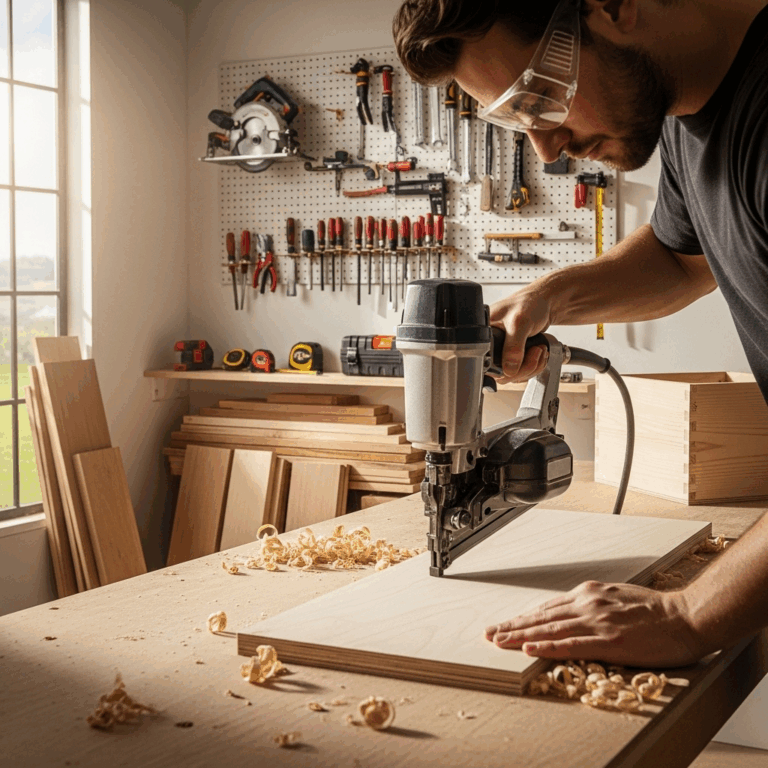
Step 3: Fastening Structural Components (Framing)
This is where a framing nailer really shines. You’ll be attaching joists to beams, rim joists, and ledger boards.
- Position the Nailer: Place the nose of the nailer firmly against the lumber where you want to drive the nail.
- Engage Safety Contact: Ensure the safety contact tip is pressed against the wood. This is a safety feature that prevents the nailer from firing unless it’s in contact with a surface.
- Pull the Trigger: Once positioned and engaged, pull the trigger. The nail should drive in quickly and smoothly.
- Maintain Pressure: Briefly hold the nailer against the wood after firing to ensure the nail is fully seated and the wood doesn’t recoil.
- Work Systematically: Follow your deck framing plan, driving nails at recommended intervals for structural integrity. You can often use the nailer’s sequential tripping mechanism for controlled firing or bump-fire for faster fastening where precise placement isn’t as critical. For framing, sequential fire is generally recommended for control.
For critical structural connections, like attaching joist hangers or ledger boards, it’s often recommended to use structural screws as per manufacturer guidelines or building codes, as they can provide a more consistent and stronger hold than nails in certain applications. Always consult your local building codes and plans.
Step 4: Attaching Deck Boards
This is the part everyone sees! Precision and consistent spacing are key here.
- Position the Board: Lay your deck board in place, ensuring it’s straight and flush with the previous board (or maintaining your desired gap).
- Nail Placement: Drive two nails near each joist. Proper nail placement prevents lifting and buckling. Typically, you’ll place nails about 1-2 inches from the ends and edges of the board.
- Spacing: Use a spacer tool or the width of a nail to ensure consistent gaps between boards for drainage and expansion.
- Flush Finish: Again, use your depth setting to ensure the nail heads are flush with the surface of the deck board, not popping up or sinking too deep.
While some people use pneumatic nailers for deck boards, others prefer specialized decking screws driven by a powerful impact driver or screw gun. Screws generally offer a stronger and more consistent hold for deck boards and are often preferred for their ability to be removed if needed. However, a well-calibrated framing nailer can certainly do the job for many DIYers.
Step 5: Troubleshooting Common Issues
Even with the best tools, you might run into a hiccup. Here are some common problems and solutions:
- Nails Not Driving Fully:
- Too little air pressure (pneumatic).
- Depth adjustment set too shallow.
- Incorrect nail collation (if they’re not lining up straight).
- Driving into an extremely hard knot or a joist end.
- Nails Driving Too Deep:
- Too much air pressure (pneumatic).
- Depth adjustment set too deep.
- Nail Jams:
- Ensure you are using the correct size and type of nails for your tool.
- Don’t force nails that aren’t properly aligned.
- Most nailers have an easy-access panel to clear jams; consult your manual.
- Tool Not Firing:
- Check if the safety contact tip is blocked or not engaged against the wood.
- Ensure the nail magazine is loaded correctly and not empty.
- For pneumatic tools, check if the air hose is connected and the compressor is running.
- For cordless tools, check battery charge or fuel cell.
Nailer Maintenance for Longevity
To keep your nailer working reliably for this project and many more, a little regular maintenance goes a long way. Your nailer manufacturer will have specific recommendations, but here are general guidelines:
- Cleanliness: Keep the exterior of your nailer clean. Wipe away sawdust and debris regularly. Pay attention to the nose of the tool where nails are driven.
- Lubrication (Pneumatic): Pneumatic nailers typically require a few drops of specialized pneumatic tool oil per day before use. This keeps the internal O-rings and motor lubricated. Never use WD-40 for routine lubrication; it can dry out rubber parts.
- Air Filter Maintenance (Pneumatic): Regularly check and clean or replace the air filter on your compressor and any inline filters. Dirty filters can restrict airflow and reduce performance.
- Inspect O-rings and Seals: Periodically check for any worn or damaged O-rings or seals, especially if you notice air leaks.
- Store Properly: When not in use, store your nailer in a clean, dry place, away from extreme temperatures. For pneumatic tools, drain any residual air and water from the tool and compressor tank to prevent corrosion.
Regular maintenance ensures your tool performs at its best, preventing frustrating downtime and extending its lifespan. For more detailed maintenance, always refer to your specific tool’s user manual.
When to Consider Screws Over Nails for Decking
While nailers are fantastic for speed and repetitive fastening, it’s important to note that many professionals and discerning DIYers opt for screws when it comes to fastening deck boards down. Here’s why:
- Holding Power: Screws generally offer superior holding power compared to nails. They are less likely to “back out” over time as wood expands and contracts with weather changes.
- Ease of Removal: If you ever need to replace a deck board, screws are much easier to remove cleanly without damaging the surrounding wood, unlike nails which can be difficult to extract.
- Less Damage to Surface: High-quality deck screws are designed to sit flush or slightly recessed, often with less impact on the wood surface than a nail head that might be over-driven.
- Corrosion Resistance: Many deck screws are made from stainless steel or feature specialized coatings that offer excellent resistance to corrosion, which is vital for outdoor projects.
For areas like joist hangers and structural framing, nails (often specialized structural nails) are commonly used. However, for the deck boards themselves, screws are a very popular and often recommended alternative. You’d typically use a powerful impact driver or a screw gun with a depth-setting collar for driving screws.
Frequently Asked Questions (FAQ)
Q1: What is the best type of nailer for fastening deck boards directly?
While a framing nailer can be used, many prefer specialized deck screws driven by an impact driver for deck boards due to better holding power and ease of replacement. If using a nailer, a framing nailer with good depth control is suitable.
Q2: Do I need a special type of nail for decking projects?
Yes, absolutely! You need exterior-grade nails that are coated or made of stainless steel to resist rust and corrosion. For framing, common framing nails in the appropriate length and gauge are used. For deck boards, specific decking nails are available, but screws are often preferred.
Q3: How many PSI do I need for a pneumatic nailer for decking?
Most framing nailers operate effectively in the 70-120 PSI range. Ensure your air compressor can consistently supply the CFM (Cubic Feet per Minute) rating required by your specific nailer model to maintain optimal performance.