Mastering nail gun safety means you get your DIY projects done right and, more importantly, safely. Following these essential tips prevents common injuries, ensuring your woodworking adventures are rewarding, not regrettable. We’ll cover everything from essential gear to proper technique, making sure you’re confident and protected every step of the way.
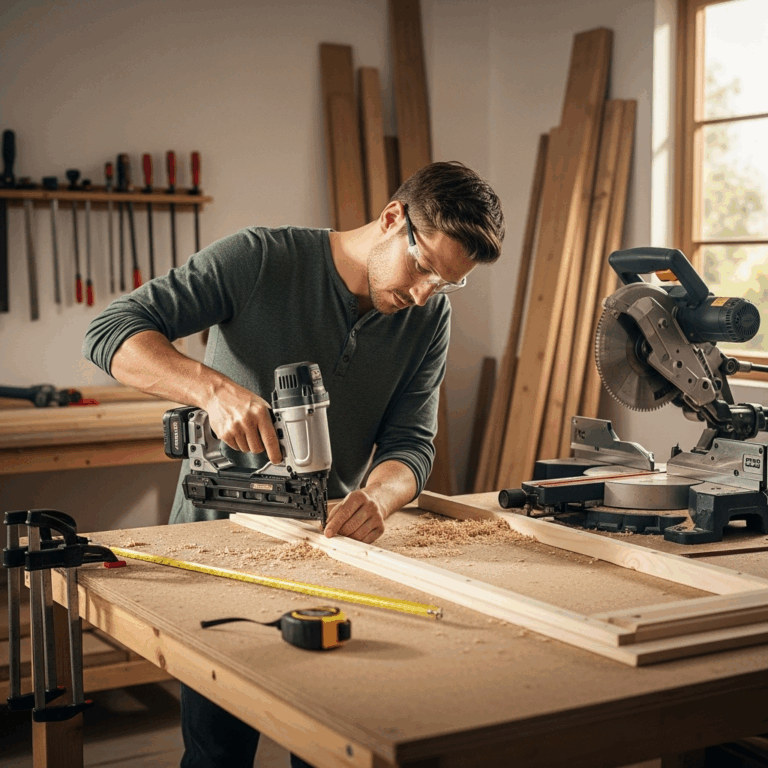
Hey there, DIYers! Jack Shaffer, Nailerguy, here. Tackling a new woodworking project can feel super exciting, right? Maybe you’re building that bookshelf you’ve always wanted, or perhaps you’re putting up some trim around the house. Tools like nail guns can make these jobs so much faster and easier. But with all that power comes an important responsibility: safety. It’s easy to overlook safety steps when you’re eager to get started, but a little prep goes a long, long way to prevent accidents. Don’t worry, I’m here to guide you through it all. We’ll break down nail gun safety into simple, easy-to-follow steps so you can build with confidence.
Table of Contents
Why Nail Gun Safety is Non-Negotiable for DIYers
Nail guns are incredible tools. They can drive nails much faster and more consistently than a hammer. This means less fatigue for you and a much more professional finish. However, they also contain a powerful spring-loaded firing mechanism that can deploy nails with significant force. Without proper precautions, this can lead to serious injuries, including deep puncture wounds, eye injuries, and damage to bones and nerves. Understanding and applying nail gun safety tips isn’t just about following rules; it’s about protecting yourself and anyone around you.
Think of it this way: you wouldn’t drive a car without a seatbelt, would you? Using a nail gun without understanding and implementing safety measures is just as risky. We want your DIY dreams to come true, not turn into a trip to the emergency room. That’s why we’re diving deep into what you need to know to stay safe and stitch your projects together flawlessly.
Understanding Your Nail Gun
Before you even think about firing a nail, get to know your tool. Every nail gun, whether it’s pneumatic (air-powered), electric, or battery-powered, has specific operating procedures. Reading the manual is your first and most important step. It’s designed by the people who made the tool, for you, the user.
Key things to look for in your manual include:
- The type of nails it uses (length, gauge, head style).
- Recommended air pressure settings (for pneumatic models).
- Maintenance requirements.
- Specific safety features and how they work.
- Troubleshooting common issues.
This knowledge empowers you to use the tool correctly and safely. It’s like learning the rules of the road before you drive – crucial for a smooth journey.
Essential Nail Gun Safety Gear: Your Personal Protection Zone
Safety gear isn’t optional; it’s essential. Consider it your personal protection zone when you’re operating a nail gun. These items are designed to shield you from common hazards. Investing in quality gear is an investment in your well-being.
Eye Protection: The #1 Must-Have
This is non-negotiable. Always, always wear safety glasses or goggles that meet ANSI Z87.1 standards. Flying debris, nails, or even parts of the tool can cause severe eye damage. Make sure your eye protection fits snugly and doesn’t obstruct your vision.
Hearing Protection: Guard Your Ears
Nail guns can be loud, especially pneumatic ones. Prolonged exposure to loud noise can lead to permanent hearing loss. Use earplugs or earmuffs to protect your hearing. Different projects might call for different levels of hearing protection, so check the decibel rating of your nail gun and choose accordingly.
Hand Protection: Grip and Guard
Gloves can improve your grip on the tool, reducing the chance of it slipping. They can also offer a minor layer of protection against scrapes and splinters. Opt for gloves that allow you good dexterity so you can still operate the tool comfortably and accurately.
Foot Protection: Sturdy Soles
When working with heavy tools and materials, sturdy footwear is a must. Steel-toed boots can protect your feet if something heavy is dropped or if you accidentally step on a nail. They also provide a stable base for when you’re maneuvering around your workspace.
Respirator (Situational): Breathing Easy
If you’re working with materials that produce fine dust (like treated lumber or certain composites), or if you’re using adhesives or finishes in conjunction with nailing, consider wearing a dust mask or respirator. This prevents you from inhaling harmful particles or fumes.
Safe Nail Gun Operation: Step-by-Step
Now for the critical part: how to use the nail gun safely. Following these steps will significantly reduce the risk of accidents.
Step 1: Inspect Your Nail Gun Before Each Use
Before you connect the air hose (for pneumatic) or insert the battery, give your nail gun a quick once-over. Check for any visible damage, loose parts, or blockages in the nose. Ensure the safety contact tip (the part that touches the material) moves freely.
Step 2: Connect to Power Safely
- Pneumatic Nailers: Ensure the air compressor is turned off and depressurized. Connect the air hose securely to the nailer, then to the compressor. Open the air valve slowly.
- Electric/Battery Nailers: Ensure the battery is properly seated or the power cord is securely connected. For battery models, ensure the battery is charged.
Step 3: Choose the Right Nailer for the Job
Using the wrong type of nailer can lead to frustration and potential danger. For framing, you need a powerful framing nailer. For finishing trim, choose a finish nailer or brad nailer. Using a framing nailer for delicate trim is overkill and can split the wood or drive nails too deep. Understanding the different types of nailers is key to both success and safety. Learn more about them here: Family Handyman: Types of Nail Guns.
Step 4: Load Nails Correctly
Always disconnect the power source (air or battery) before loading nails. Open the magazine, insert the correct type and quantity of nails, and close the magazine until it latches securely. Never force nails into the magazine.
Step 5: Understand the Trigger Mechanism and Contact Tip
Nail guns typically have two main firing modes: sequential (contact) and bump fire.
- Sequential (Contact) Mode: The nailer fires one nail only when the contact tip is depressed against the work surface AND the trigger is pulled. This is the SAFEST mode and recommended for most DIY tasks.
- Bump Fire Mode: The nailer will fire nails continuously as long as the contact tip is held against the work surface and the trigger is held down. This is faster but much more dangerous, especially for beginners, as it can lead to accidental nail discharge.
Most modern residential nailers come set to sequential mode for safety. If yours can be switched, understand its operation thoroughly and err on the side of caution.
Step 6: Prepare Your Workspace
A cluttered workspace is a recipe for accidents. Clear away any trip hazards, debris, or unrelated tools. Ensure you have good lighting and ventilation. If you’re working on a ladder or elevated surface, make sure it’s stable and secure.
Step 7: Position the Nailer Correctly
Place the contact tip firmly and squarely against the surface where you want to drive the nail. Always aim at your material; never point the nailer at yourself or others. Keep your body out of the nail’s path.
Step 8: Drive the Nail
Once the contact tip is firmly pressed against the material, pull the trigger. For sequential firing, this will drive one nail. For bump firing (use with extreme caution and only if you are experienced), you would hold the trigger and “bump” the nose against the material to fire successive nails. As a beginner, stick STRICTLY to sequential firing.
Step 9: Never Force the Nailer
If a nail doesn’t drive completely, don’t immediately pull the trigger again. Check the magazine, air pressure, or battery. Attempting to drive a second nail when one is already partially driven can cause jams or misfires. If a nail jams, disconnect the power source and carefully remove it according to the manual’s instructions.
Step 10: Re-positioning and Driving Subsequent Nails
Lift the nailer away from the surface when you are done driving a nail. When ready to drive the next nail, re-position the nailer and ensure the contact tip is firmly against the workpiece before pulling the trigger again (in sequential mode).
Step 11: Disconnect Power When Not in Use or When Moving
Crucially, disconnect the air hose or remove the battery whenever you are:
- Loading or unloading nails.
- Clearing a jam.
- Making adjustments.
- Moving to a new location.
- Taking a break.
- Leaving the tool unattended.
This is one of the most critical safety habits to develop.
Common Mistakes to Avoid with Nail Guns
Even with the best intentions, beginners (and sometimes experienced users!) can slip up. Here are some common pitfalls to watch out for:
- Not wearing safety glasses: We can’t stress this enough.
- “Dry firing” the tool unnecessarily: This can damage the tool and is a bad habit.
- Carrying the nailer with your finger on the trigger: Always keep your finger off the trigger when not actively driving a nail.
- Treating the nailer like a hammer: It’s not meant for prying or hammering in loose nails.
- Bypassing safety features: If your nailer has a contact tip safety, don’t disable it.
- Working with inadequate ventilation or in tight spaces where recoil can cause issues.
- Assuming any nail will work: Always use the manufacturer-specified nails.
Nail Gun Safety Checklist
Before you start any project, run through this quick checklist. It’s a great way to ensure you haven’t missed anything important.
| Check | Details |
|---|---|
| Safety Gear | Are your safety glasses/goggles, hearing protection, and gloves ready and worn? |
| Tool Inspection | Is the nail gun free of damage and blockages? Does it function smoothly? |
| Power Source | Is the air pressure correct (pneumatic) or battery charged (electric)? Is the connection secure? |
| Nail Load | Are the correct nails loaded properly into the magazine? |
| Workspace | Is the area clear of hazards, well-lit, and stable? |
| Firing Mode | Is the nailer in sequential/contact fire mode (recommended)? |
| Trigger Discipline | Is your finger OFF the trigger when not actively firing a nail? |
Understanding Different Nail Gun Types and Their Safety Nuances
While the core safety principles apply to all nail guns, the type of nailer you use can introduce specific considerations.
1. Pneumatic (Air-Powered) Nailers
These are the workhorses of the construction world. They require an air compressor and hose.
- Safety Note: Ensure the air hose is in good condition and securely connected. Tripping over the hose is a significant hazard. Keep air pressure at the manufacturer’s recommended level – too high can be dangerous, too low can cause jams. For more on compressor safety, check out the OSHA Compressed Air Systems Safety guidelines.
2. Electric Nailers (Corded)
These plug into a standard wall outlet.
- Safety Note: Be mindful of the power cord. Avoid working in wet conditions, as this can create an electrical hazard. Ensure the cord is not damaged.
3. Battery-Powered Nailers (Cordless)
These use rechargeable batteries, offering great portability.
- Safety Note: Ensure the battery is properly installed and charged. Like corded electric models, be cautious in wet environments. Some battery nailers have less recoil than pneumatic, but still pack a punch.
Specific Nailer Types:
- Framing Nailers: Drive large nails for structural work. Very powerful. Always use sequential fire if available.
- Finish Nailers (15 and 16 gauge): Drive slimmer nails for trim work. Less powerful but still require full safety gear.
- Brad Nailers (18 gauge): Drive very thin nails, ideal for delicate molding and small projects. Lower power, but safety still paramount.
- Staplers: While not strictly nail guns, they operate on similar principles and share many safety precautions.
Safety When Working With Others
If you’re working on a DIY project with a friend or family member, communication and awareness are key.
- Establish a Safety Zone: Designate an area around where the nail gun is being operated. Keep others out of this zone unless they are directly assisting and also equipped with safety gear.
- Clear Communication: Make sure everyone knows when the nail gun is in operation. A simple “Nailer Hot!” can alert others.
- Never point the nail gun at anyone: This seems obvious, but in a bustling work environment, it needs to be said.
- Be aware of your surroundings: Ensure no one is accidentally in the path of a nail, especially during bump firing or if a nail ricochets.
Troubleshooting & Jam Removal Safety
Jams happen. It’s how you handle them that matters. When a nail jams:
- IMMEDIATELY disconnect the power source (unplug, remove battery, or disconnect air hose).
- Remove your finger from the trigger.
- Wait for any internal mechanisms to settle.
- Consult your tool’s manual. Different nailers have different methods.
- Use appropriate tools (like needle-nose pliers) to gently remove the jammed nail. Never use excessive force, as this can damage the gun.
- NEVER attempt to clear a jam while the tool is powered.
If you’re unsure or uncomfortable, it’s always better to consult the manual or seek help from a tool shop rather than risking an injury.
Maintaining Your Nail Gun for Safety
A well-maintained tool is a safer tool. Regular maintenance ensures your nail gun functions as intended.
- Lubrication: Pneumatic nailers require regular lubrication. Follow the manufacturer’s recommendations (usually a few drops of specific oil into the air inlet).
- Cleaning: Keep the exterior of the tool clean. Periodically remove any sawdust or debris from around the nose and magazine.
- Inspection: After a jam or if you notice any unusual performance, inspect the tool for wear or damage. Pay special attention to the firing pin and the contact tip.
- Storage: Store your nail gun in a clean, dry place, ideally in its original case. Disconnect air hoses or remove batteries before storage.
Frequently Asked Questions (FAQ)
Q1: What is the single most important nail gun safety tip?
A1: Always wear safety glasses or goggles meeting ANSI Z87.1 standards. Eye injuries are among the most common and severe, and they are entirely preventable with proper eye protection.
Q2: Can I use any nail in my nail gun?
A2: Absolutely not. You must use the specific type, size, and gauge of nails recommended by your nail gun’s manufacturer. Using incorrect nails can cause jams, misfires, or damage to the tool, and potentially cause a nail to shoot sideways.
Q3: How do I know which firing mode to use?
A3: For most DIY projects, the sequential (contact) fire mode is the safest. It requires you to press the contact tip against the surface and then pull the trigger, firing one nail at a time. Bump fire is faster but much riskier, especially for beginners.