Quick Summary: Nail gun pressure regulator settings are crucial for optimal performance and safety. Correctly adjusted PSI ensures nails drive properly without damaging material or causing jams. This guide will demystify PSI settings, helping you find the sweet spot for any project.
Table of Contents
Nail Gun Pressure Regulator Settings Explained: Your Essential Guide
Ever feel like your nail gun is playing a guessing game? Sometimes it drives nails like a charm, and other times they’re left sticking out or buried too deep. It can be frustrating, especially when you’re in the middle of a project! The good news is, it’s usually not the nail gun’s fault; it’s often down to the air pressure settings. Understanding your nail gun pressure regulator is key to getting consistent, professional results every time. Don’t worry, it’s simpler than it sounds! I’m Jack Shaffer, and I’ll guide you through understanding and setting the perfect pressure for your nailer, making your DIY projects smoother and more successful.
Why Nail Gun Air Pressure Matters So Much
Think of air pressure as the “oomph” your nail gun needs to do its job. Too little, and the nail won’t penetrate the wood properly, leaving a messy job. Too much, and you risk damaging your workpiece, bending nails, or even hurting yourself. Getting this just right is essential for a few key reasons:
- Nail Driving Depth: Consistent pressure ensures nails are driven to the correct depth, flush with the surface or slightly countersunk as needed.
- Material Protection: The right pressure prevents over-penetration, which can blow through thin materials or leave unsightly dents on softer woods.
- Tool Longevity: Running a nailer at excessively high pressures can put undue stress on its internal components, leading to premature wear and tear.
- Nail Bending/Jamming: Incorrect pressure is a common culprit for bent nails or jams, costing you time and frustration.
- Safety: While not the primary function, proper pressure contributes to safe operation by ensuring the nail is driven effectively and reliably.
For more in-depth information on air compressors and their role, the U.S. Department of Energy offers excellent resources on compressed air systems and efficiency, which can also shed light on the importance of managing air usage and pressure.
Decoding Your Nail Gun, Air Compressor, and Regulator
Before we dive into settings, let’s quickly clarify what’s what. You’ve got three main players here:
- The Nail Gun: This is the tool that fires the nails. Each type of nail gun (framing, brad, finishing, etc.) has a recommended operating pressure range.
- The Air Compressor: This is the machine that stores and supplies the compressed air. It has its own pressure gauge, often showing the tank pressure and the regulated output pressure.
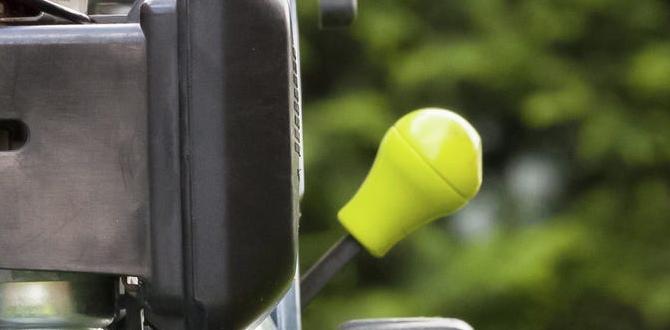
- The Regulator: This is the crucial component, usually attached to the compressor’s air outlet or inline with the air hose. It allows you to precisely control the air pressure being sent to your nail gun.
Most modern air compressors have a built-in regulator. If yours doesn’t, or if you’re using a longer hose, an inline regulator can be a lifesaver. These regulators typically have a knob or dial that you turn to set your desired pressure, which is then displayed on a gauge.
The Golden Rule: Start Low and Go Slow
This is the most important piece of advice for setting your nail gun pressure: always start with the lowest recommended pressure for your specific nailer. Then, gradually increase it until you achieve the desired result. Why? Because it’s easy to add more pressure, but much harder to undo the damage caused by too much pressure.
Overdriving nails (driving them too deep) or splitting the wood can happen in an instant. Starting low gives you control and a better understanding of your tool’s performance with minimal risk.
What’s the Right PSI for Your Nail Gun?
The term “PSI” stands for Pounds per Square Inch. It’s the standard measurement for air pressure. You’ll find that different types of nail guns and different tasks require varying PSI levels. Here’s a general guideline. Remember, these are starting points, and fine-tuning is often necessary.
Common Nail Gun Types and Their PSI Ranges
| Nail Gun Type | Typical PSI Range (Low End) | Typical PSI Range (High End) | Typical Use |
|---|---|---|---|
| Framing Nailer | 70 PSI | 120 PSI | Joists, studs, sheathing, subfloors |
| Sheathing Nailer | 60 PSI | 100 PSI | Roofing and wall sheathing |
| Brad Nailer (18-gauge) | 60 PSI | 100 PSI | Trim, delicate moldings, small craft projects |
| Finish Nailer (15/16-gauge) | 70 PSI | 110 PSI | Baseboards, crown molding, door/window trim |
| Pin Nailer (23-gauge) | 70 PSI | 100 PSI | Very delicate trim work, holding pieces before gluing |
| Stapler (various gauges) | 40 PSI | 100 PSI | Upholstery, sheathing, fencing, trim |
Pro Tip: Always check your nail gun’s manual for the manufacturer’s specific recommended operating pressure range. This is the most reliable source of information for your tool.
Factors Influencing PSI Settings
Beyond the type of nailer, several other factors can influence the ideal PSI setting for your project:
- Material Hardness: Softer woods require less pressure than hardwoods. If you’re nailing into oak, you might need slightly more pressure than if you’re nailing into pine.
- Nail Size: Longer and thicker nails generally need more driving force, so a slightly higher PSI might be beneficial.
- Hose Length and Diameter: Longer or narrower air hoses can cause “pressure drop.” This means the pressure at the nail gun is less than what’s set on the regulator. You might need to increase your regulator setting slightly to compensate. A good rule of thumb is to add about 1 PSI for every 5 feet of hose over 25 feet. For hoses smaller than 1/4 inch, you might need to add even more.
- Compressor Capacity: While not directly about regulator settings, a compressor with a larger tank and higher CFM (Cubic Feet per Minute) output will better maintain consistent pressure, especially during rapid firing.
- Environmental Conditions: Extreme cold can affect air compressor performance and pressure.
- Depth Adjustment Feature: Many modern nail guns have a depth adjustment wheel or lever. This is your first line of defense for fine-tuning nail depth. Use this feature before significantly altering the air pressure.
Step-by-Step Guide to Setting Your Nail Gun Pressure
Let’s get practical. Here’s how to set your nail gun pressure correctly and safely.
Step 1: Gather Your Tools and Information
You’ll need:
- Your air compressor
- Your nail gun
- The correct air hose
- Scrap pieces of the material you’ll be working with
- Your nail gun’s manual (highly recommended!)
Step 2: Connect Everything Safely
- Turn off the air compressor and ensure it’s not building pressure.
- Connect the air hose securely to both the compressor outlet and the nail gun’s air inlet. Ensure quick-connect fittings are fully seated.
- Load your nails into the nail gun according to the manufacturer’s instructions.
- Ensure the nail gun’s safety tip is not pressed against anything.
Step 3: Set the Initial Regulator Pressure
Locate the regulator on your air compressor. It usually has a dial or knob. You’ll also see a gauge. For most nail guns, you’ll start testing at the lower end of the recommended PSI range. For example, if your brad nailer’s range is 60-100 PSI, set your regulator to 60 PSI.
- If it’s a knob, you might need to pull it out to unlock it before turning, then push it back in to lock.
- Turn the knob clockwise to increase pressure and counter-clockwise to decrease it.
Step 4: Turn On the Compressor and Let It Build Pressure
Turn on your air compressor. Let it run until it reaches its cut-off pressure (the maximum pressure the tank can hold). The gauge will show the tank pressure, and also what pressure is being regulated and sent to the hose.
Step 5: Test Fire on Scrap Material
This is where the magic happens! Take your scrap material and fire a few nails. Pay attention to how they drive:
- Are the nails sinking in too deep? This means your pressure is too high for this material or nail size.
- Are the nails not sinking in enough? Your pressure is likely too low.
- Are the nails bending or not firing cleanly? This could be pressure, but also check nail collation angle or if you’re using the wrong size nail for the gun.
Step 6: Adjust and Re-test
Based on your test firing, adjust the pressure:
- If nails are overdriven: Turn the regulator knob counter-clockwise to decrease the PSI.
- If nails are underdriven: Turn the regulator knob clockwise to increase the PSI. Make small adjustments (2-5 PSI at a time).
Fire another nail or two after adjusting. Repeat this process until the nails are driven to your desired depth. For most trim work, you want the nail head to be just slightly below the surface so it can be easily filled.
Step 7: Fine-tune With the Nail Gun’s Depth Adjustment
Once you’ve got the air pressure close, use your nail gun’s built-in depth adjustment feature for final precision. This allows for very fine-tuning without needing to constantly fiddle with the regulator. Refer to your nail gun’s manual for how to adjust its depth setting.
Step 8: The Final Check
Fire a few more nails in different spots on your scrap material. They should all be driving consistently. If they are, you’ve found your sweet spot! Proceed with your project.
Troubleshooting Common Nail Gun Pressure Issues
Even with the best intentions, you might run into a hiccup. Here are some common problems and their solutions:
Problem: Nails are Bending or Not Driving Fully
- Possible Cause: Insufficient air pressure.
- Solution: Increase PSI gradually until nails start driving correctly on scrap material.
- Possible Cause: Using the wrong size nail or collation angle for the gun.
- Solution: Double-check that you’re using the correct fasteners specified for your nailer. Ensure they are loaded correctly.
- Possible Cause: Air leak in the hose or fittings.
- Solution: Inspect your air hose and fittings for damage. Listen for hissing sounds. Replace any faulty components.
Problem: Nails are Driven Too Deep (Overdriven)
- Possible Cause: Too much air pressure.
- Solution: Decrease PSI on the regulator.
- Possible Cause: Depth adjustment feature on the nail gun is set too deep.
- Solution: Adjust the depth setting on your nail gun to drive nails less deep.
Problem: Nail Gun Cycles Slowly or Loses Power
- Possible Cause: Low air pressure reaching the nail gun (pressure drop).
- Solution: Increase regulator output. Check hose length and diameter; consider a larger/shorter hose. Ensure compressor is producing enough CFM for the tool.
- Possible Cause: Air compressor tank is running low on air.
- Solution: Let the compressor refill its tank. A larger tank can help with continuous work.
- Possible Cause: Clogged air filter or internal tool issue.
- Solution: Clean or replace the air compressor’s intake filter. Consult your nail gun manual for basic maintenance or seek professional repair if issues persist.
Problem: Nail Gun “Rides” (Fires Without a Nail)
This can sometimes be a pressure issue, but more often it’s a safety mechanism issue or a worn part in the nailer itself. Always ensure the safety contact is depressed against the workpiece. If that’s fine and pressure is correct, consult your tool’s manual for troubleshooting.
Understanding CFM: The Other Air Pressure Factor
While PSI is about the force of the air, CFM (Cubic Feet per Minute) is about the volume of air your compressor can deliver. Your nail gun’s manual will state its CFM requirement. Your compressor needs to meet or exceed this CFM rating to keep up with the nail gun, especially during rapid firing.
If your compressor’s CFM is too low, you’ll experience pressure drops and power loss, even if the PSI setting is correct. It’s like trying to drink a milkshake through a straw that’s too thin – you can only get so much through at once. For more on CFM and compressor sizing, resources like Family Handyman provide great practical advice.
Nail Gun Pressure Safety First!
We’ve touched on safety, but it’s worth repeating. Treated air compressors and nail guns with respect:
- Always wear eye protection. Flying debris or a misfired nail can cause serious injury.
- Never point a nail gun at yourself or others. Treat it like a loaded firearm.
- Ensure the safety tip (nose) is depressed before attempting to fire a nail.
- Disconnect the air supply before performing maintenance, loading nails, or storing the tool.
- Be aware of your surroundings. Ensure no one is behind your workpiece where a nail could pass through.
- Read your tool manuals! They contain vital safety information specific to your equipment.
Proper pressure management is a core part of safe operation. When a nail gun is set correctly, it fires reliably and as intended.
FAQ: Your Nail Gun Pressure Questions Answered
Let’s tackle some common questions beginners have about nail gun pressure.
Q1: My nail gun came with a depth adjustment. Do I even need to worry about air pressure?
A: Absolutely! The depth adjustment wheel on your nail gun is for fine-tuning the nail depth. The air pressure from the compressor is the primary driving force. You need to set the air pressure to an appropriate baseline for your tool and material, and then use the depth adjustment for those final, precise settings. Think of pressure as the engine power and depth adjustment as the steering wheel.
Q2: Can I use the same air pressure setting for all my projects?
A: Generally, no. As we discussed, different materials (softwood vs. hardwood), different nail sizes (long framing nails vs. short brads), and even the length of your air hose can all affect the ideal pressure. It’s always best to test on scrap material and adjust your PSI for each new project or material type.
Q3: What happens if I disconnect the air hose while the compressor is running?
A: Releasing a high-pressure air hose that is still connected to a running compressor can cause the hose to whip around violently, potentially causing injury or damage. Always disconnect the air supply from the compressor before disconnecting the hose from the nail gun or compressor. Ensure the compressor is turned off and has bled off pressure.
Q4: My compressor gauge shows 100 PSI, but my nail gun feels weak. What’s wrong?
A: This is a classic sign of “pressure drop.” The regulator on your compressor might be set to 100 PSI, but if you have a very long or narrow air hose, or if there are leaks, the actual pressure reaching your nail gun could be much lower. Check your hose, fittings, and consider a regulator closer to the tool if the hose is extremely long.
Q5: How do I know if my nail gun is rated for high or low pressure?
A: The best way is to check the user manual for your specific nail gun model. It will list the optimal operating pressure range in PSI. Generally,