Quick Summary: Nails split wood primarily due to improper technique, the wrong nail type, or issues with the nailer itself. This guide dives into the common causes and provides simple solutions to prevent wood splitting, ensuring your projects come out smooth and strong.
Hey everyone, Jack Shaffer here from Nailerguy! It’s no fun when you’re halfway through a project, ready to attach that piece of trim or build that sturdy shelf, and suddenly your nailer splits the wood. It can be frustrating, making you wonder if you’re doing something wrong. But don’t worry, this happens to a lot of DIYers, especially when starting out. The good news is that it’s usually an easy fix once you know what to look for. We’re going to break down exactly why this happens and how you can prevent it, so your projects look professional and hold together beautifully. Let’s get nailing!
Table of Contents
The Dreaded Wood Split: Understanding the Problem
We’ve all been there. You line up your shot, pull the trigger, and instead of a satisfying thud, you hear a sickening crack. Your beautiful piece of wood now has a splintered line running right where you wanted that nail. It’s a common woodworking woe, and it can happen with any type of wood, from soft pine to harder hardwoods. This issue isn’t just about aesthetics; a split can weaken the joint, leading to structural problems down the line. But fear not! Most of the time, the cause is surprisingly simple, and the solution is even simpler.
When a nail splits wood, it means it forced its way through the wood fibers rather than parting them cleanly. Think of it like trying to push a blunt pencil through paper versus a sharp one. The blunt pencil will tear and crumple the paper, while the sharp one will slice through. Nails can act the same way in wood. Understanding the anatomy of a nail and how it interacts with different wood types is key to preventing this pain point.
Top Reasons Your Nails Are Splitting Wood (And How to Fix Them)
Let’s get down to the nitty-gritty. There are several common culprits behind your splitting nails. We’ll explore each one and give you practical, easy-to-follow solutions.
1. Nail Placement and Pilot Holes
This is probably the most frequent reason for splitting, especially with hardwoods or when nailing near the edge of your wood. Wood has grain, and if you try to force a nail directly into the path of those fibers, especially close to an edge, the fibers can’t move aside and they break, causing a split.
- Nailing too close to the edge: The closer the nail is to the edge of the wood, the less material there is to support the nail and resist the outward pressure. This makes splits much more likely.
- Nailing directly into end grain: End grain is like a bunch of straws open at the end. Nails don’t hold well here, and it’s very prone to splitting.
- Nailing hardwoods without preparation: Hardwoods are dense and don’t have as much give as softwoods. Forcing a nail into them without a little help almost guarantees trouble.
The Fix:
The magic word here is pilot holes. A pilot hole is a small hole drilled into the wood before you drive the nail. It acts as a guide for the nail and removes just enough material to allow the nail to pass through without forcing the wood fibers apart.
- Drill a pilot hole: For most situations, especially when nailing near an edge or into hardwoods, drilling a pilot hole is your best friend. The diameter of the pilot hole should be slightly smaller than the shank (the body) of the nail but larger than the tip. This allows the nail to still grip the wood effectively.
- Edge distance: Try to keep your nails at least 3/4 inch to 1 inch from the edge of the board. This gives the wood enough strength to hold the nail without splitting.
- Angle your nails: Sometimes, angling your nail slightly can help. Driving it at a slight angle can allow it to pass between the wood grain rather than directly against it.
2. The Wrong Nail for the Job
Just like you wouldn’t use a roofing nail to hang a picture, using the wrong type of nail for your wood and project can lead to splits.
- Nail diameter (gauge): Thicker nails (lower gauge numbers) have more power to split wood. If you’re working with delicate trim or brittle wood, a thicker nail might be overkill.
- Nail point type: Some nail points are sharper than others. A diamond point is generally sharper and designed to cut fibers cleanly, while a blunt point might be better for very hard woods as it can press fibers aside more gently.
- Nail material: While less common for splitting, some coatings can affect how a nail drives.
The Fix:
Choose your nails wisely based on the wood and the application.
- Use the right gauge: For delicate work like trim or molding, opt for finer gauge nails (e.g., 18-gauge brad nails or 23-gauge pins). For structural projects, you might need thicker nails, but always consider the wood type.
- Consider coated or diamond-point nails: These are often designed for easier driving and cleaner entry, reducing the risk of splitting.
- Experiment with nail types: If you’re unsure, do a test on a scrap piece of the same wood. Try a few different nail sizes and types to see what works best.
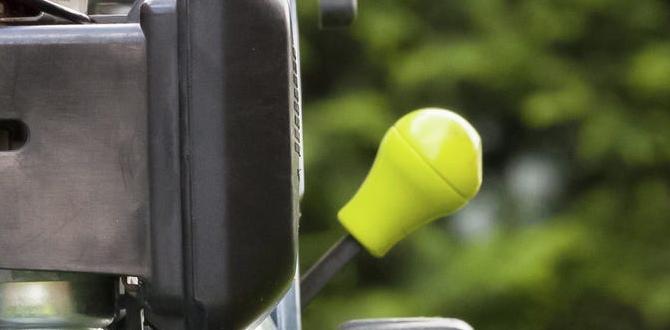
3. Nailer Pressure and Settings
If you’re using a nail gun, the pressure setting can significantly impact how the nail is driven. Too much power can slam the nail through the wood with too much force, causing it to split. Too little power, and the nail might not drive fully, leading to other issues, but for splitting, we’re often looking at excessive force.
The Fix:
Calibrate your nailer to the material you’re working with.
- Reduce air pressure: Start with a lower air pressure setting on your compressor (if using an air-powered nailer) and slowly increase it until the nails drive flush without damaging the wood. A good starting point for finishing nails is often around 70-90 PSI, but this varies by nailer and application. Always consult your nailer’s manual.
- Test on scrap wood: Before you start on your project, always fire a few test nails into a scrap piece of the same wood. Adjust the pressure until the nail head is slightly countersunk or flush with the surface of the wood.
- Sequential vs. Bump Fire: Be mindful of your firing mode. Bump fire can lead to accidental double-nailing or driving nails too close together, increasing the chance of splits, especially if you’re not precise. Sequential firing offers more control.
4. Nailer Malfunctions and Maintenance
A tool that isn’t working correctly can cause a host of problems, including splitting wood.
- Dull or bent nails: If nails are consistently coming out bent or mangled, it’s a sign something is wrong.
- Striking plate issues: The part of the nailer that contacts the wood (the striking plate or contact tip) can get worn or damaged. If it’s not sitting flat, it can cause issues.
- Driver blade problems: The driver blade, which is the part that actually pushes the nail out, can become dull or damaged.
The Fix:
Keep your nailer in top shape.
- Inspect nails: Always use fresh, straight nails loaded correctly in the magazine.
- Clean and lubricate: Most pneumatic nailers require regular cleaning and lubrication. Check your manufacturer’s manual for specific instructions. This helps everything move smoothly.
- Inspect the contact tip: Ensure the contact tip is clean, free of debris, and not excessively worn or damaged. A clean tip also helps prevent marring the wood surface.
- Service your tool: If your nailer is acting up consistently, it might be time for a professional servicing or to replace worn parts.
5. The Type of Wood You’re Using
Some woods are naturally more prone to splitting than others. This is a crucial factor to consider.
- Hardwoods: Dense woods like oak, maple, and hickory are strong but brittle. They resist the nail more, increasing the chance of a split if not prepared correctly.
- Softwoods: Woods like pine, fir, and cedar are softer and more forgiving. However, they can still split, especially near edges or if the nail is too large.
- Knots: Knots are dense, irregular sections of wood. Driving a nail through or too close to a knot is a guaranteed recipe for a split.
- Dryness: Extremely dry wood can be more brittle and prone to splitting.
The Fix:
Adapt your approach to the wood.
- Pilot holes are king: As mentioned, pilot holes are essential for hardwoods and areas around knots.
- Use appropriate nails: For softwoods, you might get away with slightly larger nails. For hardwoods, stick to finer gauge nails or ensure perfect pilot hole preparation.
- Avoid knots: Whenever possible, plan your nail placement to avoid knots entirely. If you must nail near a knot, angle the nail away from it or use a pilot hole.
- Consider wood moisture: If wood feels excessively dry and brittle, consider letting it acclimate in your workshop for a few days if possible, or be extra cautious with nail placement and pressure.
For a deeper dive into wood types and their properties, the Wood Handbook from the Forest Products Laboratory is an invaluable resource for understanding wood behavior.
Step-by-Step Guide to Preventing Nail Splits
Let’s put it all together into a clear, actionable plan.
Step 1: Assess Your Wood and Project
Before you even pick up your nailer, take a close look at the wood you’re using.
- Wood Type: Is it a hard or soft wood?
- Edge Proximity: How close will the nail be to an edge?
- Knots: Are there any knots in the nailing area?
- Appearance: Does the wood look dry and brittle?
Step 2: Select the Right Nail
Based on your assessment, choose the appropriate nail.
- For softwoods and general projects: Standard finishing nails often work well.
- For hardwoods, delicate trim, or nailing near edges: Opt for finer gauge nails (18-gauge brad nails or smaller) or diamond-point nails.
- Ensure the nail length is adequate for holding power but not so long that it risks blowing out the other side or into a weak point.
Step 3: Prepare for Nailing
This is where you set yourself up for success.
- Mark your spot: Lightly mark where each nail will go.
- Drill pilot holes (if needed): If you’re working with hardwood, near an edge (less than 1 inch), or near a knot, drill a pilot hole. Use a drill bit that is slightly smaller than the nail’s shank diameter. For areas where split is a high risk, a pilot hole is almost always the best defense.
- Check your nailer: Ensure your nail gun is clean, lubricated (if applicable), and loaded with the correct nails.
Step 4: Set Your Nailer Pressure
This step is crucial for air-powered nailers.
- Connect your air compressor if using one.
- Set your regulator to a lower PSI (e.g., 70-80 PSI).
- Perform a test fire on a scrap piece of the same wood. Adjust pressure up or down until the nail drives flush or just slightly countersunk, without damaging the wood. Aim for the nail head to sit perfectly level with or just below the surface of the wood. Over-driving can also cause damage.
Step 5: Drive the Nails
Now for the actual nailing!
- Place the nailer’s tip firmly against the wood surface at your marked spot.
- Ensure the nailer is perpendicular to the wood for a straight drive.
- Pull the trigger.
- If the nail doesn’t drive fully, slightly increase the air pressure and test again.
- If the nail splits the wood, stop! Re-evaluate your pressure, nail choice, or consider a pilot hole if you skipped it.
Common Nailer Pressure Charts (Approximate Guidelines)
The exact PSI for your nailer will depend on the specific tool, the air hose, and the size of the nails being used. However, here are some general guidelines to get you started. Always consider these approximations and perform your own tests on scrap wood!
The importance of proper air pressure cannot be overstated. Too high, and you risk splitting wood and damaging the surface; too low, and the nail may not set correctly, leading to a weak joint or a nail that sticks out too far.
| Nail Type | Approximate PSI Range | Typical Wood Type | Notes |
|---|---|---|---|
| 23-Gauge Pinner | 40-70 PSI | Delicate trim, craft wood, hardwoods where minimal impact is desired. | Very little marring. Use pilot holes if concerned about splitting fine edges on hard woods. |
| 18-Gauge Brad Nailer | 60-90 PSI | Trim, smaller moldings, general carpentry, softwoods, and some hardwoods (with pilot holes). | Good balance of holding power and minimal hole size. Can split hardwoods near edges without pilot holes. |
| 16-Gauge Finish Nailer | 70-100 PSI | Wider trim, baseboards, cabinetry, furniture. | Slightly larger hole. Essential to use pilot holes for hardwoods or edges to prevent splitting. |
| 15-Gauge & 14-Gauge (Finner/Angled) | 70-110 PSI | Crown molding, heavier trim, framing (light duty), cabinet installation. | Larger nail. Pilot holes are strongly recommended for hardwoods and near edges. |
| Framing Nailer (e.g., 8-Gauge) | 80-120 PSI | Framing lumber (pine, fir, spruce), structural projects. | Designed for driving larger nails into softer woods. Splits are less common due to wood type and nail size, but can occur with very dense lumber or near edges. |
Remember, these are starting points. The specific nailer model, the length of the nail you are driving, and the exact wood species will all influence the ideal pressure. Always start low on your pressure gauge and increase gradually while testing on scrap.
When to Use Different Nail Types
Choosing the right tool for the job extends to the nails themselves. Each type is designed for a specific purpose, and using the wrong one can contribute to splitting.
- Brad Nails (18-gauge):These are thin nails with a small head. They’re excellent for delicate trim, moldings, and areas where you want minimal damage to the wood surface. Because they are thin, they are less likely to cause splits, but they offer less holding power than thicker nails.
- Finish Nails (16-gauge):Slightly thicker than brad nails, finish nails offer more holding power. They’re great for baseboards, heavier trim, and general carpentry. You’ll need to be more mindful of pilot holes when using these in hardwoods or near edges, as their increased diameter makes them more prone to splitting the wood.
- Pin Nails (23-gauge):These are the thinnest nails available, almost like needles with tiny heads. They’re often used for the most delicate work, like attaching tiny decorative elements or holding small pieces in place while glue dries. They create virtually invisible holes and are the least likely to cause splitting, but offer very little structural holding power on their own.
- Common Nails:These are the traditional, thicker nails often used in rough carpentry and framing. While less common with nail guns for finish work, they are strong. Their thickness, however, makes them highly prone to splitting wood, especially hardwoods or anything near an edge, which is why they are rarely used in finish carpentry applications where precise, clean results are desired.