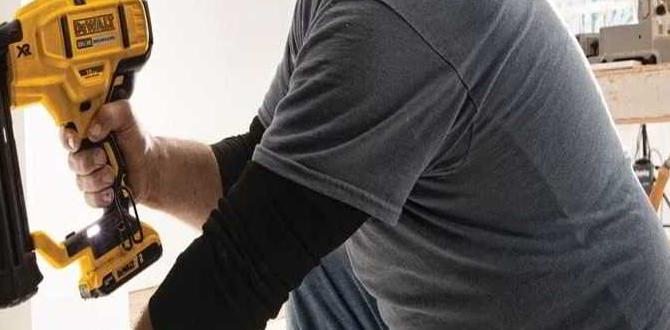
Have you ever struggled with a jammed nailer while working on a project? It can be really frustrating. If you are a beginner, a Makita framing nailer might be your new best friend. This tool is powerful and easy to use, but like all machines, it can sometimes get stuck.
Imagine you’re in the middle of building a treehouse or fixing a deck. Suddenly, your nailer won’t work. What do you do? Understanding how to remove a jam will save you time and stress. Did you know that even experienced builders face this problem? It’s true! It happens to everyone, no matter how skilled they are.
In this article, we will explore simple steps for Makita framing nailer jam removal. You’ll learn how to keep your tool running smoothly and what to do when it gets stuck. So, let’s get started and make your projects easier!
Table of Contents
Makita Framing Nailer For Beginners: Jam Removal Tips
Getting a jam in your Makita framing nailer can be frustrating, especially for beginners. First, always unplug your tool. Then, check the magazine for stuck nails. You can use a pair of pliers to carefully remove any jammed nails. Did you know that keeping your nailer clean can prevent jams? Regular maintenance helps your tool work smoothly. With practice, you’ll clear jams quickly and keep building with confidence!
Common Causes of Nail Jams
Types of jams associated with framing nailers. Factors leading to jam occurrences.
Nail jams are like the annoying cousin that shows up uninvited. They can pop up in a few ways. Commonly, nails might misfire, causing a jam. Sometimes, the nails and gun aren’t best buddies. Using the wrong size nails is a classic problem. Dust and debris can also play tricks, clogging your tool.
| Type of Jam | Description |
|---|---|
| Misfiring | Shooting without a nail or double-nailing can stop the show. |
| Wrong Nails | Using nails that don’t fit? That’s a ticket to jam city! |
| Clogs | Just like a messy room, dirt can block everything. |
Always check your gun’s manual and keep it clean. A little care goes a long way in keeping those nails flying right!
Step-by-Step Guide to Jam Removal
Tools and safety equipment needed. Detailed procedure for removing jams in various models.
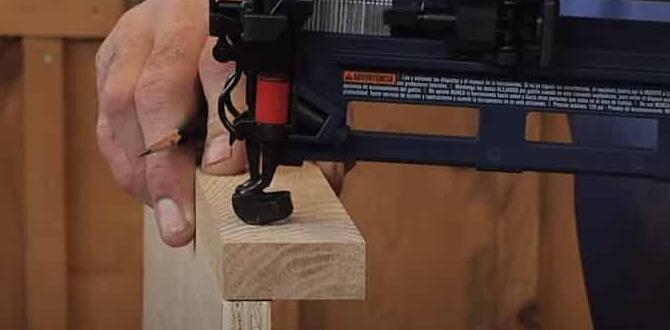
To tackle a jam in your framing nailer, first gather your tools. You’ll need a screwdriver, wrench, and a good pair of gloves. Safety first! Make sure to wear those gloves, or you might give your fingers an unintended makeover.
Now, here’s a quick and funny way to remember the steps:
| Step | Action |
|---|---|
| 1 | Turn off the nailer. No one wants a surprise attack! |
| 2 | Remove the battery or unplug it. Safety dance, anyone? |
| 3 | Use the screwdriver to open the jam door. It’s like unlocking a treasure chest. |
| 4 | Carefully pull out the jammed nails. Think of it as a game of nail Tetris. |
| 5 | Close everything back up, and you’re ready to go! |
Follow these steps for your model. Jam removal doesn’t have to be scary, plus, you’ll feel like a pro in no time!
Preventative Measures to Avoid Jamming
Best practices for loading nails. Tips on selecting the right nails for your project.
To keep your job site running smoothly, it helps to load your nails like a pro. First, check your nails’ size and shape. Using the right nails for your project is key. They should fit your nail gun perfectly. Using mismatched nails can lead to a jam, and nobody wants to deal with that mess! Tip: Always choose nails that fit your gun’s specifications.
| Nail Type | Best For |
|---|---|
| Ring Shank | Heavy-duty projects |
| Smooth Shank | Light-duty work |
| Spiral Shank | Holding power |
Don’t forget to load the nails straight. If they’re crooked, they’ll turn your tool into a mini demolition device. A little care here can save you a lot of headaches!
When to Seek Professional Help
Signs your framing nailer needs professional service. Cost considerations for repairs vs. replacements.
Spotting trouble with your framing nailer can be a bit tricky. If your tool starts making weird noises, or you notice nails flying everywhere except where they should go, it might be time to call in the experts. Remember, if it seems broken, it probably is!
Considering repairs versus a new one? Repairs can be cheap, but sometimes replacement is smarter. If the repair costs are over 50% of a new nailer, you may want to invest in a shiny new model. Here’s a quick cost comparison:
| Repair Cost | Replacement Cost |
|---|---|
| $50 – $100 | $200 – $400 |
| $100 – $150 | $150 – $400 |
If your nailer is older than your grandma’s secret cookie recipe, it might be worth considering an upgrade. Always choose wisely!
Frequently Asked Questions
Common concerns regarding jam removal and maintenance. Troubleshooting tips for beginners.
Many beginners wonder about jam removal and keeping their tools in shape. It’s normal to face jams, especially when using a framing nailer. Here are some common questions and simple answers to help you out:
| Concern | Tip |
|---|---|
| How to remove a nail jam? | Unplug the tool, open the magazine, and gently pull out the jammed nails! |
| What causes jams? | Using wet or bent nails can lead to trouble! |
| How to prevent jams? | Always check your nails, and keep your tool clean! |
As you can see, it’s easy to keep your Makita framing nailer running smoothly. Remember, a happy tool means a happy builder! And if it jams, don’t throw it a tantrum! Just follow these tips.
Conclusion
In summary, learning how to remove jams from a Makita framing nailer is essential for easy use. We should regularly check for stuck nails and keep the tool clean. If you face a jam, don’t panic! Follow step-by-step guides or watch videos for help. Practice will make you more confident. Happy nailing, and keep exploring more tips to improve your skills!
FAQs
What Are The Common Signs That Indicate A Jam In A Makita Framing Nailer?
If your Makita framing nailer is jammed, you might notice a few signs. First, the tool makes a weird noise instead of a nail sound. You might also see nails stuck inside it. Sometimes, it won’t shoot any nails at all. If the nailer feels heavy or feels stuck, that’s another sign.
How Can I Safely Disassemble My Makita Framing Nailer To Remove A Jam?
First, make sure the nailer is unplugged or the battery is taken out. Then, loosen any screws or fasteners with a screwdriver. Carefully take off the front cover to see inside. Look for the jammed nail and gently pull it out. Once clear, put the cover back on and secure it with the screws. Always be careful with tools!
What Tools Do I Need To Effectively Clear A Jam In A Makita Framing Nailer?
To clear a jam in a Makita framing nailer, you need a few tools. First, get a screwdriver to open the front. You might also want a pair of pliers to pull out stuck nails. Finally, have a clean cloth handy to wipe any dust. These tools will help you fix the jam easily!
Are There Preventative Measures I Can Take To Minimize The Chances Of Jams Occurring In My Framing Nailer?
Yes, you can take steps to prevent jams in your framing nailer. First, make sure to use the right nails for your tool. Keep the nails clean and dry, as dust can cause problems. Regularly check the nailer for any dirt or debris and clean it out. Finally, follow the manufacturer’s instructions for use and maintenance.
After Removing A Jam, How Can I Ensure My Makita Framing Nailer Is Functioning Correctly Before Resuming Work?
After fixing the jam, check the nailer’s parts. Make sure they are clean and not broken. Then, load some nails into the nailer. Test it on a scrap piece of wood to see if it fires correctly. If it works, you’re ready to start your project again!