Quick Summary: A consistent maintenance routine for your air-powered nail gun is crucial for its longevity and performance. Regularly cleaning, lubricating, and inspecting your nailer ensures it fires accurately, avoids jams, and operates safely, saving you frustration and costly repairs down the line.
Hey there, fellow woodworkers and DIY enthusiasts! Jack Shaffer here from Nailerguy. Ever reached for your trusty air nailer, ready to tackle a project, only to have it sputter, jam, or just plain refuse to fire? It’s one of those frustrating moments that can derail your entire workflow. Many beginners might think their nail gun is just a tool that works until it doesn’t. But the truth is, like any finely tuned instrument, your air nailer needs a little TLC to keep performing at its best. Don’t worry, it’s not complicated! We’re going to walk through a simple, effective maintenance routine that will keep your air nailer firing powerfully and reliably for years to come. Ready to banish those nail gun woes? Let’s get started!
Table of Contents
Why Air Nail Gun Maintenance Matters
Think of your air nail gun like a car. You wouldn’t drive your car for thousands of miles without an oil change or tire rotation, right? Similarly, your nail gun, powered by compressed air and driven by internal mechanisms, needs regular attention. Neglecting it can lead to a host of problems, from minor annoyances like inconsistent nail depth to major issues like seal failures or bent driver blades. These problems aren’t just inconvenient; they can be costly to repair and, more importantly, can pose safety risks.
A well-maintained nail gun means:
- Reliability: It fires when you need it to, at the depth you set.
- Longevity: It lasts longer, saving you money on replacements.
- Safety: Reduced risk of misfires or tool malfunction.
- Efficiency: Projects get done faster and with fewer headaches.
This routine is designed for simplicity, even if you’ve never touched a nail gun’s internals before. We’ll cover everything from basic cleaning to more involved lubrication, ensuring you have the knowledge to keep your tool in prime condition.
Essential Tools for Your Nail Gun Maintenance Kit
Before we dive into the steps, let’s gather what you’ll need. Most of these items are likely already in your workshop or can be found at any hardware store. Having the right supplies makes the process smooth and effective.
What You’ll Need:
- Safety Glasses: Non-negotiable! Always protect your eyes.
- Gloves: To keep your hands clean and protected.
- Clean Rags or Microfiber Cloths: For wiping down parts.
- Nail Gun Lubricant (Pneumatic Tool Oil): Specifically designed for air tools. Using the wrong oil can cause damage. You can usually find this where you buy your air tools.
- Compressed Air (Optional but Recommended): For blowing out dust and debris. A can of compressed air or an air compressor with a blow nozzle works well.
- Small Brush (e.g., an old toothbrush or a soft-bristled parts brush): For getting into nooks and crannies.
- Allen Wrench Set (Hex Keys): Your nailer likely came with one, or you might need a standard set. Check your manual.
- Screwdriver Set: Phillips and flathead, usually for accessing specific panels.
- Owner’s Manual: Every nail gun comes with one, and it’s your best friend for model-specific instructions!
Having these items on hand will make your maintenance routine a breeze. Remember to always refer to your specific nail gun’s manual for manufacturer recommendations.
Your Step-by-Step Air Nail Gun Maintenance Routine
This routine is broken down into manageable steps that you can perform periodically. We’ll cover both a quick weekly check and a more thorough monthly service. Consistency is key!
Weekly Quick Check (After Each Use or Every Few Uses)
Even a quick glance and wipe-down can prevent small issues from becoming big problems. This is about staying ahead of the game!
- Disconnect Air Supply: This is the most critical safety step. Always disconnect the air hose before doing any maintenance.
- Visual Inspection: Look for any obvious signs of damage, leaks, or loose parts. Check the magazine for dents or bent feed lips.
- Wipe Down the Exterior: Use a clean, dry cloth to wipe away dust, sawdust, and any other grime from the body of the nail gun. This prevents build-up that can get into the internal mechanisms.
- Check Air Fitting: Ensure the air coupler on your nail gun is clean and free from debris. A dirty fitting can restrict airflow.
- Test Firing (Briefly): Once the air is reconnected, dry fire the tool a couple of times (into scrap wood or with a safety barrier) to ensure it’s operating smoothly. Listen for any unusual noises.
This quick check takes just a couple of minutes but can save you a lot of trouble. It’s like brushing your teeth – a simple habit that keeps things healthy!
Monthly Thorough Maintenance
This is where we get a little more hands-on. Aim to do this every month, or more often if you use your nail gun heavily or in dusty environments.
Step 1: Disconnect Everything and Disassemble (Partially)
- Disconnect Air and Nails: Again, ensure the air hose is disconnected. Also, unload all nails from the magazine.
- Remove the Magazine: Most nail guns have a removable magazine. Slide it off according to your manual’s instructions.
- Access the Driver Blade: This is the part that actually drives the nail. Many nail guns allow you to easily access the driver assembly. This usually involves removing a few screws or a retaining plate on the nose of the gun. Your manual will be specific here. For example, some framing nailers have a nose piece that can be removed with an Allen wrench.
Pro Tip: Keep track of any screws or small parts. A magnetic tray or a small container is perfect for this. If your manual shows a specific order for disassembly, follow it closely. For many basic models, you might only need to remove the tip assembly to get to the driver.
Step 2: Clean the Interior Components
This is where your brush and rags come in handy.
- Clean the Driver Blade Channel: Use your brush and a clean rag to remove any dust, debris, or old lubricant from the area where the driver blade travels. You might be surprised at what you find in here!
- Inspect the Driver Blade: Gently pull the driver blade out (if it’s removable). Check for any nicks, bends, or wear. If it looks damaged, it might be time for a replacement – consult your manual or a tool repair shop. Ensure it moves freely.
- Clean the Magazine Interior: Wipe down the inside of the magazine. Ensure the nail strip guide is free from obstructions.
- Blow Out Debris: Use your compressed air tool to blow out any remaining dust or particles from the access areas you’ve opened up.
A clean internal environment is crucial for smooth operation and prevents premature wear. Imagine trying to slide something through a dusty tube – it wouldn’t be easy! The same principle applies here.
Step 3: Lubricate Properly
Lubrication is vital for the moving parts of your air nailer, especially the driver and seals.
- Apply Nail Gun Oil: Your manual will tell you exactly where and how much oil to apply. Typically, you’ll add a few drops directly into the air inlet port. Some manufacturers recommend applying a small amount to the driver blade itself before reinsertion.
- Work the Lubricant: After applying oil, reinsert the driver blade (if removed) and trigger the nail gun a few times (while disconnected from air and nails, or with safety glasses on and pointing at a safe surface). This helps distribute the lubricant throughout the internal mechanism.
- Reassemble: Carefully reassemble any parts you removed, following the reverse order of disassembly. Ensure all screws are tightened appropriately – don’t overtighten.
Important Note on Lubrication: Always use pneumatic tool oil specifically designed for air nailers. Other oils, like WD-40 (which is a solvent and water displacer, not a true lubricant), can actually strip away necessary lubricants and damage internal seals over time. Stick to what the manufacturer recommends. You can often find good quality pneumatic tool oil from brands like DeWalt, Bostitch, or specifically formulated generic brands on Amazon or at your local hardware store. For more on lubricants, check out resources from reputable tool manufacturers. For instance, DeWalt’s general power tool maintenance FAQ offers insights into proper care for their tools, which often applies broadly.
Step 4: Reattach Magazine and Test
- Reattach the Magazine: Slide the magazine back onto the nail gun until it clicks or locks securely into place.
- Connect Air and Load Nails: Reconnect your air hose, ensuring a secure connection. Load a strip of the correct type and size of nails for your gun.
- Final Test Fire: Point the nail gun at a piece of scrap wood and squeeze the trigger. It should fire cleanly and powerfully. Test a few more times, varying the pressure slightly if your tool has depth adjustment. Listen for any erratic sounds or performance issues.
If everything sounds and feels good, your nail gun is ready to go! If you notice any problems, disconnect the air immediately and re-check your disassembly and reassembly steps, or consult your manual’s troubleshooting section.
Specific Considerations for Different Nail Gun Types
While the general maintenance principles are the same, certain nail gun types have specific needs.
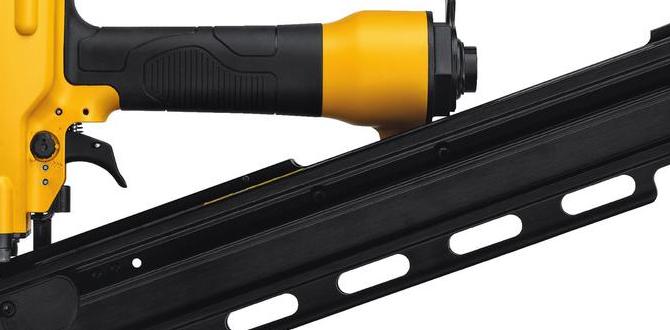
Framing Nailers
These workhorses often see heavy use and can get quite dirty. Pay extra attention to the driver blade and exhaust port. If your framing nailer has a port for direct lubrication after a powerful firing session, ensure you’re applying the correct oil there as per the manual. Regular cleaning of the magazine feed is also crucial due to the large number of nails they hold.
Finish and Brad Nailers
These are generally more delicate tools. While they don’t need as much heavy-duty cleaning, keeping the nose area clean and free of any stray glue or wood shavings is important to prevent marring your workpiece. Lubrication is still key, but in many smaller models, it’s primarily through the air inlet. Over-lubrication can sometimes cause issues with these finer tools, so follow your manual’s guidance on the amount.
Pin Nailers and Brad Nailers
These tools are very sensitive. The driver pin is very small and delicate. Keep the nose clear of any debris, and ensure the magazine feeds smoothly. Lubrication is typically done through the air inlet. If you notice inconsistent pin placement or bent pins, it’s often a sign of a dirty internal channel or wear on the driver.
Common Trigger and Safety Mechanism Issues
If your nail gun features a contact-fire trigger (meaning you have to hold the trigger and press the nose against the material to fire), ensure the safety contact tip (the part that rests on the surface) can move freely. If it’s stuck or jammed with debris, the nailer won’t fire. A quick clean with a brush and compressed air often resolves this. For sequential triggers, ensure the trigger mechanism itself isn’t obstructed.
Troubleshooting Common Nail Gun Problems
Sometimes, even with great maintenance, you might encounter issues. Here’s a quick guide to common problems and their likely solutions:
Nail Gun Not Firing
- Check Air Pressure: Is the compressor turned on and set to the correct PSI?
- Check Air Connection: Is the hose securely connected to the nail gun?
- Check Safety Mechanism: Is the safety tip or contact element engaged? Try pressing it firmly against scrap wood.
- Low Power Firing: Could be low air pressure or a need for lubrication.
- Jammed Driver: The driver blade might be stuck. Disconnect air, try to gently free it manually, or disassemble the nose to inspect.
Nail Gun Jamming (Nails Bending or Not Feeding)
- Incorrect Nail Size/Type: Are you using the correct nails for your gun? Check your manual.
- Damaged Magazine: The feed lips might be bent, preventing nails from feeding correctly.
- Debris in Magazine: Clean out any wood dust or fragments.
- Worn Driver Blade: A damaged blade can misfire and cause jams.
- Insufficient Lubrication: Moving parts might be sticking.
Nails Firing Too Deep or Not Deep Enough
This is usually an air pressure setting issue, not necessarily a maintenance problem. Consult your nailer’s manual to adjust the depth of drive. However, if the adjustment mechanism seems stiff or unresponsive, it might indicate a need for cleaning or lubrication around that specific part.
Air Leaks
- Check Couplings: Ensure the air hose quick-connect is making a good seal.
- Exhaust Port: Some minor “hissing” is normal, but a significant leak from the exhaust or body might mean internal seals are damaged and require professional repair or replacement.
- Air Inlet: Ensure the fitting where the hose connects is tight and not leaking.
A little detective work can often solve these problems. For more complex issues, don’t hesitate to consult your owner’s manual or a qualified tool repair service. Reputable tool manufacturers like Porter-Cable offer service and warranty information that can guide you on when to seek professional help.
Preventative Maintenance Schedule Summary
To keep things organized, here’s a handy table summarizing your maintenance tasks:
| Task | Frequency | Notes |
|---|---|---|
| Visual Inspection & Exterior Wipe Down | After each use or weekly | Check for damage, debris, and loose parts. |
| Unload Nails & Disconnect Air | Before any maintenance | Crucial for safety. |
| Clean Driver Blade Channel & Interior | Monthly | Use brush, rags, and compressed air. |
| Inspect Driver Blade | Monthly | Check for nicks, bends, or wear. |
| Lubricate Moving Parts & Air Inlet | Monthly (or as per manual) | Use only pneumatic tool oil. |
| Test Fire | After maintenance steps | Ensure smooth operation. |
| Check Air Pressure Settings | As needed | Refer to nailer manual for recommended PSI. |
This table provides a quick reference. Adjust the frequency based on how often and in what conditions you use your nail gun. If you’re working on a dusty construction site, you might need to perform the monthly tasks more often than if you’re using it for occasional home projects in a clean workshop.
Conclusion
There you have it! A straightforward maintenance routine for your air nail gun that will keep it running smoothly and reliably. It might seem like a few extra steps, but believe me, the peace of mind and the extended life of your tool are well worth it. By performing these simple checks and cleanings regularly, you’re not just maintaining a tool; you’re investing in your productivity and ensuring your projects go off without a hitch. So next time you finish up a job, take those few extra minutes to give your trusty nailer some attention. It’s the least you can do for a tool that works so hard for you!
Frequently Asked Questions (FAQ)
What kind of oil should I use for my air nail gun?
You should only use synthetic pneumatic tool oil specifically designed for air-powered tools. These oils are formulated to lubricate effectively and protect the seals and internal components of your nail gun. Do not use WD-40, 3-in-1 oil, or motor oil, as they can damage the tool’s seals and reduce its lifespan.
How often should I lubricate my air nail gun?
Most manufacturers recommend lubricating your air nail gun monthly, or after about 10,000 nail fires, whichever comes first. However, if you use your nailer frequently or in