Quick Summary: Loading nails into a nail gun is simple and quick! Ensure the gun is unplugged or de-gassed. Open the magazine, insert the correct nail collation at the right angle, and slide the magazine back in until it clicks. Always refer to your gun’s manual for specific instructions.
Hey there, DIYers and aspiring woodworkers! Jack Shaffer here from Nailerguy. Ever stare at your nail gun, ready to tackle a project, only to feel a moment of hesitation about loading the nails? You’re not alone! It’s a common spot for beginners, and honestly, getting it wrong can be frustrating. But here’s the good news: how to load nails in a nail gun is a straightforward process, and I’m here to walk you through it step-by-step. With a little practice, you’ll be loading your nailer like a pro in no time, making your projects smoother and more enjoyable. Let’s get those nails loaded and that project started!
Table of Contents
Why Getting Nail Loading Right Matters
Loading your nail gun correctly is more than just a minor detail; it’s fundamental to safe operation and effective performance. When you load nails improperly, you risk:
Jams: This is the most common issue. Incorrectly loaded nails can misalign, causing your nail gun to jam frequently, halting your work and requiring time-consuming fixes.
Damage to the Gun: Forcing nails or using the wrong type can damage the internal mechanisms of your nailer, leading to costly repairs or even rendering the tool useless.
Poor Nailing Performance: Nails that aren’t seated properly can bend or not drive in fully, compromising the strength and appearance of your project.
Safety Hazards: An improperly loaded nail gun can misfire or jam in a way that makes it more dangerous to handle.
Understanding how to load nails in a nail gun ensures you’re working safely and efficiently, allowing you to focus on the satisfaction of building something great.
Your Nail Gun Anatomy: What You Need to Know
Before we dive into loading, let’s quickly get familiar with the parts of your nail gun involved in the process. While designs vary slightly, most shared these key components:
Magazine: This is essentially the “holder” for your nails. It’s a long channel designed to keep the nails neatly organized and ready to be fed into the firing mechanism.
Nail Strip/Collation: This refers to how nails are held together in strips. Common types include straight strips, angled strips, and round head nails versus clipped head nails.
Feeder Arm/Slider: This is the part you’ll typically push back to create space for loading the nails. It pushes the nails forward into the gun.
Release Latch/Button: Often a button or lever you press to allow the feeder arm to slide back.
Nose/Tip: Where the nail is driven out.
Knowing these parts will make following the loading instructions much easier.
Types of Nail Guns and How They Affect Loading
The process of how to load nails in a nail gun can look a little different depending on the type of nail gun you’re using. Here’s a quick rundown:
1. Pneumatic Nailers (Air-Powered)
These are the workhorses of many workshops, powered by an air compressor via a hose.
Loading: Typically involves a magazine that slides open. You release a lever or button, pull back the feeder arm, insert the nail strip, re-engage the feeder arm, and close the magazine.
Key Consideration: Always disconnect the air hose before loading or performing any maintenance.
2. Cordless Electric Nailers (Battery-Powered)
These offer great portability, powered by rechargeable batteries. They can be either spring-loaded or gas-canister powered.
Loading (Spring-Loaded): Similar to pneumatic, you’ll usually have a magazine that you open by releasing a spring-loaded feeder arm.
Loading (Gas-Powered): These require both nails and a fuel cell (gas canister). You load the nails into the magazine and then insert the gas canister into its designated port.
Key Consideration: Remove the battery before loading nails. For gas models, ensure the gas canister is properly seated.
3. Corded Electric Nailers
These plug directly into an outlet and are often lighter and less powerful than their pneumatic counterparts, great for lighter trim work.
Loading: Function very similarly to cordless spring-loaded models, with a magazine you open and load.
Key Consideration: Unplug the tool before loading.
4. Framing Nailers
Designed for heavy-duty construction, these drive larger nails. They can be pneumatic, cordless, or even gas-powered.
Loading: The principle is the same – open the magazine, load the correct nails (usually straight collated), close the magazine.
Key Consideration: Framing nails are larger and heavier. Ensure you use the correct ones specified for your tool.
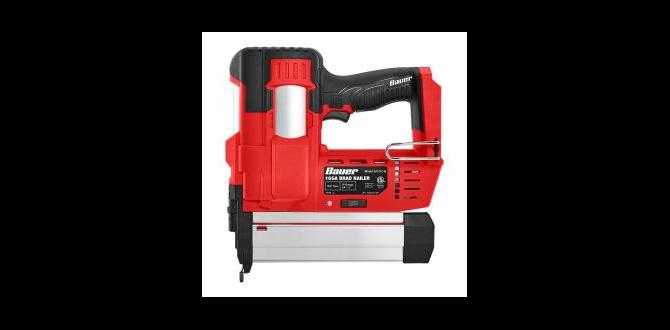
5. Brad and Finish Nailers
These are for finer woodworking, trim, and molding. They use smaller gauge nails (brads and finish nails).
Loading: Again, it’s about opening the magazine, inserting the specific type of brad or finish nail strip, and closing it securely. Check the collation angle (e.g., 18-degree for some framing, 15-degree for some roofing, but brad and finish nailers often use straight or angled collation depending on the nail type).
Key Consideration: The angle of the nails in the collation is critical here. Make sure you use the correct nail angle that matches your nail gun’s magazine.
Essential Tools and Safety Gear
Before you even think about picking up your nail gun, make sure you have these essentials:
Your Nail Gun: Make sure it’s the right type for your project.
The Correct Nails: This is HUGE! Using the wrong size, type, or collation angle will lead to jams and potential damage. Always check your nail gun’s manual (or the manufacturer’s website) for the exact specifications.
Safety Glasses: Non-negotiable. Always wear ANSI Z87.1-certified safety glasses, even for quick tasks.
Hearing Protection: Nail guns can be loud. Earplugs or earmuffs are a good idea.
Gloves (Optional but Recommended): Can help with grip and protect your hands.
User Manual: Your best friend for specifics about your model. You can usually find PDF versions online if you’ve lost yours.
For example, Bostitch is a popular brand, and their manuals are excellent resources. You can typically find them by searching “Bostitch [your nail gun model] manual.”
How To Load Nails In A Nail Gun: Step-by-Step Guide
Alright, let’s get down to business! This guide covers the general process. Remember to always consult your specific tool’s manual for any unique instructions.
Step 1: Prepare Your Nail Gun and Workspace
1. Power Down:
Pneumatic: Disconnect the air hose completely from the nail gun and the compressor.
Cordless Electric: Remove the battery pack.
Corded Electric: Unplug the power cord from the wall outlet.
2. Clear the Area: Make sure there’s nothing obstructing your workspace and that no one is standing in the path of potential misfires.
3. Wear Safety Gear: Put on your safety glasses and any other protective gear.
Step 2: Locate and Open the Magazine
Find the long housing that holds the nails – this is your magazine.
Look for a release latch, button, or lever. This is usually near the back of the magazine or where it connects to the gun body.
Press or slide this release to disengage the feeder arm or magazine lock.
For many common models, like many DeWalt nail guns, you’ll find a button or lever that allows the magazine to slide open or pivot outwards.
Step 3: Load the Nails
1. Identify Nail Orientation: Look at the nails you’re about to load. They are typically held together by adhesive, paper, or plastic. Note which side faces up and which way the sharp points are pointing.
2. Insert the Nail Strip:
Gently place the strip of nails into the open magazine.
Ensure the nails are seated correctly, with the sharp points facing towards the gun’s nose.
The “collation” (the tape, paper, or plastic holding them together) should be neatly aligned within the magazine track.
Crucial: The angle of the nail strip must match the angle of your magazine. For example, if your magazine is angled at 20 degrees, you must use a 20-degree collated strip. Using straight collation in an angled magazine (or vice-versa) is a surefire way to cause jams.
3. Check Nail Count: Sometimes there’s a minimum number of nails required for the gun to operate correctly. Don’t load just one or two nails. Load a full strip or at least the number recommended by the manufacturer.
Table: Common Nail Specifications to Check
| Feature | Description | Importance for Loading |
| :———— | :———————————————————————————————————– | :————————————————————————————————————————– |
| Nail Type | Refers to the head shape (e.g., round head for framing, clipped or offset for convenience, brad/finish head). | Must match the nail gun’s intended use and firing mechanism. Round heads may not fit in certain magazines. |
| Nail Size | Length and gauge (diameter) of the nail. | Must fit within the magazine and be appropriate for the material you’re fastening. Too large won’t fit, too small might bend. |
| Collation | How nails are held together (e.g., paper, wire, plastic). | Determines how the nails feed. Incorrect collation type or angle will cause jams. |
| Collation Angle | The angle at which nails are joined (e.g., 0°, 15°, 20°, 25°, 30°, 34°). | MUST match the angle of your nail gun’s magazine for proper feeding. |
Step 4: Engage the Feeder Arm and Close the Magazine
Once the nails are in place, you need to push the feeder arm forward to apply a slight tension to the nail strip. This ensures the first nail is ready to be driven.
Some guns have a spring-loaded feeder arm that you simply push forward until it latches or you can lock it in place.
Other guns might require you to manually push the feeder arm forward, and then the magazine covers will snap or slide closed.
Ensure the magazine is securely closed and latched. You should hear a click or feel it lock into place.
Many professionals recommend pulling the feeder arm back slightly after closing the magazine. This relieves tension on the last nail, preventing it from accidentally firing if the gun is bumped.
Step 5: Re-engage Power and Test Fire
1. Reconnect Power:
Pneumatic: Reconnect the air hose securely.
Cordless Electric: Reinsert the battery pack.
Corded Electric: Plug the power cord back into the outlet.
2. Safety Check: Point the nail gun in a safe direction, away from yourself and others.
3. Test Fire:
If your gun has a sequential trigger, you’ll need to place the nose against a piece of scrap wood and squeeze the trigger.
If it has a contact trip trigger, just squeezing the trigger will fire it (make sure the nose is against something solid).
Listen for the gun to fire and feel for the nail driving. A single test fire confirms the nails are loaded correctly and the gun is ready.
You’ve successfully loaded your nail gun!
Troubleshooting Common Loading Issues
Even with the best intentions, jams can happen. Here are solutions for common problems you might encounter when loading:
Problem: Nails Won’t Fit into the Magazine.
Solution: Double-check you’re using the correct size and type of nail. Ensure you are using the right collation angle for your specific nail gun. For example, a framing nailer needs framing nails, not brad nails.
Problem: Feeder Arm Won’t Slide Back or Stay Back.
Solution: Make sure you’ve pressed the release latch or button correctly. Check for any debris or bent nails obstructing the mechanism. Read your manual to understand how the feeder arm is supposed to operate.
Problem: Magazine Won’t Close Properly.
Solution: Ensure no nails are protruding improperly. Check for bent nails or debris in the magazine track. Make sure the feeder arm is correctly seated before closing the magazine covers.
Problem: Nails Are Jammed Immediately After Loading.
Solution: This often happens if the nail strip is not seated perfectly or if the wrong collation angle was used. You’ll need to open the magazine, remove the jammed nails, and reload. It’s a good time to inspect the feeder arm and magazine for any damage.
Problem: The Nail Gun Fires Weakly or Not at All.
Solution:
Pneumatic: Check your air pressure. Too low, and it won’t drive nails. Ensure the air hose is connected properly and there are no leaks.
Battery: Make sure the battery is fully charged and properly inserted.
Gas: Ensure the fuel cell is correctly installed and has fuel.
General: You might just be low on nails in the magazine, or the first nail isn’t engaging properly with the driver.
For stubborn jams that cannot be cleared by opening the magazine and removing nails, consult your tool’s manual on how to access the firing chamber for deeper clearing. Always ensure the tool is de-powered before attempting any internal clearing.
Tips for Efficient and Safe Nail Gun Use
Mastering how to load nails in a nail gun is the first step. Here are some tips from the workshop to keep you going safely and efficiently:
Always Use the Right Nails: I can’t stress this enough. Different brands and models have specific requirements. Refer to your manual or the manufacturer’s website. For example, Paslode and Senco often have overlapping compatibility, but it’s always best to verify.
Keep Your Magazine Clean: Dust and debris can cause jams. Wipe down your magazine regularly.
Don’t Overload: While you want a full magazine, don’t try to force more nails than the magazine is designed to hold.
Handle with Care: Avoid dropping your nail gun, as this can misalign parts and lead to jams.
Regular Maintenance: Follow the manufacturer’s recommended maintenance schedule. This often includes lubricating moving parts and checking for wear. For specific maintenance on pneumatic nailers, the Occupational Safety and Health Administration (OSHA) has guidelines for power-operated tools that are worth reviewing for general safety principles.
Understand Your Trigger Mechanism: Know if you have a sequential (fire-one-nail-at-a-time) or contact trip (bump fire) trigger and use it appropriately to avoid accidental firing.
* Store Properly: When not in use, store your nail gun with the safety engaged and in a dry place. If it’s pneumatic, consider disconnecting the air. For battery models, remove the battery for long-term storage.
Frequently Asked Questions (FAQ)
Here are some common questions beginners have about loading nail guns:
—
Q1: Do I need to unplug my nail gun before loading?
A: Absolutely, yes! Always disconnect the power source – whether it’s the air hose, battery, or power cord – before loading or performing any maintenance. Safety first!
—
Q2: What happens if I use the wrong size nails?
A: Using the wrong size nails is a fast track to jams, misfires, or even damage to your nail gun. The nails might be too big to fit, too small to feed correctly, or the wrong length for the driving mechanism.
—
Q3: How do I know if I have the right collation angle?
A: Your nail gun’s magazine has a specific angle. This angle is usually stamped on the gun itself or listed in the user manual. You must use nails with the same collation angle. For instance, if your gun is 20 degrees, use 20-degree nails.
—
Q4: Can I mix brands of nails in my nail gun?
A: While some brands might be compatible, it’s always safest to use the nails recommended by your nail gun’s manufacturer. Nail coatings, collation materials, and exact specifications can vary, impacting performance.
—
Q5: My nail gun keeps jamming after I load it. What might be wrong?
A: This usually points to an incorrectly loaded nail strip (wrong angle, not seated properly), using the wrong collation type, or a worn feeder mechanism. Double-check your nail specifications and reloading procedure. If issues persist, consult your manual or the manufacturer.
—
Q6: Do I need to apply tension to the nails before closing the magazine?
A: Yes, you typically need to engage the feeder arm to apply slight forward tension to the nail strip. This ensures