Imagine walking into your home and being greeted by beautiful, shiny floors. You might think that this dream can only come true by hiring a professional. But what if I told you it’s possible to install laminate wood flooring yourself? Yes, you can do it!
Many people enjoy DIY projects because they feel proud of their work. Laminate wood flooring is a great way to start because it’s easy to handle. Plus, it can change the look of any room quickly.
Did you know that laminate flooring can also save you money? Instead of paying someone else, you can gather your tools and make your space beautiful. With just a bit of time and effort, you can create a stunning floor that you will love.
Are you ready to learn how to transform your home? Let’s explore how laminate wood flooring DIY can be your next exciting project!
Table of Contents
Laminate Wood Flooring Diy: A Step-By-Step Guide

Laminate Wood Flooring DIY
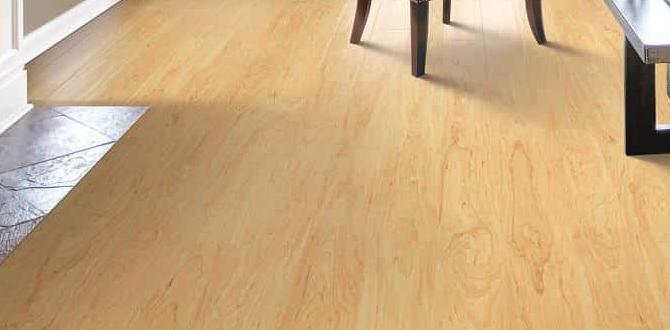
Laminate wood flooring is a great choice for a DIY project. It’s easy to install and doesn’t need special tools. Imagine transforming your space with beautiful wood looks at a low cost! You can choose from various styles and colors to match your home. Plus, it’s durable and easy to maintain. Did you know you can often place it right over your current floor? With patience and care, your room can shine with new life!
Benefits of Laminate Wood Flooring
Costeffectiveness compared to traditional hardwood. Durability and resistance to scratches and dents.
Laminate wood flooring offers great benefits for homes. It is usually cheaper than traditional hardwood, saving you money. You can achieve the look of real wood without breaking the bank. Plus, it’s tough! Laminate is resistant to scratches and dents, making it perfect for busy areas. You don’t have to worry about your pets or kids ruining it. Enjoy a beautiful floor that lasts!
Is laminate wood flooring worth it?
Yes! Laminate wood flooring is cost-effective and very durable. It looks great and can resist everyday wear and tear.
Key Benefits:
- Cost-Effective: Less expensive than hardwood.
- Durable: Resists scratches and dents.
Choosing the Right Laminate Flooring
Types of laminate flooring available in the market. How to select the appropriate thickness and AC rating.
Many types of laminate flooring are available. First, you’ll find standard laminate, which is good for homes. Then, there’s water-resistant laminate, great for kitchens and bathrooms. Finally, high-definition laminate offers realistic wood looks. Choosing the right thickness is also key. A thickness of 8-12 mm works well in most homes. The AC rating matters too. An AC3 rating is good for residential use, while AC4 can handle light commercial spaces. This way, your flooring lasts longer and looks great!
What types of laminate flooring are available?
Standard laminate, water-resistant laminate, and high-definition laminate are the main types to consider.
How to select the appropriate thickness and AC rating?
- Choose 8-12 mm for thickness.
- Look for an AC3 rating for homes.
- Consider AC4 for light commercial spaces.
Preparing Your Space for Installation
Assessing the subfloor and making necessary repairs. Importance of acclimating laminate planks before installation.
Before you lay down laminate wood flooring, it’s key to prepare your space. Start by checking the subfloor. Look for cracks or bumps. Fix these to make the surface smooth. Next, let the laminate planks sit in the room for at least 48 hours. This is called acclimating. It helps the planks adjust to the room’s temperature and humidity, preventing warping later.
Why assess the subfloor?
Checking the subfloor ensures a flat and stable base, leading to better flooring performance.
Key steps to prepare your space:
- Inspect the subfloor for damage.
- Repair cracks or uneven areas.
- Acclimate laminate planks for 48 hours.
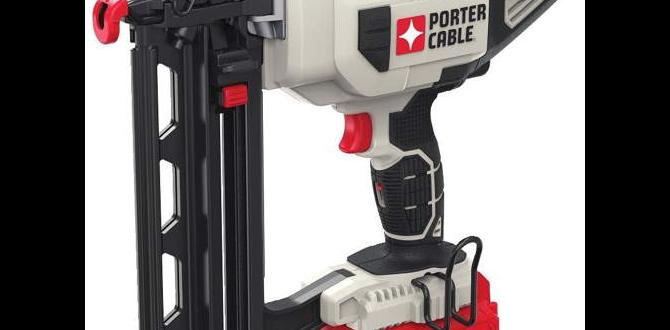
Essential Tools and Materials for DIY Installation
List of tools needed for laminate flooring installation. Recommended materials for underlayment and trim.
Starting your laminate flooring project? You’ll need some essential tools and materials! Grab a laminate flooring cutter for clean edges, a measuring tape to avoid surprises, and a mallet to tap the pieces snugly. Don’t forget a spacer for those tiny gaps that keep your floor from doing the cha-cha! For a smooth base, use foam underlayment and finish it off with stylish baseboards or trim. Your floor will thank you!
| Tools | Recommended Materials |
|---|---|
| Laminate flooring cutter | Foam underlayment |
| Measuring tape | Baseboards or trim |
| Mallet | |
| Spacer |
Step-by-Step Installation Process
Detailed instructions on measuring and cutting planks. Techniques for laying down the laminate flooring securely.
Measuring and cutting your laminate wood planks is like being a ninja with a tape measure. First, grab your tape and measure the room carefully. Double-check your measurements—no one wants a surprise floor dance contest with mismatched planks! Use a saw to cut your planks with precision. For laying down the flooring, start at the longest wall for a smooth finish. Remember to use spacers to keep that style intact. It’s all about having fun while keeping everything secure!
| Step | Description |
|---|---|
| Measure | Use a tape measure for accurate room dimensions. |
| Cut | Carefully cut planks to fit using a saw. |
| Lay Down | Start at the longest wall and use spacers. |
Finishing Touches After Installation
Adding baseboards and trim to enhance the finished look. Tips for cleaning and maintaining your laminate floor.
After installing your shiny new flooring, it’s time for the finishing touches! Adding baseboards and trim can make your laminate floor pop like a fresh pizza out of the oven. These small details tie everything together and give your space a polished look. Don’t forget regular cleaning! A soft broom and a damp mop work wonders. Here’s a quick tip: avoid harsh chemicals, as they can turn your floor from sleek to weak. Check out the cleaning routine below!
| Cleaning Tip | Recommended Tool |
|---|---|
| Dust Regularly | Soft Broom |
| Mop Weekly | Damp Mop |
| Avoid Scratches | Furniture Pads |
Common Mistakes to Avoid During Installation
Issues caused by improper subfloor preparation. Misalignments and gaps in the flooring that can occur.
Many people make mistakes during their DIY laminate wood flooring projects. One common mistake is not preparing the subfloor properly. A rough or uneven subfloor can lead to problems like squeaky floors or warping. Misalignments can also happen. Gaps between the boards can appear, making it look unprofessional. Here are ways to avoid these issues:
- Check the subfloor for levelness before starting.
- Use a moisture barrier if needed.
- Align the boards carefully as you lay them down.
What can happen if the subfloor is not prepared?
If the subfloor is not smooth, your floor can be uneven and make noise. This can ruin the look of your room and even cause damage to the flooring.
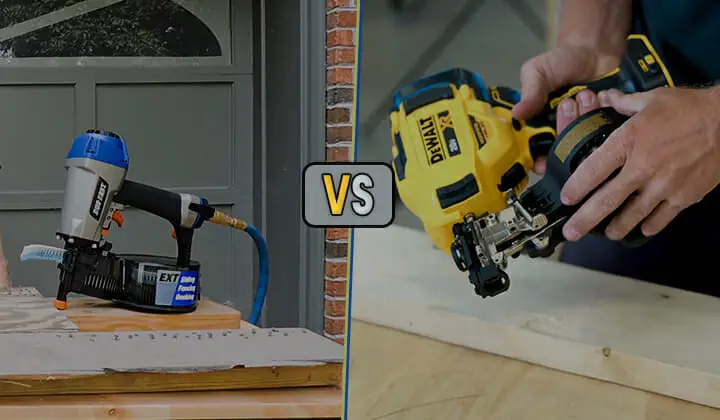
DIY vs Professional Installation: Pros and Cons
Benefits of undertaking the project yourself. Scenarios where hiring a professional might be advantageous.
Taking on a laminate wood flooring DIY project can be fun and rewarding. Doing it yourself saves money and teaches valuable skills. Plus, you get to choose your design! However, if your space is large or complicated, hiring a pro might be smart. A professional can ensure quality work and save time.
- DIY Benefits:
- Cost savings
- Learning experience
- Creative control
- When to Hire a Pro:
- Large areas
- Complex layouts
- Need for quick completion
Is DIY flooring worth it?
Yes, if you enjoy hands-on projects and have the time. This way, you can save money while adding personal touches to your home.
Conclusion
In summary, laminate wood flooring DIY is a fun and rewarding project. You can transform your space easily and save money too. Remember to measure your area and choose the right materials. Don’t forget to follow installation guides for the best results. Now that you know the basics, grab your tools and start your flooring adventure!
FAQs
Certainly! Here Are Five Questions Related To Diy Laminate Wood Flooring:
Sure! Here are answers to some DIY laminate wood flooring questions: 1. **What is laminate flooring made of?** Laminate flooring is made of different layers. The top looks like wood and the bottom is strong. 2. **Can you install laminate flooring on your own?** Yes, you can! With some tools and guidance, you can do it yourself. Just follow the steps carefully. 3. **What tools do you need for installing laminate flooring?** You will need a saw, a measuring tape, and a hammer. These tools help you cut and fit the pieces. 4. **How do you clean laminate flooring?** You can clean it with a damp cloth or a broom. Avoid using too much water, so it stays nice. 5. **Can you put laminate flooring in wet places?** It’s best not to put it in very wet places like bathrooms. Water can damage the floor.
Sure! Please go ahead and ask your question, and I will provide a clear and simple answer.
What Tools And Materials Are Needed For Installing Laminate Wood Flooring?
To install laminate wood flooring, you need some basic tools and materials. First, get a measuring tape to measure your room. You will also need a saw to cut the panels to fit. Don’t forget to have a hammer, a tapping block, and spacers to help with installation. Finally, get some underlayment to place under the flooring for comfort and soundproofing.
How Do You Properly Measure And Prepare A Room For Laminate Flooring Installation?
To measure a room for laminate flooring, first, use a tape measure. Measure the length and the width of the room. Then, multiply those two numbers to find the area in square feet. Next, clear the room of furniture and any old flooring. Make sure the floor is clean and dry before laying the new laminate.
What Are The Best Practices For Cutting Laminate Planks To Fit Around Corners And Edges?
To cut laminate planks for corners, first measure the area carefully. Use a pencil to mark where to cut. You can use a jigsaw or a hand saw to make the cuts. Always wear safety goggles to protect your eyes. After cutting, check if it fits well before nailing it down.
How Do You Ensure A Level And Smooth Subfloor Before Laying Down Laminate Flooring?
To make sure your subfloor is level and smooth, you can start by cleaning the area. Use a broom or vacuum to remove dust and debris. Next, check for any bumps or holes. You can fill in holes with a patching compound. Lastly, use a level tool to see if the floor is flat. If everything is even, you’re ready to lay down your laminate flooring!
What Are Some Common Mistakes To Avoid When Installing Laminate Wood Flooring As A Diy Project?
When installing laminate wood flooring, be careful not to skip the underlayment. This padding helps with sound and warmth. Also, you should let the flooring adjust to the room temperature before putting it down. Don’t rush your cuts; take your time for better fitting pieces. Finally, remember to leave space around the edges for expansion.
{“@context”:”https://schema.org”,”@type”: “FAQPage”,”mainEntity”:[{“@type”: “Question”,”name”: “Certainly! Here Are Five Questions Related To Diy Laminate Wood Flooring:”,”acceptedAnswer”: {“@type”: “Answer”,”text”: “Sure! Here are answers to some DIY laminate wood flooring questions: 1. **What is laminate flooring made of?** Laminate flooring is made of different layers. The top looks like wood and the bottom is strong. 2. **Can you install laminate flooring on your own?** Yes, you can! With some tools and guidance, you can do it yourself. Just follow the steps carefully. 3. **What tools do you need for installing laminate flooring?** You will need a saw, a measuring tape, and a hammer. These tools help you cut and fit the pieces. 4. **How do you clean laminate flooring?** You can clean it with a damp cloth or a broom. Avoid using too much water, so it stays nice. 5. **Can you put laminate flooring in wet places?** It’s best not to put it in very wet places like bathrooms. Water can damage the floor.”}},{“@type”: “Question”,”name”: “”,”acceptedAnswer”: {“@type”: “Answer”,”text”: “Sure! Please go ahead and ask your question, and I will provide a clear and simple answer.”}},{“@type”: “Question”,”name”: “What Tools And Materials Are Needed For Installing Laminate Wood Flooring?”,”acceptedAnswer”: {“@type”: “Answer”,”text”: “To install laminate wood flooring, you need some basic tools and materials. First, get a measuring tape to measure your room. You will also need a saw to cut the panels to fit. Don’t forget to have a hammer, a tapping block, and spacers to help with installation. Finally, get some underlayment to place under the flooring for comfort and soundproofing.”}},{“@type”: “Question”,”name”: “How Do You Properly Measure And Prepare A Room For Laminate Flooring Installation?”,”acceptedAnswer”: {“@type”: “Answer”,”text”: “To measure a room for laminate flooring, first, use a tape measure. Measure the length and the width of the room. Then, multiply those two numbers to find the area in square feet. Next, clear the room of furniture and any old flooring. Make sure the floor is clean and dry before laying the new laminate.”}},{“@type”: “Question”,”name”: “What Are The Best Practices For Cutting Laminate Planks To Fit Around Corners And Edges?”,”acceptedAnswer”: {“@type”: “Answer”,”text”: “To cut laminate planks for corners, first measure the area carefully. Use a pencil to mark where to cut. You can use a jigsaw or a hand saw to make the cuts. Always wear safety goggles to protect your eyes. After cutting, check if it fits well before nailing it down.”}},{“@type”: “Question”,”name”: “How Do You Ensure A Level And Smooth Subfloor Before Laying Down Laminate Flooring?”,”acceptedAnswer”: {“@type”: “Answer”,”text”: “To make sure your subfloor is level and smooth, you can start by cleaning the area. Use a broom or vacuum to remove dust and debris. Next, check for any bumps or holes. You can fill in holes with a patching compound. Lastly, use a level tool to see if the floor is flat. If everything is even, you’re ready to lay down your laminate flooring!”}},{“@type”: “Question”,”name”: “What Are Some Common Mistakes To Avoid When Installing Laminate Wood Flooring As A Diy Project?”,”acceptedAnswer”: {“@type”: “Answer”,”text”: “When installing laminate wood flooring, be careful not to skip the underlayment. This padding helps with sound and warmth. Also, you should let the flooring adjust to the room temperature before putting it down. Don’t rush your cuts; take your time for better fitting pieces. Finally, remember to leave space around the edges for expansion.”}}]}