Choosing the right framing nailer can feel a bit overwhelming. Do you know why? There are many types and brands available. Each one has its own features. It’s easy to get lost in all the choices!
Imagine you are building a treehouse. You want it strong and safe. A framing nailer can help you do just that! With the right one, you can finish the job faster and have fun while building.
Did you know that a good framing nailer can save you time and effort? It can make your projects easier, from home repairs to fun crafts. So, how do you select the best framing nailer? Let’s explore the key tips and tricks together!
Table of Contents
How To Select Framing Nailer: Tips For Choosing The Right Tool

How to Select a Framing Nailer
Choosing a framing nailer can feel overwhelming. First, consider the type: pneumatic or electric? Pneumatic nailers are powerful but need an air compressor. Electric ones are easier to use, especially for smaller jobs. Next, think about the nail size; framing nailers usually use 16- or 18-gauge nails. Also, check the weight and balance. A good nailer should feel comfortable in your hands. Did you know that the right nailer can save hours on a project?Understanding Framing Nailers
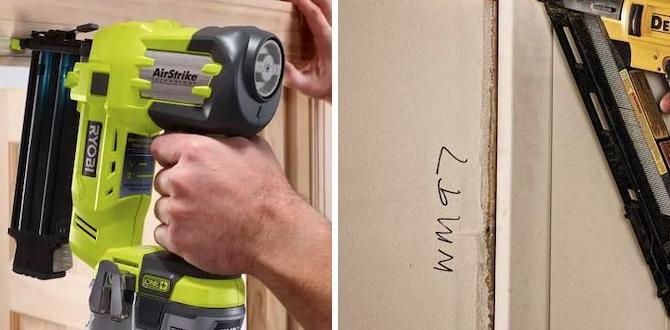
Definition and purpose of framing nailers. Types of framing nailers: pneumatic vs. cordless.Framing nailers are powerful tools that help you join wood pieces quickly and easily. They save time and energy. Instead of hammering nails one by one, you can fire them in a flash! There are two main types: pneumatic and cordless. Pneumatic nailers need an air compressor, which makes them strong but a bit bulky. Cordless models run on batteries, giving you freedom of movement, but they may need a recharge during a big job. So, whether you prefer power or portability, there’s a framing nailer for you!
| Type | Pros | Cons |
|---|---|---|
| Pneumatic | Powerful & Fast | Needs an air compressor |
| Cordless | Portable & Convenient | Requires battery recharge |
Key Features to Consider
Gauge size and nail length compatibility. Magazine capacity and loading mechanism.Choosing the right framing nailer can be tricky! First, ensure the gauge size matches your project needs. Smaller gauges work well for delicate tasks, while larger gauges give stronger holds. Next, check nail lengths! You want them just right—too short, and they’ll wiggle like jelly, too long, and they’ll poke through.
Also, think about magazine capacity. A bigger magazine means fewer trips to refill. Some nailers let you load nails quickly, so you won’t be stuck in a nail jam—nobody likes that! So, keep these features in mind for a smoother building experience.
| Feature | Importance |
|---|---|
| Gauge Size | Determines nail strength |
| Nail Length | Fits project requirements |
| Magazine Capacity | Reduces refill trips |
| Loading Mechanism | Speeds up the process |
Power Sources and Performance
Comparing pneumatic and electric framing nailers. Evaluating powertoweight ratio for ease of use.Choosing the right framing nailer is crucial for any DIY project. Pneumatic nailers use air compressors, providing lots of power but needing a hose. Electric nailers are easy to carry and are great for smaller jobs, like fixing your neighbor’s fence when they’re on vacation! Consider the power-to-weight ratio as well. A heavy nailer can tire your arms out faster than chasing your dog. Finding the right balance makes work easier and more fun!
| Type | Power Source | Weight | Best Use |
|---|---|---|---|
| Pneumatic | Air Compressor | Heavier | Heavy-Duty Jobs |
| Electric | Battery/Electric | Lighter | Smaller Projects |
Ergonomics and Design
Importance of grip and weight distribution. Features that enhance maneuverability.Choosing the right tools is key to finishing your project without losing your mind. First, look at the grip and weight distribution. A tool that feels heavy on one side might make you feel unbalanced—like trying to walk a tightrope with a pie in your hands! Next, check out features that help with maneuverability. A well-designed nailer should dance in your hand, not trip over itself. You’ll want to make quick turns and reach tight spots without feeling like you’re wrestling an octopus!
| Feature | Benefit |
|---|---|
| Comfort Grip | Reduces hand fatigue |
| Balanced Weight | Improves control |
| Swivel Hose Connector | Enhances movement |
Safety Features and Maintenance
Common safety features to look for. Maintenance tips for prolonging the life of your nailer.Be sure to check out some important safety features when picking a framing nailer. Look for guards to keep your fingers safe and switches that only let the tool work when you want it to. Also, consider a model with a low nail jam indicator so you don’t get surprised in the middle of a project.
Keeping your nailer in tip-top shape is crucial. Clean it regularly and add a few drops of oil here and there, just like you would to a bicycle (if your bike needed oil!). Following the manufacturer’s guidelines helps you avoid a nailer that suddenly stops working, leaving your wall half-finished and you sitting there wondering, “What happened?”
| Maintenance Tips | Frequency |
|---|---|
| Clean the tool | After each use |
| Oil moving parts | Weekly |
| Check the safety features | Monthly |
Remember, a little care goes a long way. Treat your framing nailer like a buddy—take care of it, and it will work hard for you!
Budgeting for Your Framing Nailer
Price ranges for different types of framing nailers. Factors influencing the cost: features vs. brand.Choosing a framing nailer can feel like picking a favorite dessert—so many options, and they all look tasty! Prices can vary quite a bit. For example, manual nailers may start around $50, while electric or air-powered models can range from $150 to $500. You might ask, what makes the price? Features like weight, power, and brand name influence cost. Sometimes, you’re paying for a fancy logo on the side. Remember, the right tool is the one that fits your budget and your needs!
| Type of Nailer | Price Range |
|---|---|
| Manual | $50 – $100 |
| Pneumatic | $100 – $300 |
| Electric | $150 – $500 |
Additional Accessories and Tools
Essential accessories for optimal performance. Tools that complement your framing nailer.Having some handy accessories can make using a framing nailer a breeze! You won’t want to dive into the construction deep end without these essentials. For peak performance, consider getting safety goggles to protect your precious peepers. A compressor is also key; it powers your nailer and keeps things moving. Don’t forget a nail case—you’ll always need extra nails at your fingertips. Pair these tools with a proper workbench and a trusty hammer for the ultimate combo. Here’s a quick look at some must-have tools:
| Accessory | Purpose |
|---|---|
| Safety Goggles | Protect your eyes from flying debris. |
| Compressor | Powers the nailer for optimal performance. |
| Nail Case | Holds extra nails for quick access. |
| Workbench | Provides a stable surface for your projects. |
| Hammer | For any stubborn nails that refuse to go in! |
Remember, a well-equipped worker is a happy worker. So, gather your gear and get ready to build something amazing (and maybe a little crooked, if you’re like most of us)!
Common Mistakes to Avoid
Typical pitfalls when selecting a framing nailer. Ensuring compatibility with your specific project needs.Choosing a framing nailer can be tricky, and many make common mistakes. One big pitfall is not checking for compatibility with your project. A nailer that’s great for one job may not fit another. Don’t forget to think about the nail size and type you need! Also, ensure you’re picking the right power source. Choosing air or battery can change everything. Here’s a quick table to help you remember:
| Common Mistakes | Tip |
|---|---|
| Ignoring nail size | Always check the specs! |
| Wrong power source | Choose wisely between air and battery. |
| Not testing | Test before purchase! |
Remember, even the pros make mistakes. Avoid them and you’ll nail it—pun intended!
Conclusion
In summary, choosing the right framing nailer involves knowing the type you need, checking its power source, and considering your project size. Look for features like adjustable depth and magazine capacity. As you shop, read reviews and compare models. Take your time and find a nailer that fits your needs. Happy building! For more tips, keep exploring!FAQs
What Are The Key Features To Consider When Choosing A Framing Nailer For Construction Projects?When choosing a framing nailer, think about a few important things. First, pick between electric or gas-powered. Electric nailers are quieter, while gas ones are stronger. Next, check the size of nails it uses. Bigger nails hold stronger. Finally, look at the weight. Lighter nailers are easier to carry and use.
Should I Opt For A Pneumatic Or Cordless Framing Nailer, And What Are The Pros And Cons Of Each?If you need to choose between a pneumatic or cordless framing nailer, think about how you will use it. A pneumatic nailer uses air and works fast, but you need an air compressor. It’s strong and great for big jobs. A cordless nailer runs on batteries, so it’s easy to move around. It’s great for smaller tasks, but it may not last as long on bigger jobs. Choose the one that fits your project and how much you want to carry!
How Do I Determine The Appropriate Nail Size And Type For My Framing Nailer?To choose the right nail size and type for your framing nailer, check the tool’s manual first. It usually says what sizes work best. We need to think about what we’re building too. Longer nails help hold heavier pieces together. For most framing, 2 to 3.5-inch nails are common. Always use nails that match your project!
What Safety Features Should I Look For In A Framing Nailer To Prevent Accidents On The Job Site?When choosing a framing nailer, look for a safety lock feature. This stops the nailer from firing when not in use. You should also check for a trigger that needs a firm press before it works. Some nailers have a tip that must touch the surface before firing. These features help keep you safe while you work.
What Is The Typical Maintenance Required For A Framing Nailer To Ensure Its Longevity And Performance?To care for a framing nailer, you should clean it regularly. After using it, wipe off any dirt or dust. You also need to oil it to keep the parts moving smoothly. Check for loose screws or broken parts and fix them right away. Finally, store it in a safe place to protect it from damage.